10 Peel-and-Stick Floor Tile Ideas for Renters
10 peel and stick floor tile ideas for renters: waterproof peel and stick floor tile for bathrooms, kitchen floors, entryways, and laundry rooms, with grout lines, costs, and damage-free removal.
In This Guide
Peel and stick floor tile is a vinyl tile with a pre-glued backing: peel the paper, press it onto the floor, and you have a new floor without thinset, grout buckets, or a contractor. For renters, it is the fastest way to cover stained linoleum, dated vinyl, or a scuffed kitchen floor, and it comes off at move-out if you install and remove it correctly.
The difference between a floor that lasts two years and one that peels in two weeks is preparation and product choice. Bathroom floors need waterproof peel and stick floor tile, kitchen floors need tiles rated for chair legs and dropped pans, and every room needs a clean, smooth, dry base floor. This roundup covers peel and stick tile flooring ideas for floors only: kitchens, bathrooms, entryways, and laundry rooms, with costs per square foot, grout line options, and removal steps that protect your deposit. For walls, see renter-friendly peel-and-stick backsplash ideas. For other floors that come back out cleanly, see renter-friendly temporary flooring ideas.
1. Wood-Look Planks for Rental Kitchens
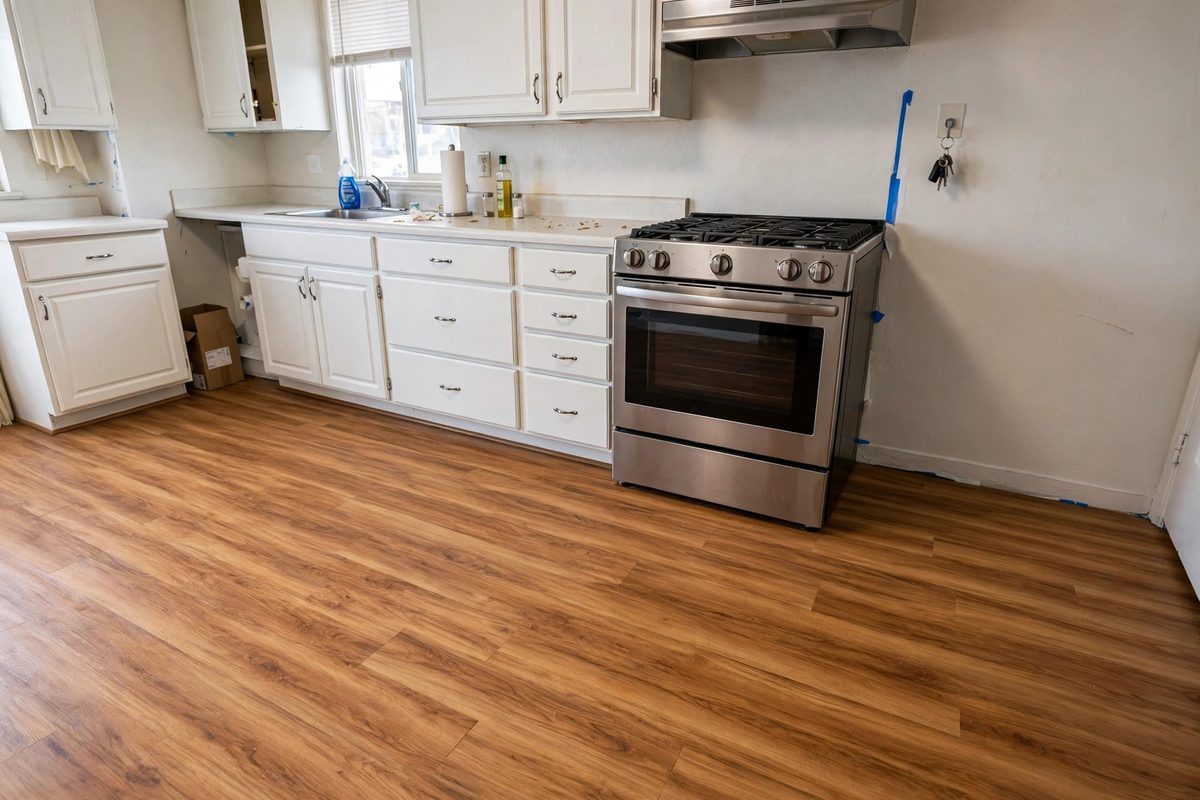
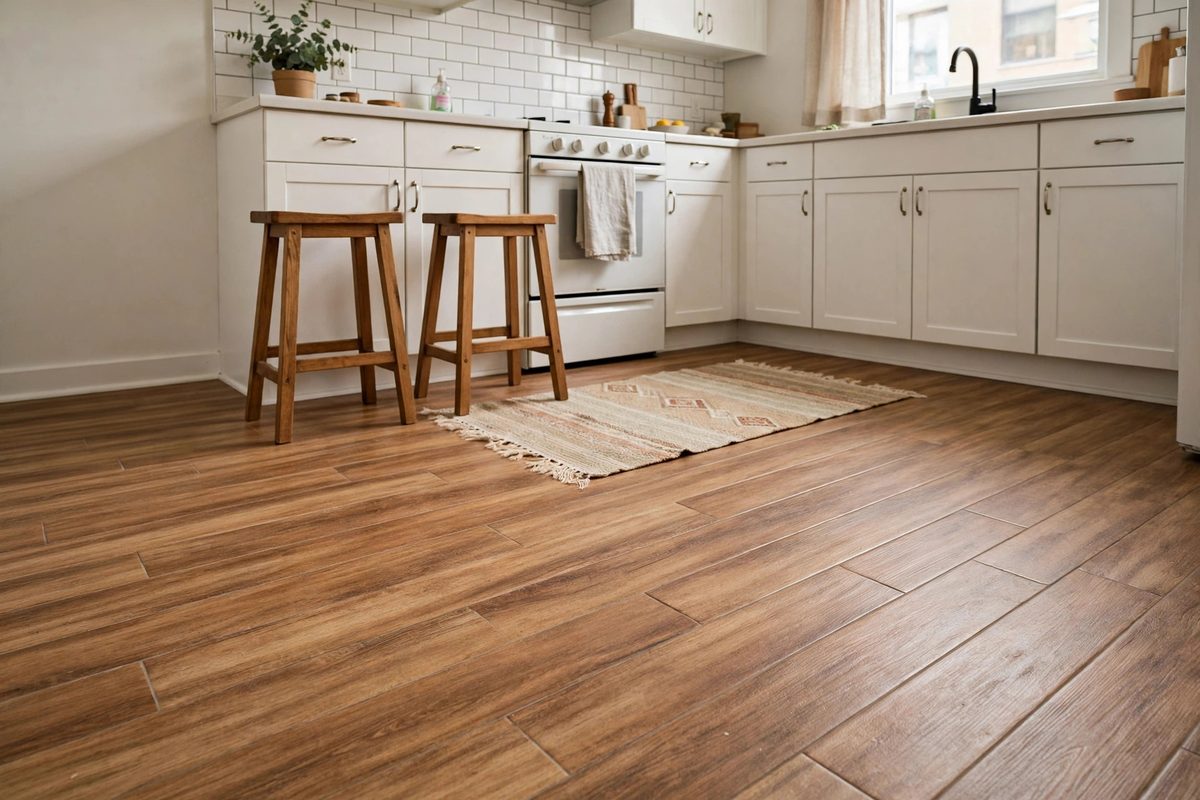
Wood-look peel and stick planks, usually 6 by 36 inches, turn a dated kitchen floor into a warm wood floor for 1 to 2 dollars per square foot. They suit kitchens because the plank shape hides seams better than square tiles, and a mid-tone oak or walnut pattern hides crumbs and scuffs between cleanings. A typical 100 square foot kitchen needs 10 to 12 boxes, so the full material cost lands around 150 to 250 dollars.
Kitchen floors take rolling chair legs, dropped cans, and cooking splashes, so choose planks at least 2 millimeters thick with a wear layer of 12 mil or more. Thin, cheap planks dent under fridge feet and curl at the edges near the stove. Run planks parallel to the longest wall for the most natural look, and stagger the end joints by at least 6 inches so the floor reads as planks, not a grid.
How to make it work
Sweep, mop, and let the floor dry completely, then wipe with a degreaser near the stove, since cooking grease kills adhesion. Lay planks from the center of the room outward, pressing each one firmly and rolling it with a kitchen rolling pin or a rented floor roller. Leave a 1/8 inch gap at walls and cabinets for expansion, and cover it with quarter-round trim or caulk. Wait 24 hours before mopping, and use felt pads under every chair and table leg.
2. Waterproof Vinyl Tiles for Bathrooms
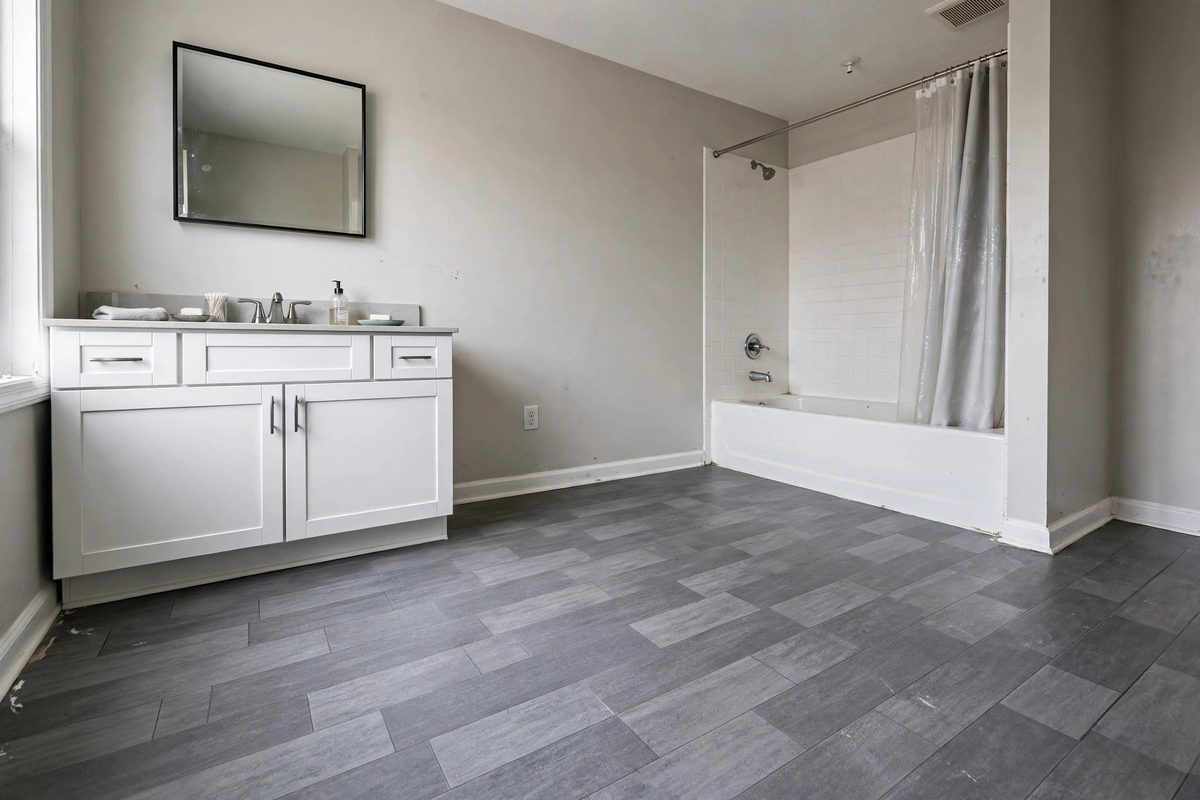
Bathroom floors are the hardest test for peel and stick tile flooring, because standing water, steam, and bare feet punish every weak seam. Waterproof peel and stick floor tile uses a solid vinyl core and a sealed surface that does not swell, unlike foam-backed tiles that soak up water and curl. Expect 1.50 to 3 dollars per square foot for a true waterproof tile, and check the box for the word waterproof, not just water resistant.
The subfloor matters as much as the tile. Peel and stick tiles bond best to smooth vinyl, sealed concrete, and existing smooth tile. They bond poorly to rough concrete, damaged linoleum with tears, and any floor with loose or curling edges. In a bathroom, seal the perimeter with silicone caulk where tile meets tub and toilet base, since that joint is where water sneaks underneath.
How to make it work
Remove the toilet only if you are comfortable resetting the wax ring, otherwise tile up to the toilet base and caulk the joint neatly. Start tiling at the doorway so the most visible rows are full tiles, and cut the last row with a utility knife and straightedge. Press each tile, roll the seams, and caulk the tub and vanity edges after 24 hours. Use a bath mat outside the tub to cut standing water, and mop up splashes the same day. For more bathroom upgrades that keep a deposit safe, see renter-friendly bathroom upgrades.
3. Stone-Look Tiles for Entryways
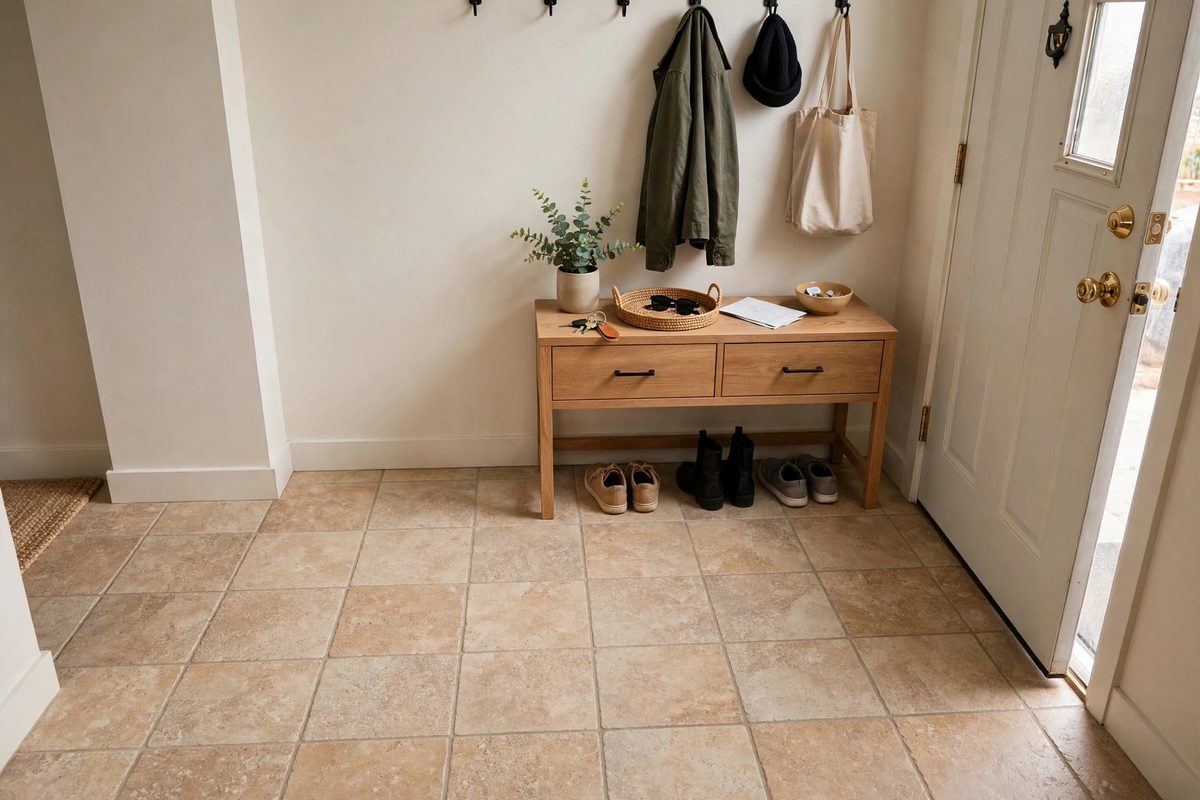
Entryways take grit, wet shoes, and suitcase wheels, so stone-look peel and stick tiles are a practical pick: the speckled pattern hides dirt, and the harder vinyl surface resists scratches better than wood-look planks. A 12 by 12 inch or 12 by 24 inch stone tile suits the small, square shape of most rental entries, and a 30 to 50 square foot entry costs 60 to 150 dollars in tile.
The risk in an entryway is edge lifting at the door threshold, where shoes catch the tile edge every day. A metal or vinyl transition strip at the doorway solves this and costs under 15 dollars. Choose a medium gray or warm beige stone pattern rather than pure white, which shows every footprint within a day.
How to make it work
Clean the entry floor twice, once for dirt and once for salt and grit near the door, and let it dry fully. Tile from the door inward so the threshold row is a full tile, then fit the transition strip over the outer edge. Press and roll every tile, and place a coarse doormat outside and a washable rug inside to trap grit before it reaches the tile. Sweep the entry weekly, since grit under shoes is what scratches vinyl.
4. Hexagon Tiles for Small Bathroom Floors
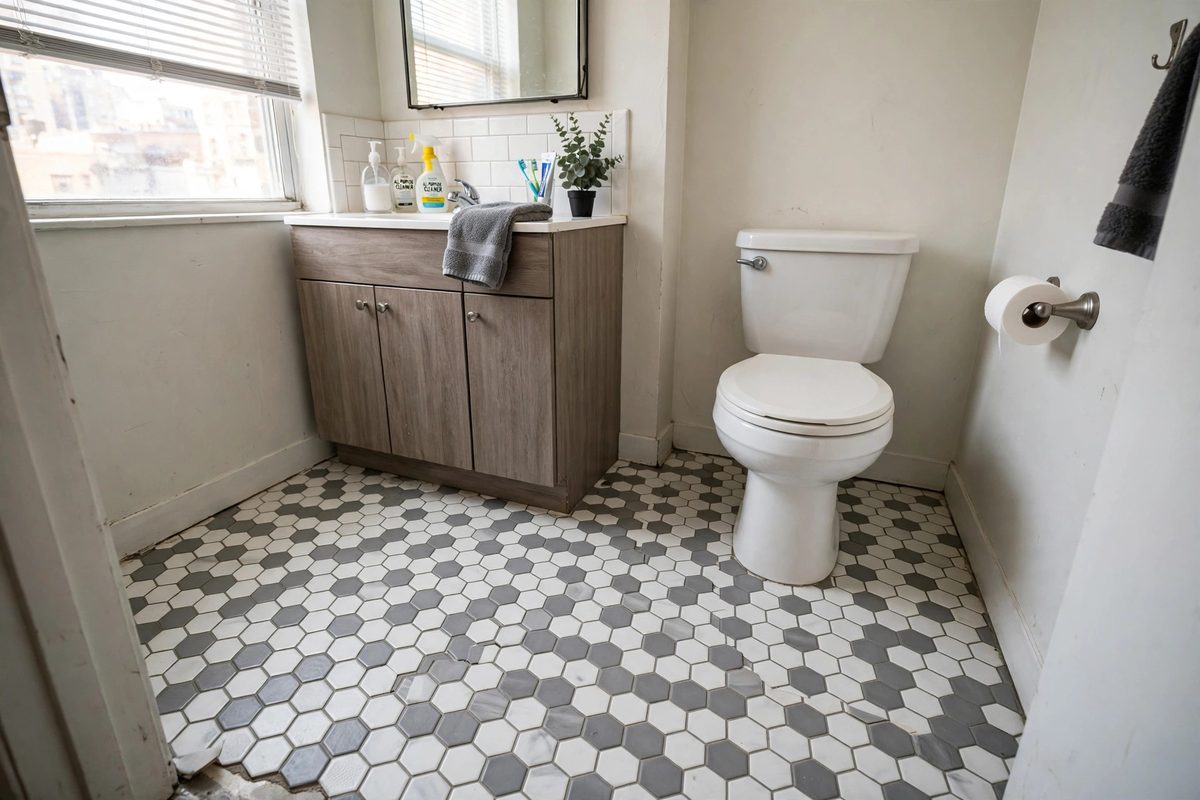
Hexagon peel and stick tiles give a small bathroom a designed look without a tiler, and the small tile size suits rooms where large square tiles would need awkward cuts around a toilet and vanity. Hex tiles usually come as 12 by 12 inch sheets with the pattern printed on vinyl, not as individual ceramic hexagons, so installation stays a peel and press job. Budget 2 to 3.50 dollars per square foot, since patterned tiles cost more than plain ones.
Small bathrooms hide a trap: the floor is often not level around the toilet flange, and a tile laid over a dip will crack or lift. Check for soft spots and dips before tiling, and fill low spots with a self-leveling patch compound if your lease allows a skim coat, or choose a thicker tile that bridges minor unevenness. Keep the pattern scale small in a tiny bathroom, since oversized hexagons make the room feel smaller.
How to make it work
Dry-lay the first two rows without peeling to check the pattern alignment around the toilet base. Peel and press one sheet at a time, aligning the printed grout lines carefully, since a crooked sheet stands out in a small room. Roll every seam, caulk the toilet and tub joints with silicone, and keep the room ventilated for 24 hours while the adhesive sets.
5. Grout-Line Tiles for a Real Tile Look
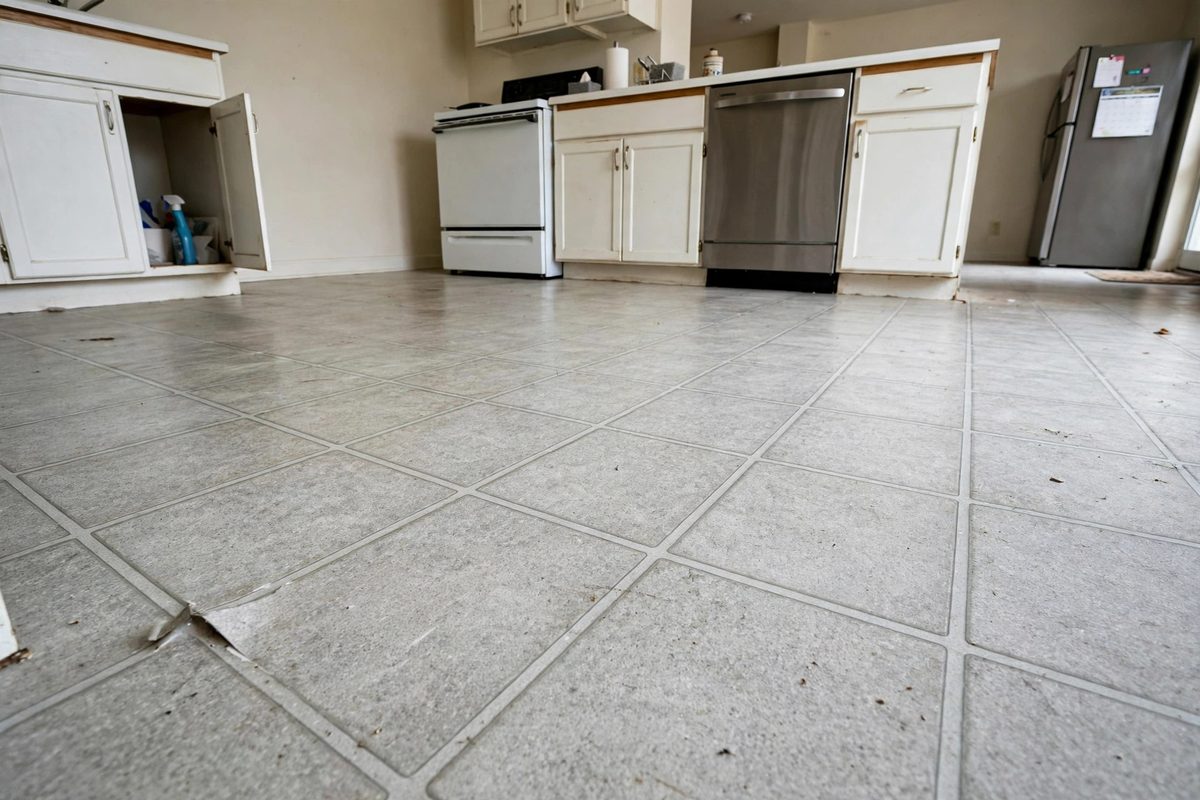
The giveaway on cheap peel and stick floors is the seam: flat tiles with no grout line read as stickers. Tiles with printed or beveled grout lines, usually in light gray or charcoal, mimic real grouted tile and make the floor look installed rather than stuck on. Some renters add a thin bead of actual grout caulk between tiles for an even more convincing joint, but printed grout lines alone are enough in most rooms.
Grout-line tiles cost slightly more, 1.50 to 3 dollars per square foot, and they suit kitchens and bathrooms where real tile is expected. The pattern alignment matters: if the grout lines do not line up between tiles, the eye catches the break instantly. Buy one extra box so you can swap any tile whose print is misaligned.
How to make it work
Snap a chalk line down the center of the room and lay the first row along it, so grout lines run straight from the start. Check alignment every third tile by stepping back and sighting along the grout line. If you use grout caulk between tiles, apply it only after 48 hours, in a thin bead, and wipe excess immediately with a damp sponge. Seal the caulk once dry in wet rooms to stop it staining.
6. Checkerboard Tiles for Laundry Rooms
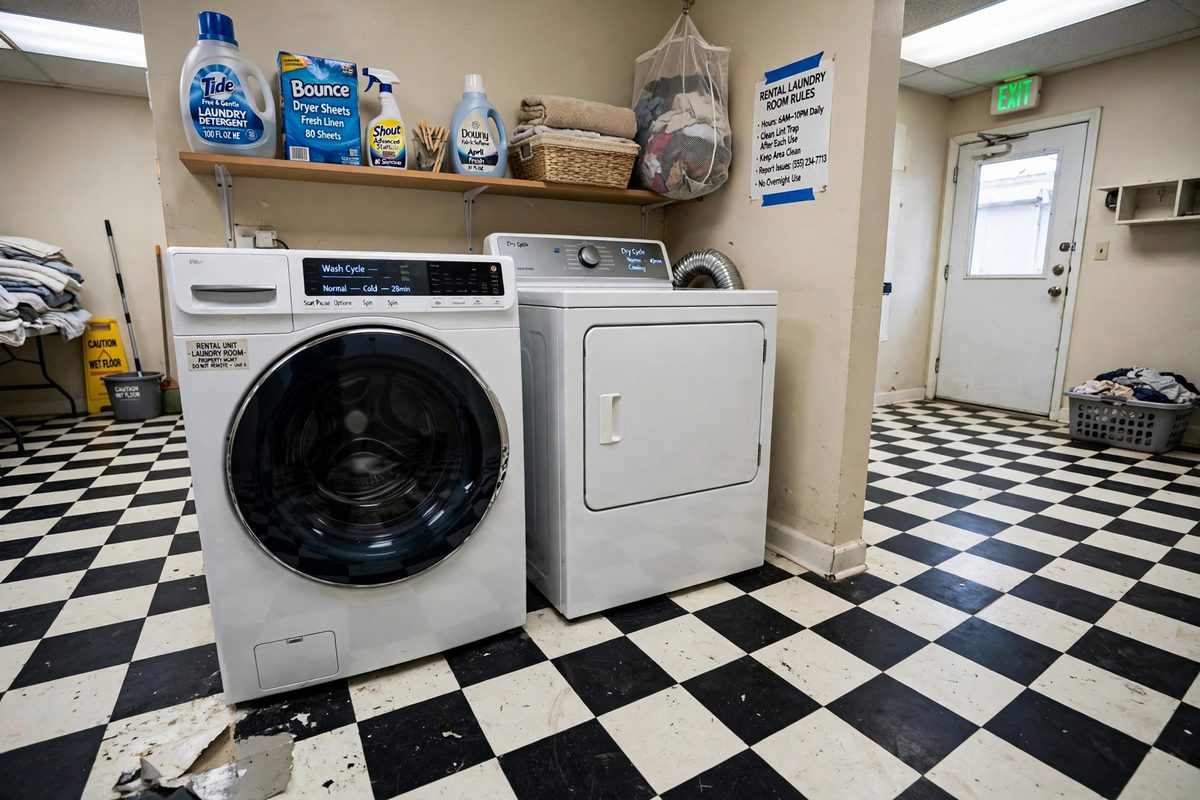
A black and white checkerboard floor is the classic laundry room upgrade, and peel and stick tiles make it a one-afternoon project for 80 to 180 dollars in a typical laundry closet or small room. The bold pattern hides lint and detergent drips, and the high contrast makes a windowless laundry space feel intentional rather than forgotten.
Laundry rooms add two hazards: washer vibration and occasional water. Vibration walks loose tiles over time, so press and roll thoroughly, and place anti-vibration pads under the washer feet. Water from a leaking hose will ruin any adhesive floor if it sits, so check hoses yearly and keep a drain pan under the washer where the hookup allows it.
How to make it work
Start at the center of the room with one black and one white tile so the pattern is symmetrical at the doorway. Alternate colors carefully and count tiles per row before peeling, since one swapped tile breaks the whole pattern. Leave the washer and dryer in place and tile around them if moving them risks the hookups, cutting tiles neatly with a utility knife. Roll the full floor twice, once after laying and once the next day.
7. Terrazzo-Look Tiles for Modern Rentals
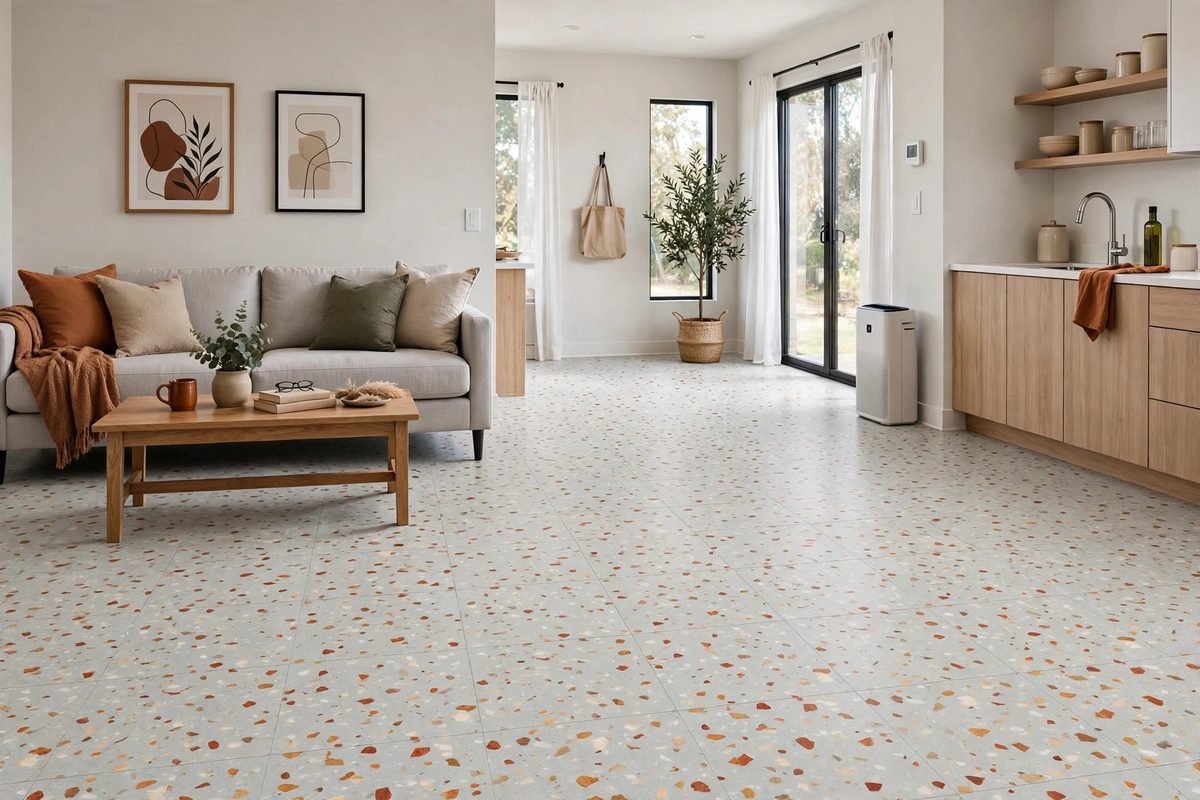
Terrazzo-look peel and stick tiles, speckled with chips of gray, beige, and rust on a pale base, suit modern rentals with white walls and light wood furniture. The busy speckle hides dust and pet hair better than any solid color, which is a real advantage in a rental with light floors. Budget 2 to 3 dollars per square foot for a convincing print, and avoid the cheapest terrazzo prints, which repeat visibly every four tiles.
The repeat pattern is the thing to check before buying in bulk. Order a single sample tile first and lay four copies together to see whether the speckle pattern repeats obviously. A good terrazzo print varies enough that the eye does not catch the repeat, while a bad one looks like wallpaper.
How to make it work
Mix tiles from several boxes as you lay them, so any print variation spreads evenly across the floor instead of clustering in one corner. Lay from the most visible corner outward, and keep the room at 65 to 85 degrees Fahrenheit during installation, since cold vinyl is stiff and bonds poorly. Do not drag furniture across the new floor for 48 hours; lift and place it instead.
8. Marble-Look Tiles for Rental Bathrooms and Kitchens
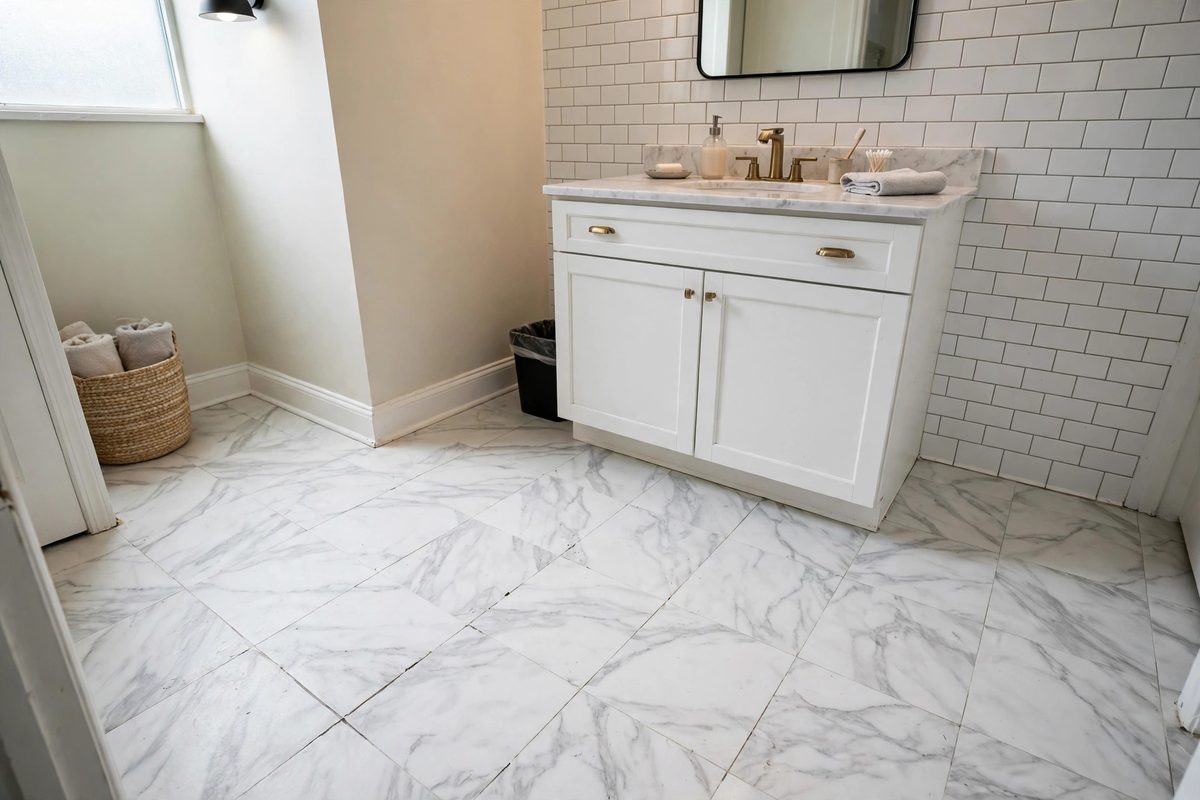
Marble-look peel and stick tiles give a rental bathroom or kitchen a brighter, more expensive feel for 2 to 3.50 dollars per square foot, and they pair well with white cabinets and chrome fixtures. The veining hides water spots better than solid white tile, which is why marble prints beat plain white in bathrooms even though both look clean on day one.
The mistake with marble prints is scale. Large, dramatic veins suit a big kitchen floor, but in a small bathroom they look oversized and fake. Choose a fine, soft vein for bathrooms under 50 square feet and save the bold veining for kitchens and open-plan floors. Matte finishes hide scratches better than glossy ones in kitchens, while gloss reads cleaner in a bathroom.
How to make it work
Dry-lay tiles to check that veins flow in a consistent direction rather than clashing tile to tile. Rotate tiles 90 degrees where the print allows it to break up vein repetition. Seal the perimeter with silicone in bathrooms and keep a squeegee in the shower room to cut standing water. For kitchen floors that pair with this look, see small kitchen flooring ideas.
9. Wide Planks for Open-Plan Rental Floors
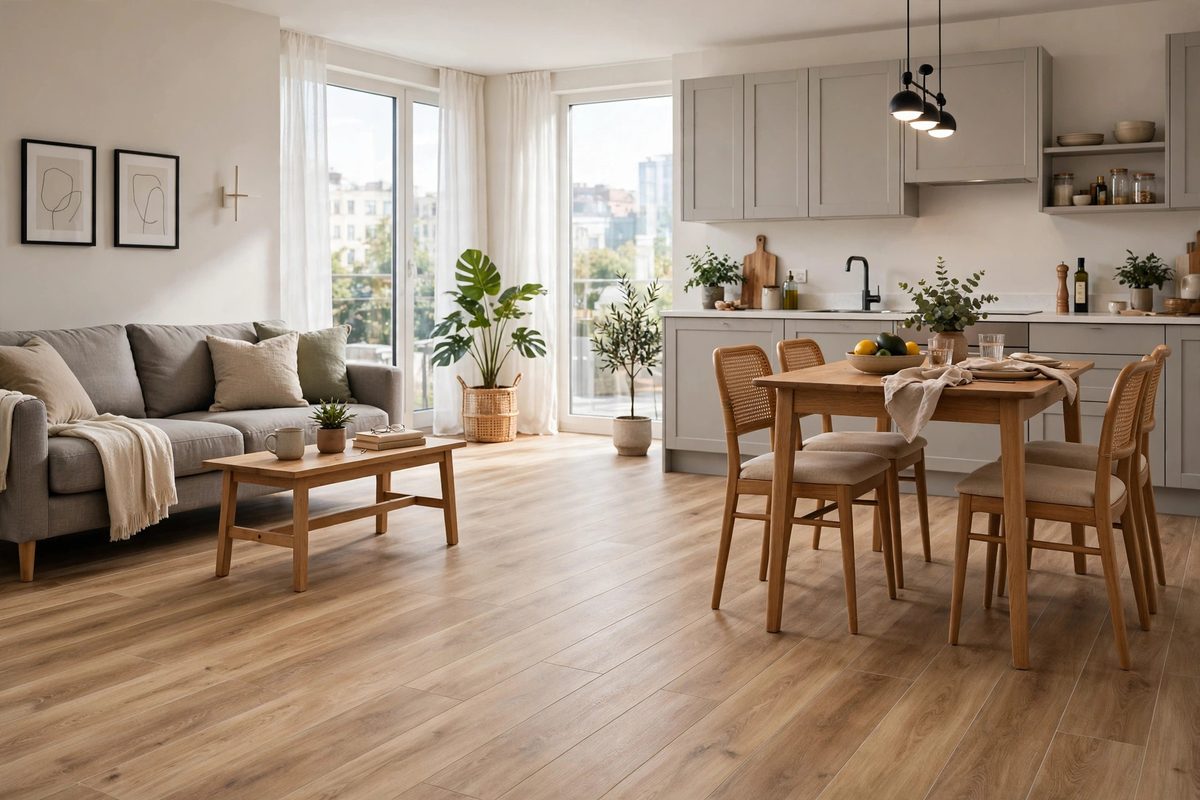
Open-plan rentals, where living, dining, and kitchen share one floor, need a single flooring choice that ties the rooms together. Wide peel and stick planks, 7 to 9 inches wide, do this better than narrow planks because fewer seams make the space read larger and calmer. A 300 square foot open-plan floor costs 450 to 900 dollars in tile, still far below any contractor-installed floor.
The challenge at this scale is subfloor flatness. A dip or ridge that a small room hides will telegraph through a large plank floor as a hollow spot or a lifted edge. Walk the whole floor barefoot before buying and mark every dip, ridge, and loose section. Fix loose vinyl underneath first, since a new tile over a loose base will lift with it.
How to make it work
Acclimate the tile boxes in the room for 48 hours before installation so the vinyl matches room temperature and humidity. Lay planks in the direction of the longest sightline, usually from the front door toward the windows, and stagger joints by at least 8 inches. Work in 10 foot sections, rolling each section before moving on, and keep traffic off the floor for 24 hours. For styling the rooms above this floor, see small living room bookshelf ideas.
10. Removal Without Losing Your Deposit
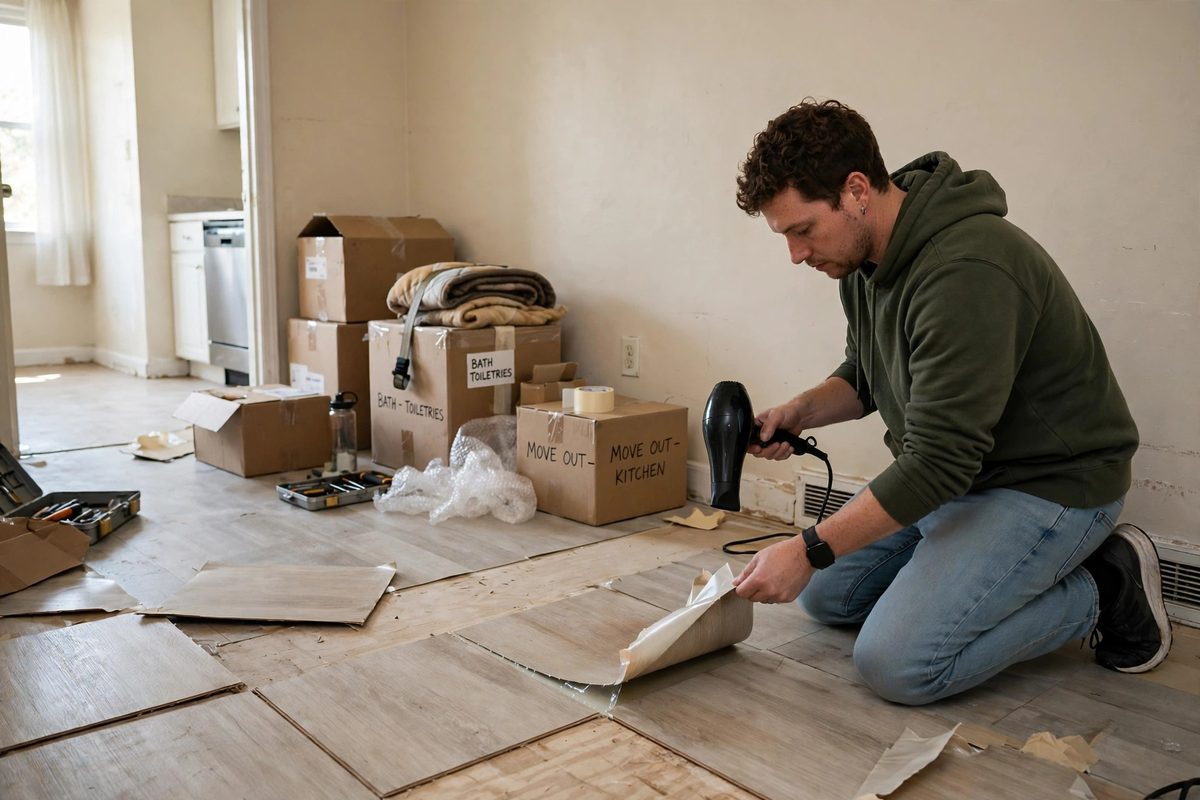
Removal is the step that decides whether peel and stick floor tile was a smart renter upgrade or a deposit deduction. Done right, tiles lift with a heat gun or hair dryer and leave the original floor intact. Done wrong, cold tiles tear, adhesive residue coats the floor, and a landlord charges for resurfacing. Budget a full day for a kitchen and a half day for a bathroom.
Heat is the key. Warm each tile for 30 to 60 seconds with a hair dryer on high, then lift a corner with a plastic putty knife and peel slowly at a low angle. Cold peeling snaps tiles and leaves backing behind. Work tile by tile, not in strips, and keep the heat moving so you never scorch the vinyl underneath.
How to make it work
After lifting all tiles, remove residue with a citrus adhesive remover or warm soapy water and a plastic scraper, never a metal blade on vinyl or linoleum. Mop the whole floor twice and let it dry, then photograph it in daylight before handing back the keys. If a tile tore the original floor, flag it early and offer the repair cost yourself, since a landlord-discovered repair costs more than one you arrange. Keep one spare tile from each room until move-out day, in case a single tile needs replacing before inspection.
Peel and stick floor tile works when the tile matches the room, the base floor is clean and smooth, and removal is planned from the start. Start with one room, test it for a month, and only then commit to the rest of the apartment.