10 Renter-Friendly Peel-and-Stick Backsplash Ideas for Small Kitchens
10 renter-friendly peel-and-stick backsplash ideas for small kitchens: subway tile, marble looks, herringbone, heat-safe stove choices, and clean removal.
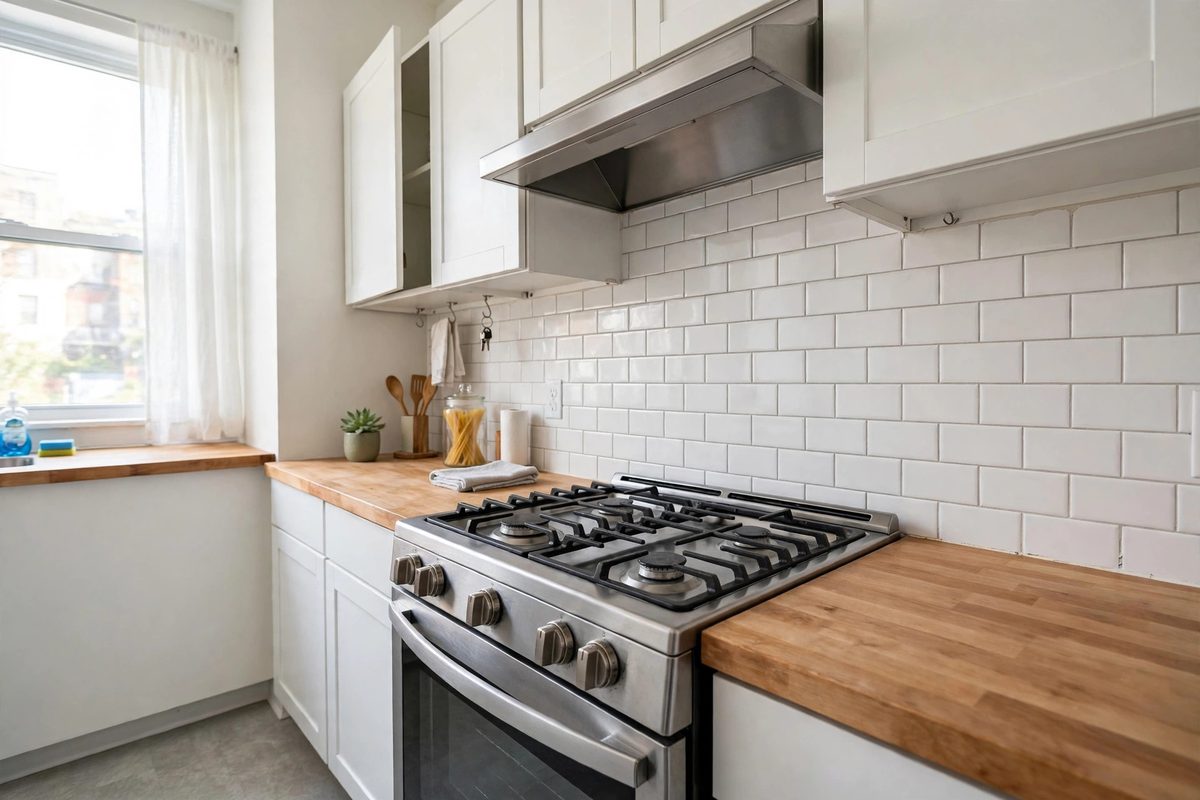
Small rental kitchen with white peel-and-stick subway tile backsplash, wood counters, and a gas stove
In This Guide
A peel-and-stick backsplash is the renter’s best kitchen upgrade. It covers dated tile or plain drywall, adds color and pattern, costs far less than real tile, and, if you choose well, removes without damaging the wall. In a small kitchen, it also does outsized visual work: the backsplash is right at eye level, so changing it changes the whole room.
The key is choosing the right product for the right spot. Not all peel-and-stick tiles handle heat, steam, or textured walls equally. A tile that looks great in a product photo can peel behind a stove or refuse to stick to bumpy plaster.
These ideas cover styles, installation, and removal, so you can upgrade with confidence and get your deposit back. They pair with the no-drill window upgrades in no-drill curtain ideas and the floor upgrades in renter-friendly temporary flooring ideas. For other no-damage kitchen changes, see renter-friendly kitchen upgrades.
1. Subway Tile Peel-and-Stick
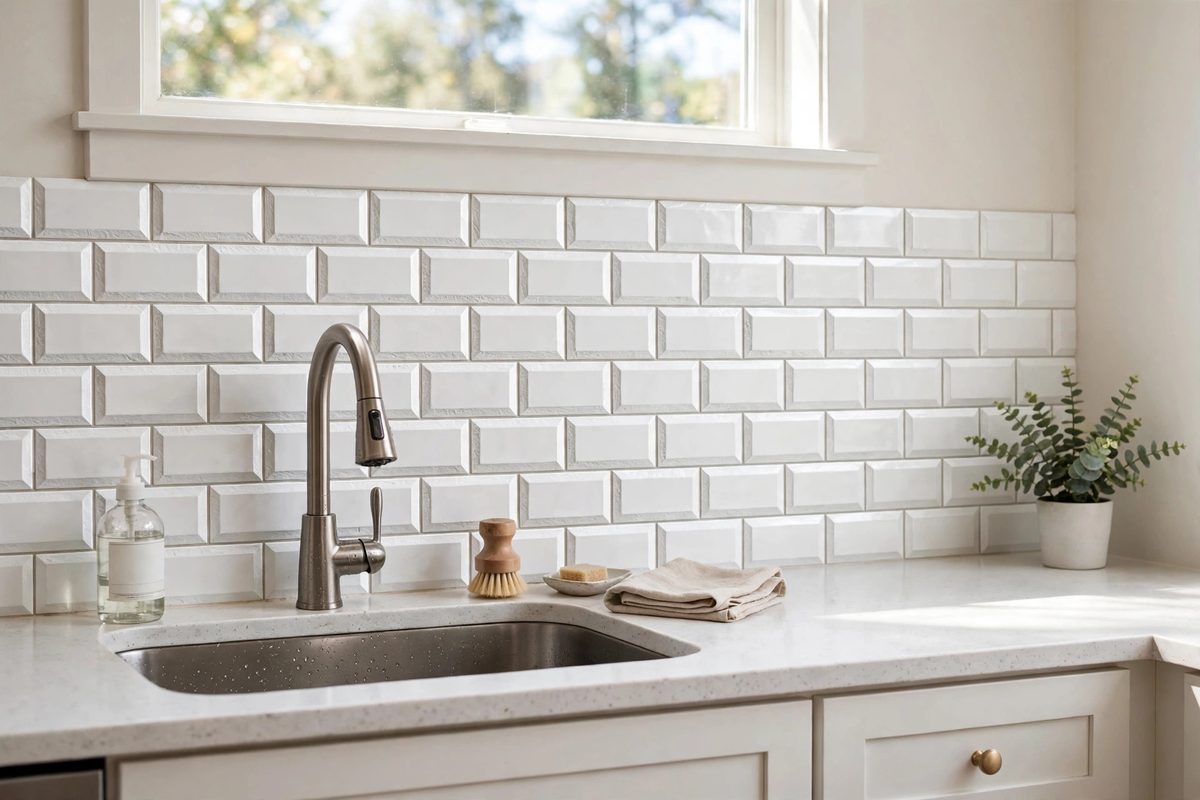
White subway tile is the safest peel-and-stick choice, and safe is good here. It brightens a small kitchen, matches almost any cabinet color, and looks convincingly like real tile from a normal standing distance. Most subway peel-and-stick sheets cost 1 to 3 dollars per square foot, so a typical small kitchen backsplash, 15 to 25 square feet, runs 30 to 75 dollars.
Look for thicker, gel-like tiles with a slight 3D edge rather than flat printed vinyl. The dimension catches light like grout lines and sells the tile illusion.
How to make it work
Start at the most visible corner, usually beside the stove or sink, and work outward so cut pieces land in less visible spots. Overlap sheets slightly or butt them tightly according to the product instructions; gaps show the wall behind and break the illusion. Press firmly with a plastic smoother, working from the center outward to push out air bubbles.
2. Marble-Look Panels for a High-End Feel
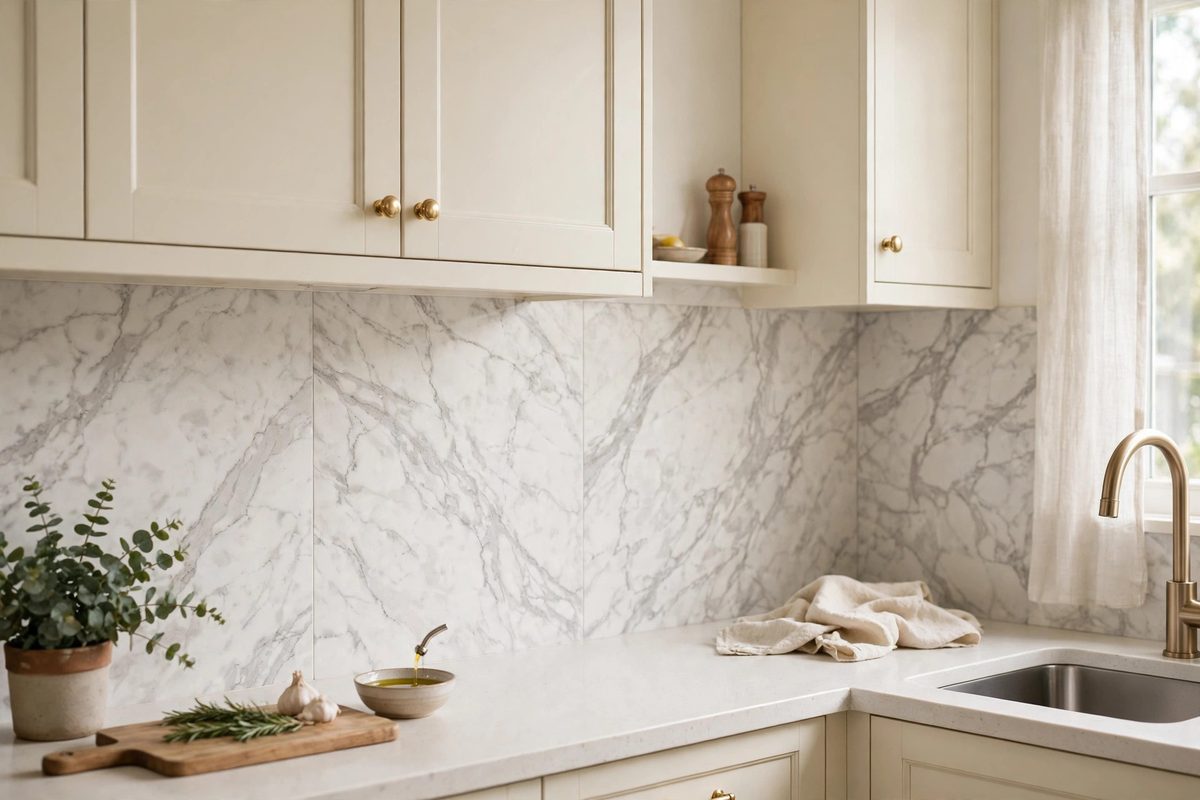
Marble-look peel-and-stick panels give a small kitchen a high-end feel without the stone price, which runs 50 dollars or more per square foot installed for real marble. The best vinyl marble has soft, irregular veining and a matte or satin finish; shiny, high-contrast veining looks printed and cheap.
Use marble-look panels on one backsplash run, not the whole kitchen plus counters, or the veining pattern repeats obviously and the illusion breaks.
How to make it work
Buy all panels from the same batch, and check veining direction before sticking; veins should flow in one consistent direction. Match panels at seams by aligning the veining as closely as possible, and keep a spare sheet for replacing a damaged section later. Wipe with a damp cloth only; abrasive cleaners dull the finish.
3. Herringbone Without the Grout
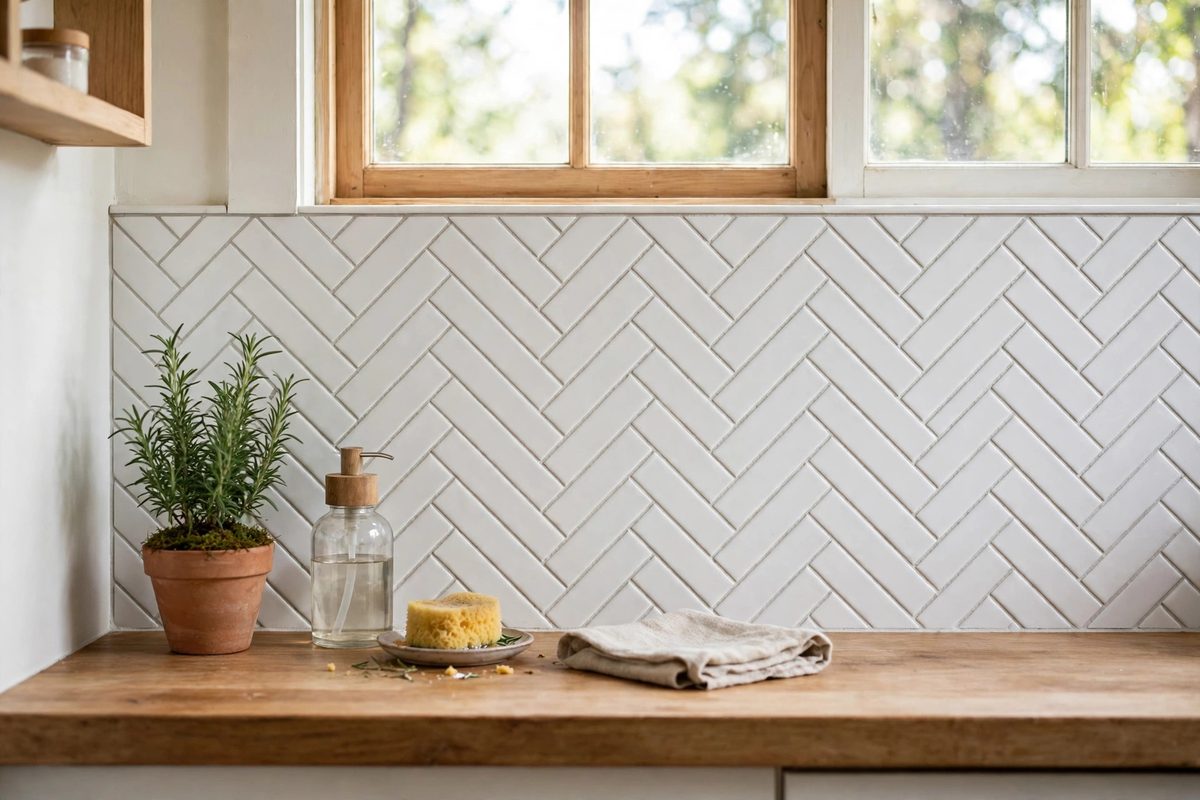
Herringbone is a classic pattern that looks expensive in real tile and fiddly to install. Peel-and-stick herringbone sheets give you the pattern pre-arranged, so you skip measuring angles and cutting dozens of small tiles. It suits small kitchens because the diagonal pattern draws the eye and makes the wall feel dynamic.
Herringbone works best in a neutral color, white, cream, or soft gray, so the pattern, not a loud color, is the feature. A bold herringbone color in a tiny kitchen can feel busy fast.
How to make it work
Herringbone sheets need careful alignment, so use a level and a pencil guideline along the bottom edge before sticking the first sheet. Work slowly, one sheet at a time, and step back after every two sheets to check the pattern stays straight. Trim the top edge with a sharp knife against a straightedge for a clean line under upper cabinets.
4. Bold Pattern on One Short Run
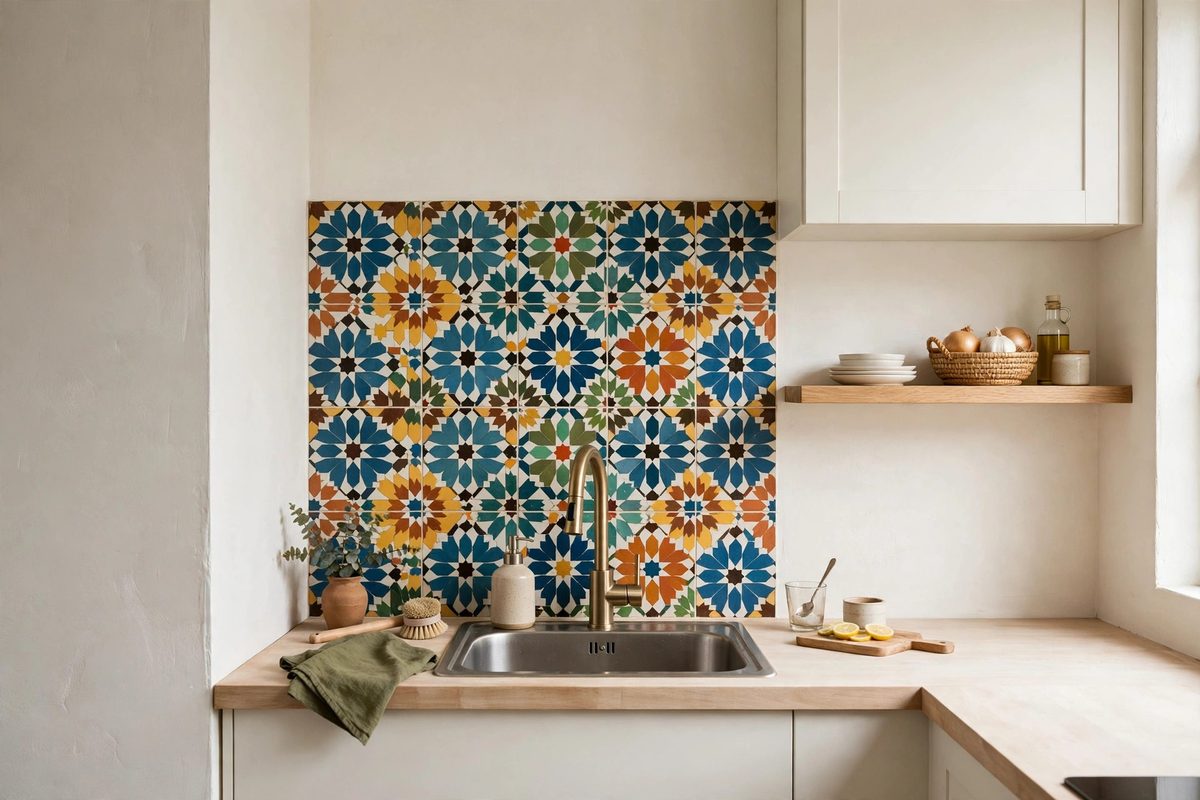
If you love bold pattern, Moroccan, encaustic-look, or colorful geometric tiles, use it on one short backsplash run, like the sink wall or a single section between cabinets. A bold pattern on a short run feels like art. The same pattern wrapped around the whole kitchen can feel overwhelming in a small space.
Bold peel-and-stick tiles cost about the same as plain ones, 2 to 4 dollars per square foot, so a short run is also a low-risk experiment. If you tire of it in a year, you have only one section to replace.
How to make it work
Choose a bold tile whose colors already appear elsewhere in the kitchen, in a dish, a towel, or a piece of art, so it connects rather than clashes. Keep counters and upper cabinets plain so the pattern has room to breathe. Photograph the run before and after; it helps at move-out to show the original wall condition.
5. Behind the Stove: Heat-Safe Choices
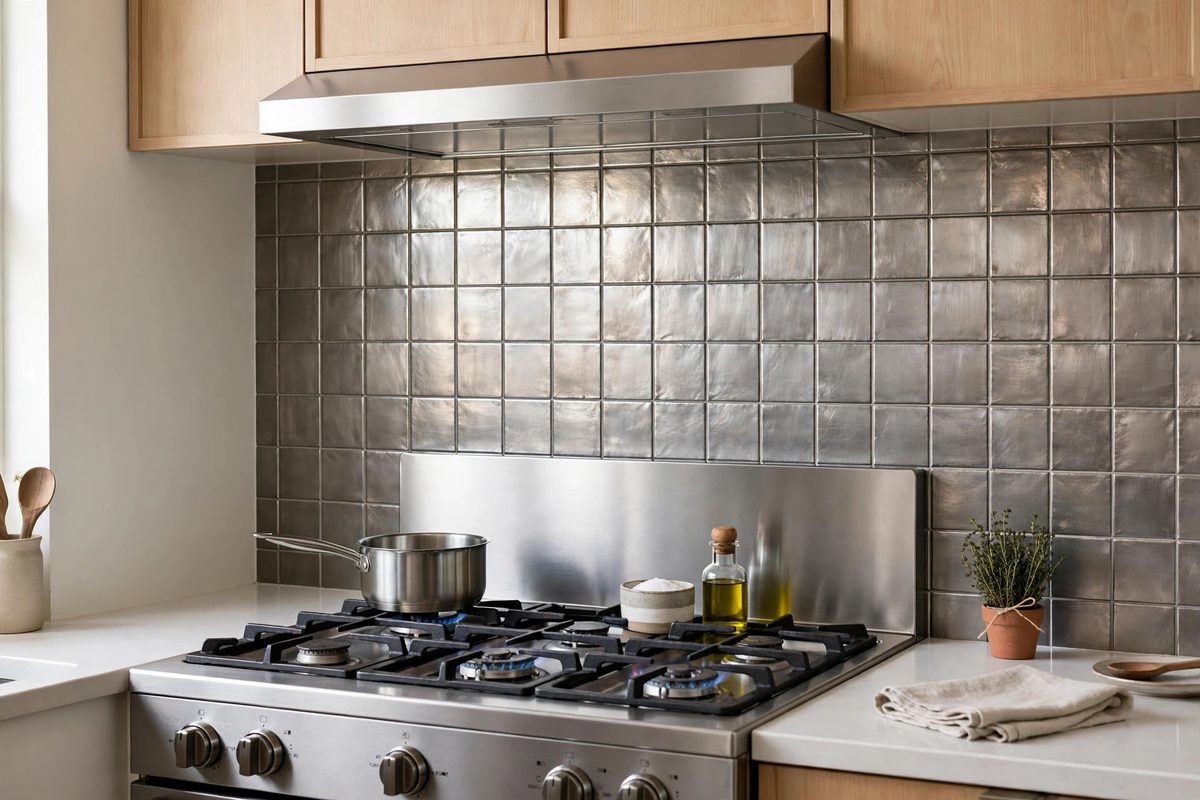
Heat is where peel-and-stick backsplashes fail. Most vinyl tiles are rated to about 150 to 200 degrees Fahrenheit, which is fine beside a sink but risky directly behind a gas burner or a high-heat stove. Tiles can warp, discolor, or peel when exposed to sustained heat.
For the stove wall, choose metal-look peel-and-stick tiles, usually aluminum composite, which handle heat better, or leave a heat-safe gap and use a freestanding stainless splash guard behind burners.
How to make it work
Check the product’s heat rating before buying, and keep vinyl tiles at least 6 inches from open flames or high-heat burners when possible. If your stove has no backsplash guard, a stainless steel sheet, cut to fit and held with removable adhesive, protects both the tile and the wall. Never place vinyl tiles inside an oven surround or on a surface that directly contacts a burner.
6. Prep and Stick: The Surface Matters
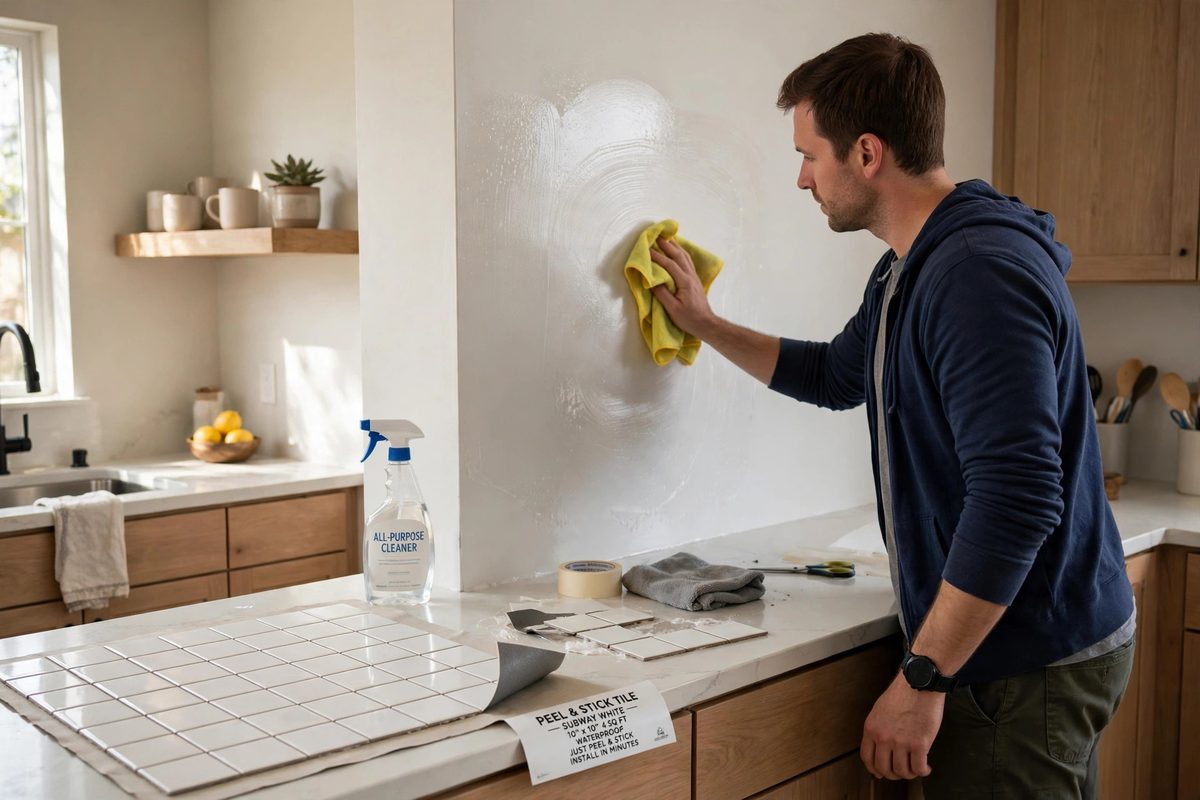
Peel-and-stick tiles stick best to smooth, clean, dry surfaces: painted drywall, smooth existing tile, or laminate. They struggle on textured plaster, rough brick, or greasy walls, and no amount of pressing fixes a dirty surface.
Preparation takes 20 minutes and determines whether tiles last two years or two weeks. Clean with a degreasing cleaner, rinse, dry fully, and wipe with rubbing alcohol on smooth tile to remove residue.
How to make it work
Test one tile in an inconspicuous corner and leave it for 48 hours before doing the whole wall. If it peels, the surface needs more cleaning or a different product, like a thicker gel tile with stronger adhesive. On existing tile, fill deep grout lines with a smooth filler or use thicker tiles that bridge the grooves; thin tiles sink into grout lines and look uneven.
7. Trimming Around Outlets Cleanly
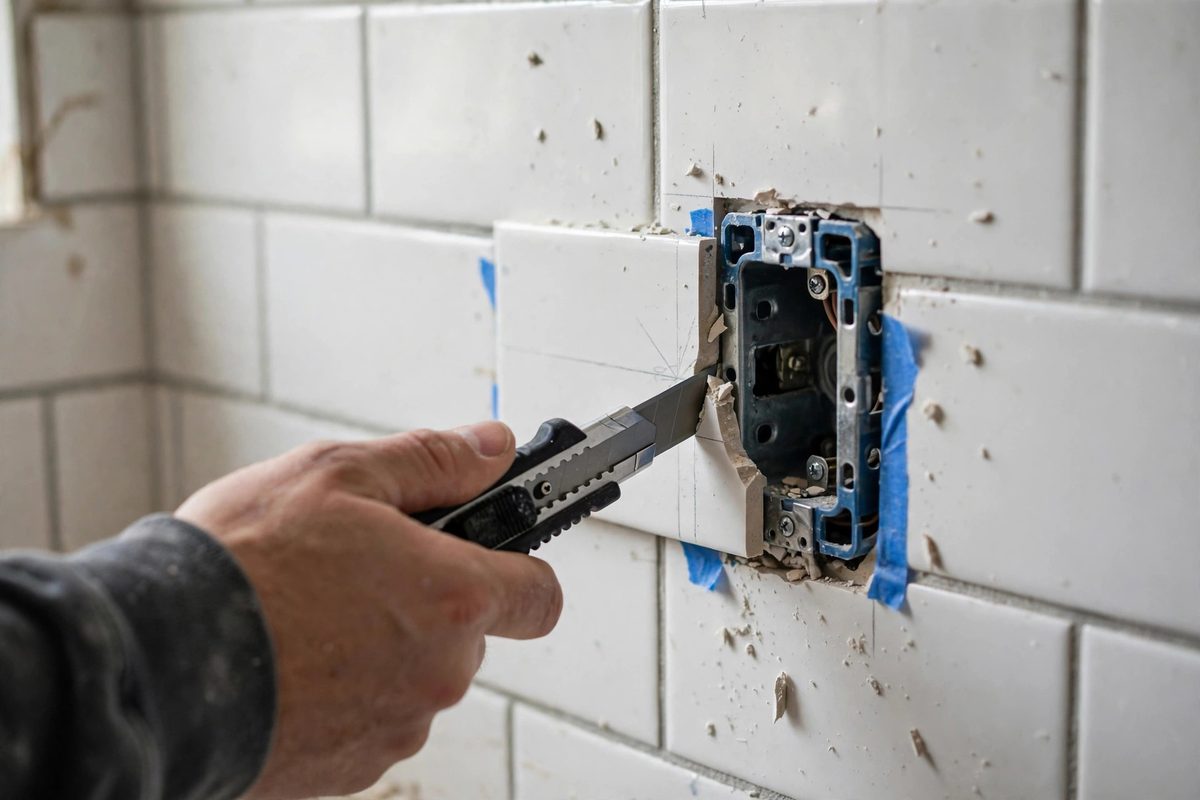
Outlets are where amateur backsplash jobs show. A tile cut too large leaves a gap, and a tile cut too small shows wall behind the outlet cover. The clean method is to turn off power, remove the outlet cover, stick the tile over the outlet area, then cut an X over the outlet box and fold the flaps back before replacing the cover.
Always turn off the circuit breaker for kitchen outlets before removing covers, and use a plastic, not metal, tool near outlets.
How to make it work
Remove the cover plate and keep its screws in a small cup. Apply the tile over the outlet, then cut carefully from the center outward with a sharp utility knife. Fold the tile edges into the box, replace the cover, and check that the cover sits flat. If the cover does not sit flat, trim a little more; forcing it cracks the tile.
8. Renters Removal: What Actually Comes Off Clean
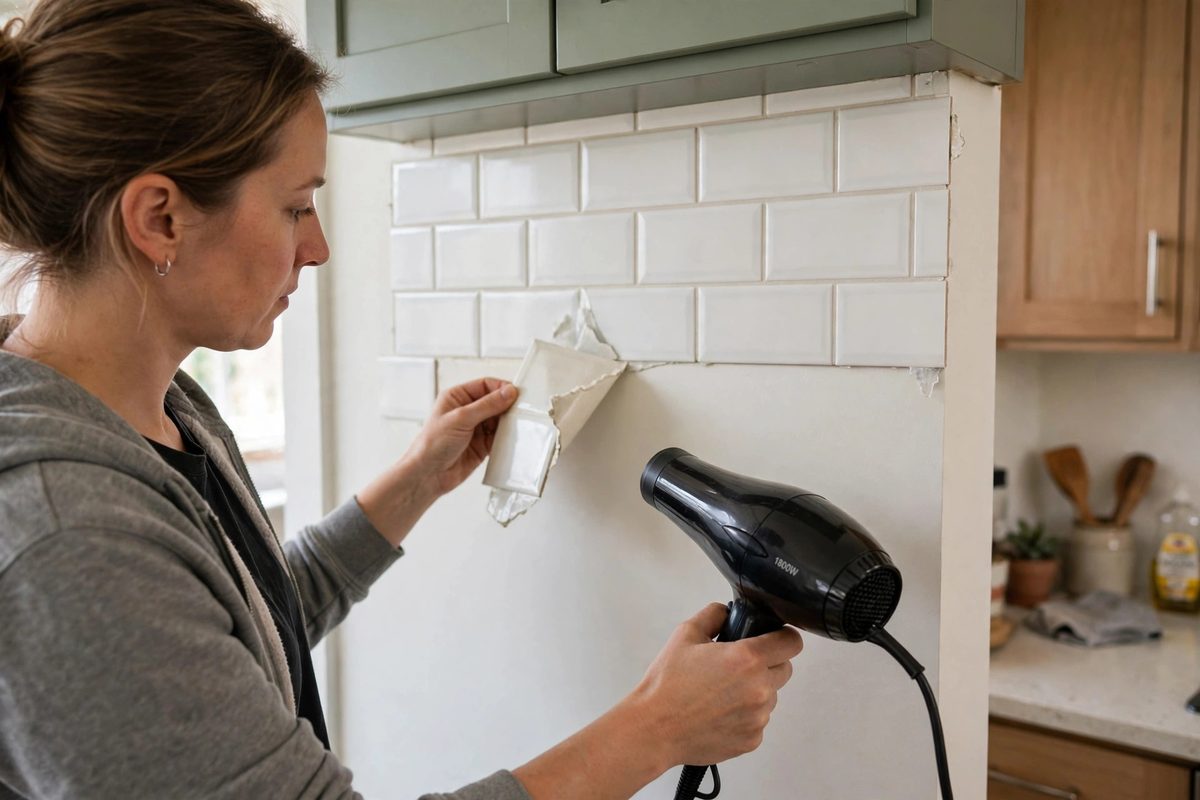
Removal is the part renters worry about most, and it is usually easier than feared if you chose a quality tile and prepared the surface well. Most peel-and-stick tiles peel off smooth painted drywall cleanly, especially if you warm them with a hair dryer on low heat and peel slowly at a 45 degree angle.
Thinner, cheaper tiles are more likely to tear and leave adhesive residue. Gel tiles and thicker vinyl usually remove in one piece. Keep your move-out kit ready: a hair dryer, a plastic scraper, and a bottle of adhesive remover safe for painted walls.
How to make it work
Start at a corner, warm the tile for 30 seconds, and peel slowly. If residue remains, roll it off with your fingers or use adhesive remover on a cloth, testing first in a hidden spot. Photograph the wall after removal, and keep the original backsplash photos from move-in to show the wall is back to its original state.
9. Pairing Backsplash With Existing Counters
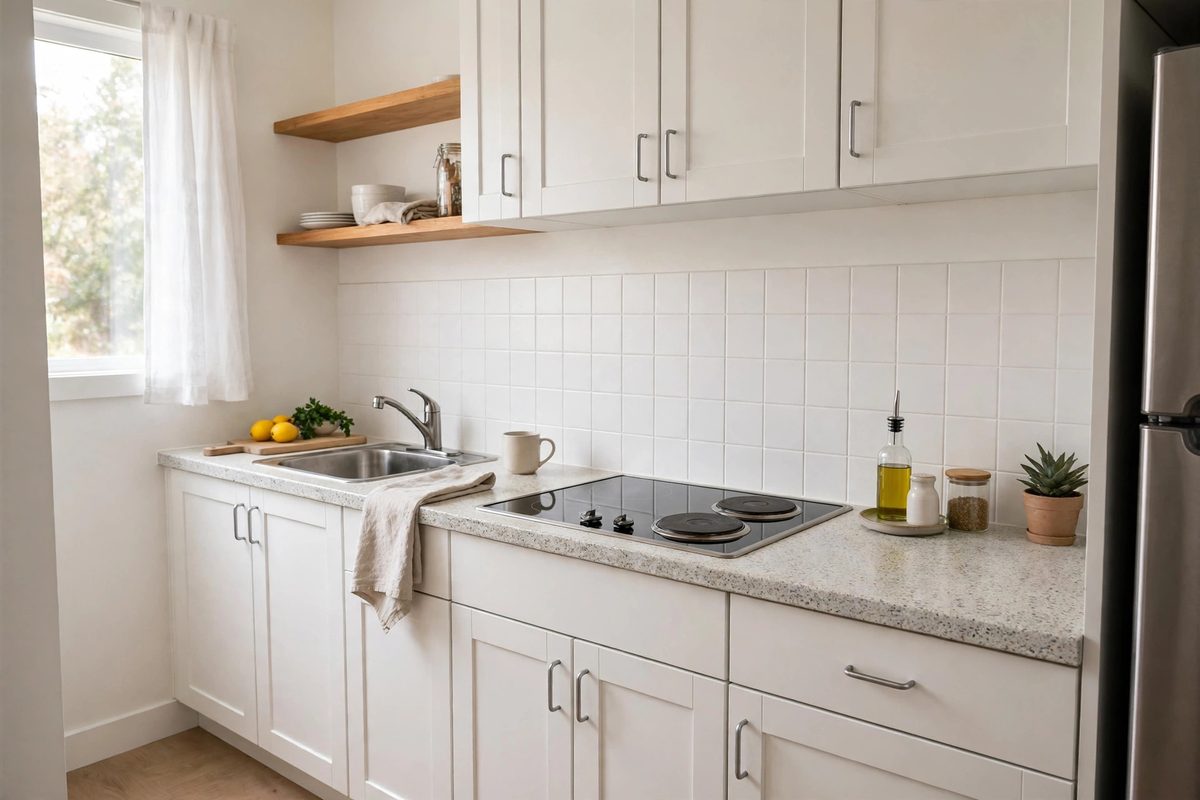
Renters cannot change counters, so the backsplash has to work with what is there. The rule is simple: if counters are busy, with speckled laminate or patterned stone, choose a plain backsplash. If counters are plain, a patterned backsplash can carry the room.
Hold tile samples against your counter in daylight and under evening kitchen light before buying a full box. Colors shift dramatically under different bulbs, and a tile that matches in the store can clash at home.
How to make it work
Take a phone photo of your counter and cabinets to the store, or order samples first; many brands sell single sheets for 3 to 5 dollars. Choose a backsplash color that appears in the counter, even subtly, so the two surfaces connect. If your counter is a warm beige laminate, a warm white tile beats a cool bright white.
10. Budget Math: Cost Per Square Foot
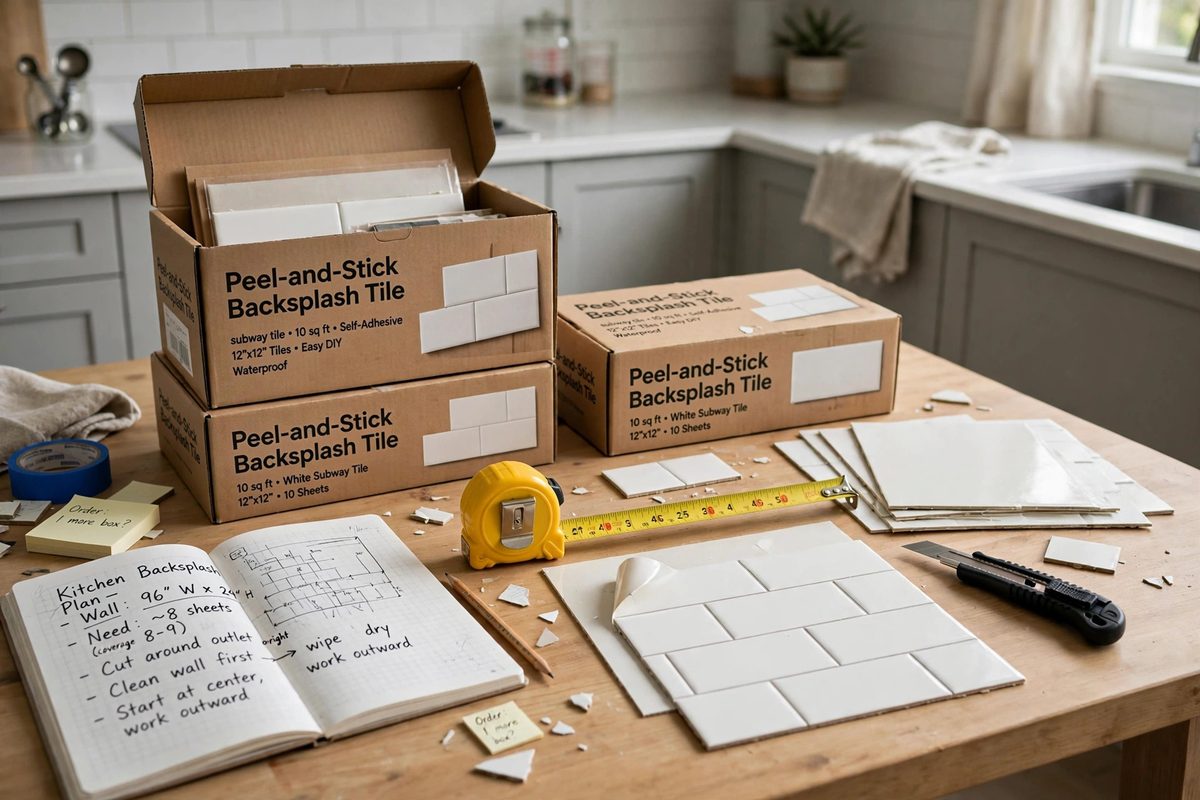
Peel-and-stick backsplash math is straightforward, but waste catches people out. Measure your backsplash area, length times height for each run, add them up, then add 15 percent for cuts, mistakes, and spares. A 20 square foot backsplash needs about 23 square feet of tile.
At 1 to 4 dollars per square foot, most small kitchen backsplashes cost 30 to 100 dollars total, plus 10 to 20 dollars for tools: a utility knife, a smoother, a level, and adhesive remover for move-out.
How to make it work
Measure twice, including around windows and outlets, before ordering. Order all tiles at once from the same batch to avoid color differences between boxes. Keep two spare sheets after installation; a single damaged tile is easy to replace if you have matching stock, and impossible to match a year later from a different batch.
A peel-and-stick backsplash is a low-risk, high-impact renter upgrade when you match the tile to the spot, prep the surface, respect heat limits, and keep spares. Do those four things, and you get a kitchen that looks renovated, with a wall that returns to normal at move-out.