10 Renter-Friendly Accent Walls With Glue, No Screws
10 renter-friendly accent walls with glue and no screws: peel-and-stick panels, glue-up wood slats, adhesive molding, starch fabric walls, and damage-free removal for every wall type.
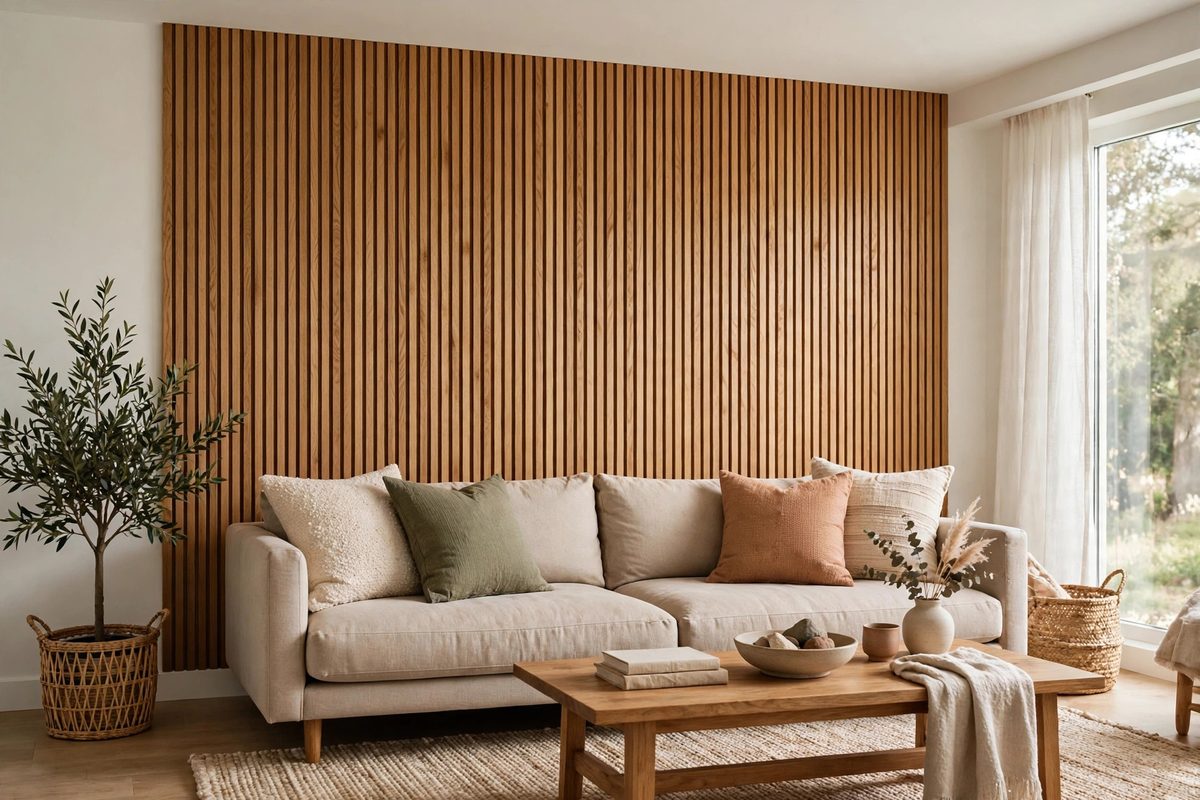
Living room accent wall made of glue-up wood slats in warm oak, installed without screws, above a sofa
In This Guide
An accent wall changes a room faster than any other single project, and renters do not need screws, nails, or a drill to get one. Every method below bonds to the wall with glue, adhesive, or a removable paste, and every method includes a removal plan, because a wall that looks great for a year and peels the paint at move-out is not renter friendly at all.
The rule that governs all ten methods is weight per square foot. Smooth painted drywall holds adhesives well. Plaster holds them less well, especially old plaster with chalky paint. Textured walls, brick, and concrete hold them worst of all, since adhesive only grips the high points of the texture. Test first: stick one panel or strip on an inconspicuous corner, leave it for 48 hours, then remove it exactly as the instructions say. If paint lifts, that method is wrong for your wall, no matter how good it looks online.
Cost and removal time vary a lot between methods. Peel-and-stick panels cost more per square foot but come down in minutes. Glue-up wood slats cost less in materials but need a full day of curing and a careful removal with a putty knife and heat. Pick the method that matches your lease length: a six month lease favors peel-and-stick, while a multi-year stay can justify a glue-up wall. For the window side of the same room, see no-drill curtain ideas for rental apartments, and for wall decor that hangs without any glue at all, see renter-friendly wall decor ideas.
1. Peel-and-Stick 3D Wall Panels
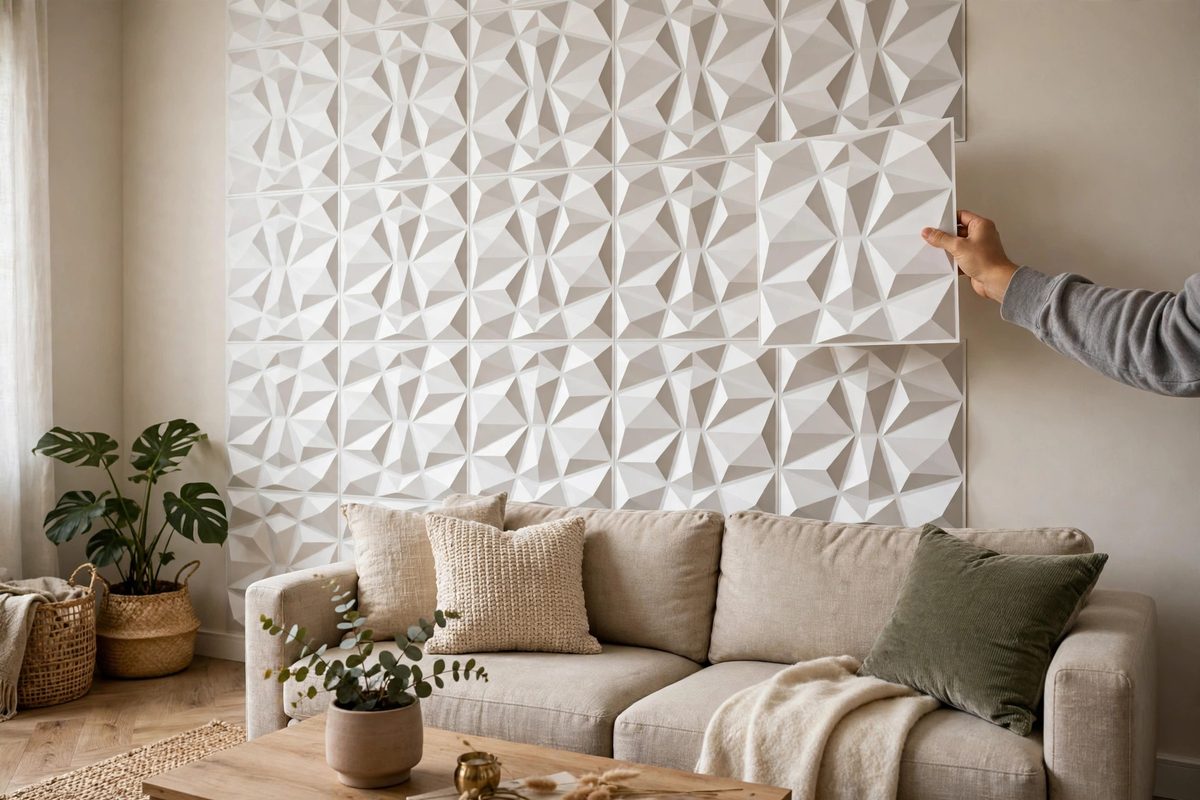
Peel-and-stick 3D panels are light PVC or foam tiles, usually 12 by 12 inches or 20 by 20 inches, with a foam adhesive backing already attached. You peel, press, and the panel is up. A 10 by 8 foot accent wall needs about 20 large panels and costs 60 to 120 dollars, and installation takes 2 to 3 hours with no tools beyond a craft knife and a level.
These panels weigh very little, about 4 to 8 ounces each, so weight is rarely the problem. Adhesion is. The foam backing grips smooth painted drywall strongly, grips lightly textured walls moderately, and grips heavily textured plaster or brick poorly, where panels can pop off overnight as room temperature changes. In a bathroom, steam softens the foam adhesive within months, so keep this method out of steamy rooms.
How to make it work
Clean the wall with rubbing alcohol and let it dry fully, then mark a level baseline along the bottom of the wall with painter’s tape. Peel the backing from the center outward, press the panel for 30 seconds, and work from the bottom center outward so seams stay straight. Cut edge panels with a sharp craft knife against a metal ruler. To remove them, warm each panel with a hair dryer on low for 30 seconds, peel slowly from a corner at a low angle, and roll off leftover foam adhesive with your thumb or a plastic scraper, never a metal one.
2. Glue-Up Wood Slats With Construction Adhesive Dots
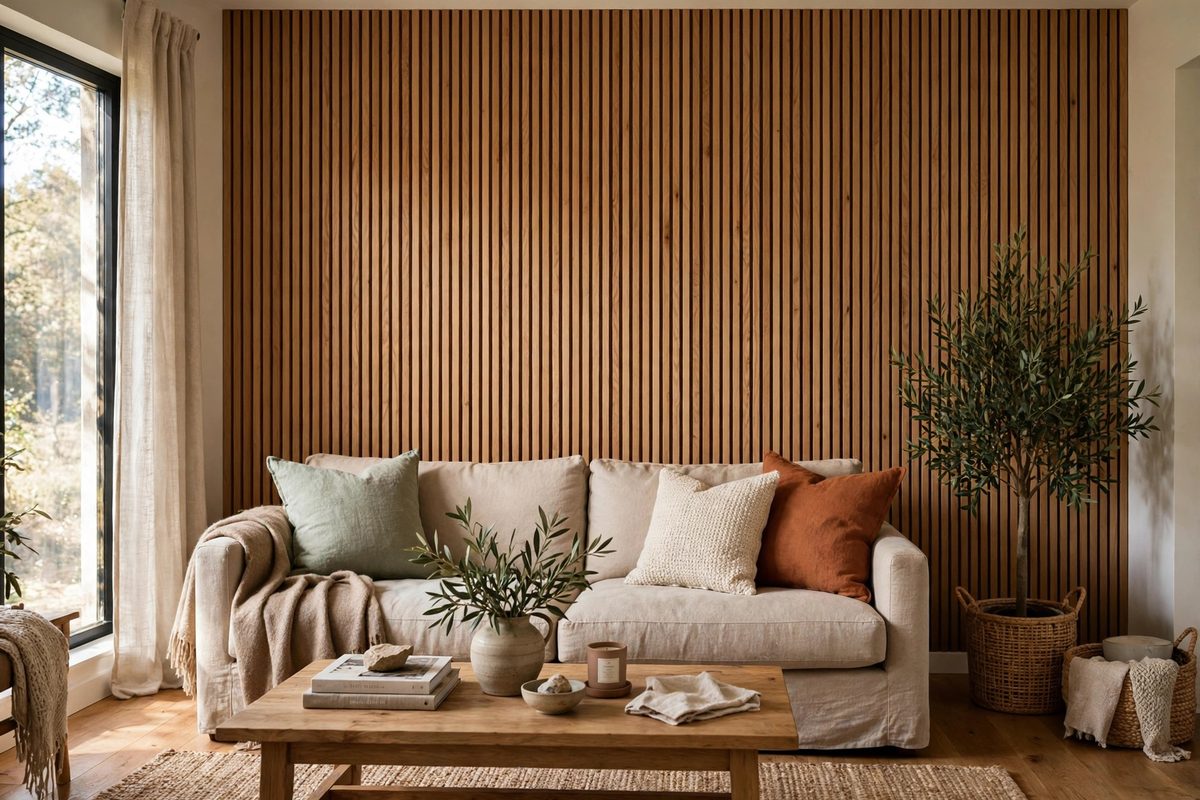
Wood slat walls are the look most renters want, and glue makes them possible without screws. Thin pine or MDF slats, half an inch thick and 2 to 3 inches wide, are bonded to the wall with dots of construction adhesive, spaced 8 to 12 inches apart along each slat. Materials for an 8 foot wide wall run 80 to 150 dollars, and the wall holds for years because the adhesive bonds across dozens of contact points.
This is the heaviest glue method in this list, so weight math matters. A pine slat 8 feet long weighs about 2 to 3 pounds, and a full wall of slats weighs 30 to 50 pounds spread across the whole surface. That load is fine on smooth drywall with a good adhesive, but it is too much for wallpaper, which will peel away from the wall under the load, taking the slats with it. Never glue slats over wallpaper.
How to make it work
Prime and paint or stain slats before installation, since finishing them on the wall is slow and messy. Apply adhesive in dots the size of a coin, not a continuous bead, so removal later is possible and air can escape. Press each slat firmly for 60 seconds and brace it with painter’s tape to the neighboring slat until the adhesive cures, usually 24 to 48 hours depending on the product label. Keep the room above 60 degrees Fahrenheit during curing, since cold adhesive cures slowly and weakly. To remove, score along each slat edge with a craft knife, warm the slat with a hair dryer, and pry gently with a wide putty knife, then patch the small adhesive spots with filler and touch-up paint.
3. Adhesive Molding Strips for a Picture-Frame Wall
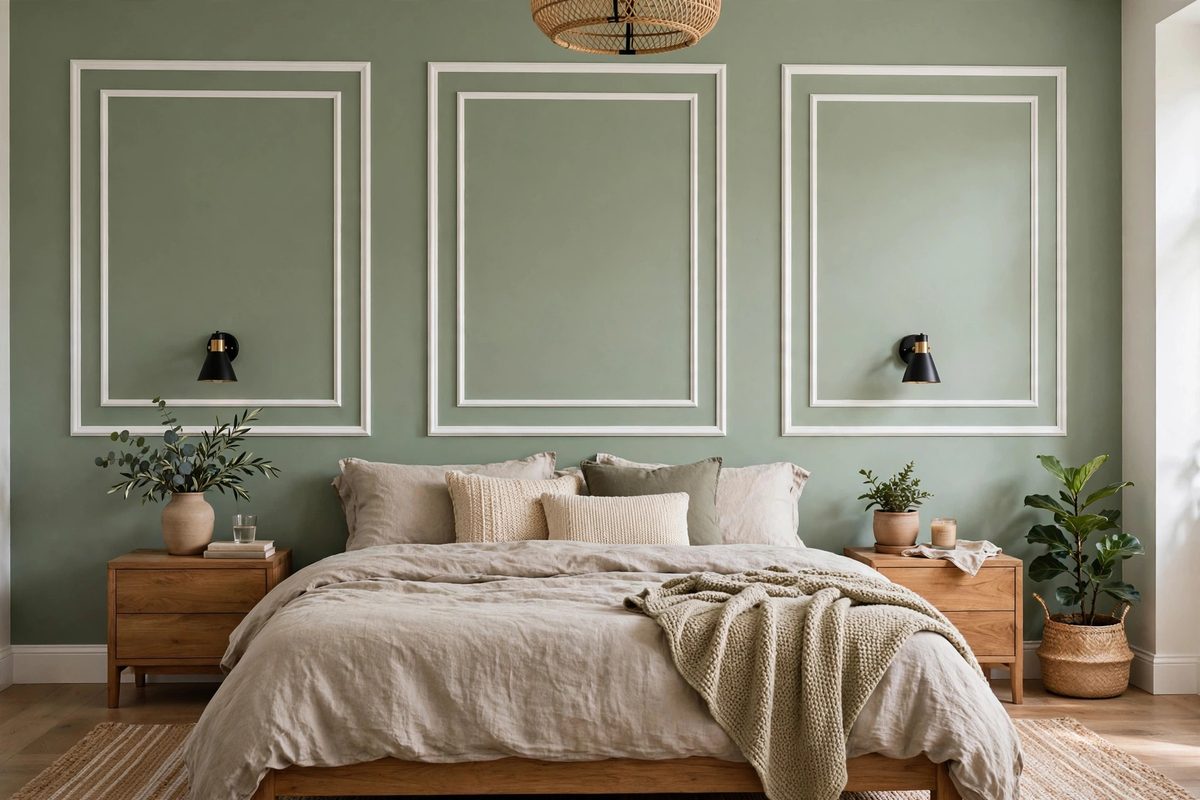
Picture-frame molding, rectangles of trim glued to the wall and painted the same color as the wall or a contrast color, gives a bedroom or dining room a tailored, architectural look with almost no weight. Lightweight polyurethane or foam molding strips cost 30 to 60 dollars for a full wall, and the whole project is glue, a miter box, and paint.
Molding strips weigh ounces per foot, so the adhesive choice is about clean removal, not holding power. A strong construction adhesive will hold molding forever and rip paint on removal, which defeats the purpose. Use a medium strength adhesive or adhesive foam tape rated for trim, and accept that you may need to re-press a corner once a year. That trade is worth it at move-out.
How to make it work
Plan rectangles on paper first, with 3 to 4 inches between rectangles and at least 6 inches from doors and outlets. Cut 45 degree miters with a miter box and fine saw, dry fit each rectangle on the floor, then glue one rectangle at a time, holding each piece with painter’s tape for 2 hours while the adhesive sets. Fill miter gaps with paintable caulk, let it dry for 24 hours, then paint the molding and the wall inside each rectangle in two coats. To remove, score the paint line with a craft knife, warm the strip, and peel it away, then fill any small dents with lightweight filler.
4. Fabric Accent Wall With Liquid Starch
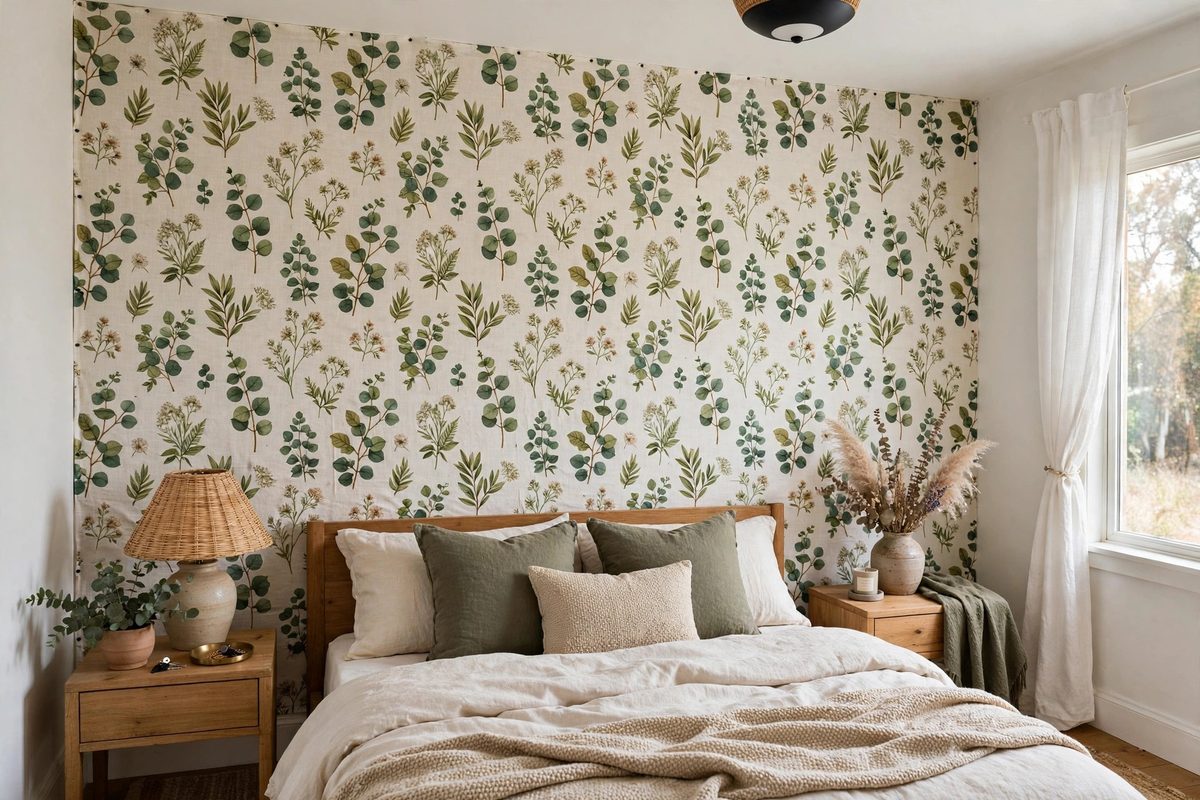
Liquid starch is the oldest renter trick for a fabric wall, and it still works. You soak or brush fabric with liquid laundry starch, smooth it onto the wall, and as the starch dries it bonds the fabric flat like a second skin. When you move out, you peel the fabric off and wipe the wall with warm water. A full wall costs 20 to 40 dollars in fabric and starch, the cheapest method in this list.
Starch holds best on smooth painted drywall and smooth plaster. It does not hold on textured walls, where the fabric bridges over texture bumps and peels at the edges, and it does not hold in bathrooms, where humidity re-dissolves starch and the fabric sags. Pick a light to medium cotton fabric. Heavy canvas is too stiff to smooth flat, and very thin fabric shows wall color through it.
How to make it work
Wash and iron the fabric first, then cut panels 2 inches longer than the wall height. Brush starch generously onto the wall in a 3 foot wide section, press the fabric on from the top, and smooth outward with a plastic smoother or a credit card to push out bubbles. Brush a second coat of starch over the fabric surface and let it dry for 24 hours before trimming edges with a craft knife. To remove, peel from a top corner slowly, then sponge the wall with warm water to dissolve any starch residue, and let the wall dry before repainting if needed.
5. Foam Brick and Stone Panels With Panel Adhesive
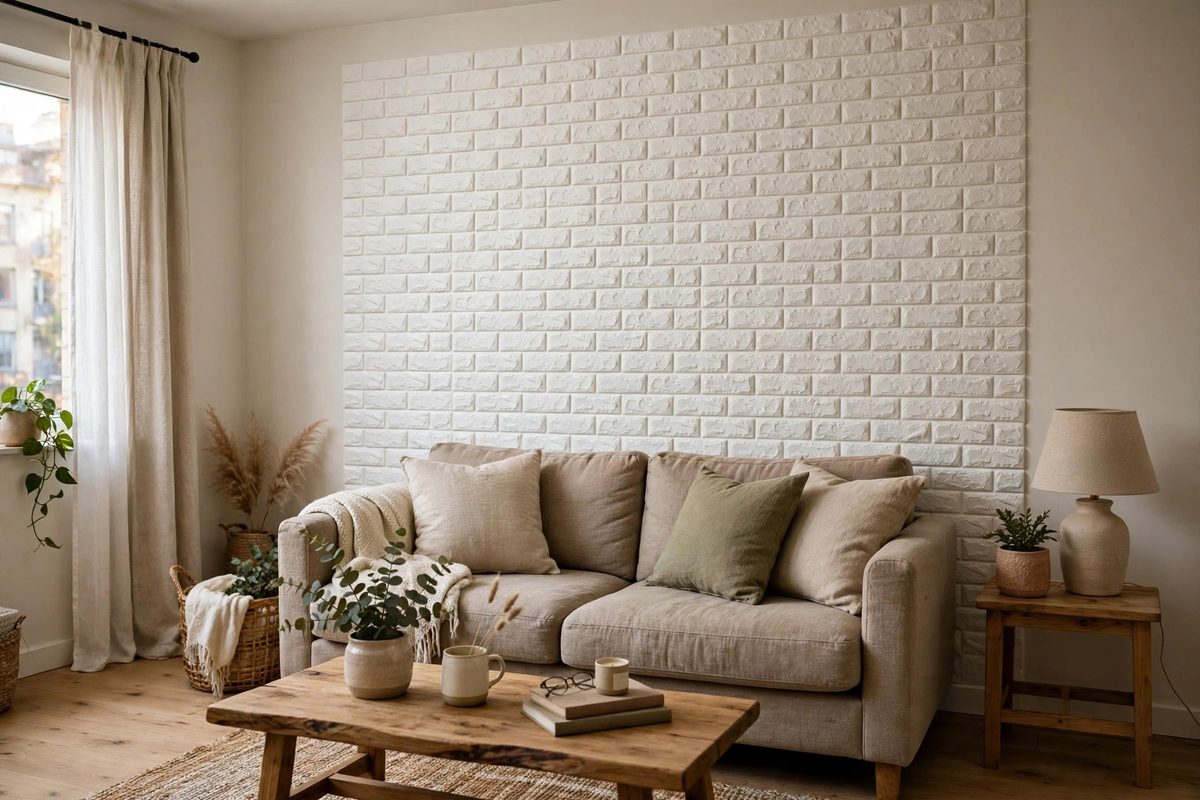
Foam brick and stone panels look like masonry from a few feet away, weigh almost nothing, and go up with panel adhesive or their own adhesive backing. A full accent wall costs 50 to 100 dollars in panels, and the texture adds depth that flat paint cannot match, which is why this method photographs so well in small living rooms.
Foam panels are thicker than flat panels, usually half an inch to 1 inch, so edges and corners need care. A raw foam edge at a doorway or a window frame looks unfinished, so plan edge trim, a painted border, or a return panel that wraps the corner. In kitchens, grease settles into foam texture and is hard to clean, so keep foam panels out of the cooking zone and wipe them with a dry cloth only.
How to make it work
Lay panels on the floor first and plan the brick pattern so vertical seams stagger like real brickwork. Apply panel adhesive in an S pattern on the back of each panel, not just the edges, press firmly for 60 seconds, and brace with painter’s tape until the adhesive sets, usually 12 to 24 hours. Cut panels with a serrated bread knife for clean edges through foam. To remove, warm a panel, peel it from a corner, and scrape residual adhesive with a plastic scraper, then wipe with warm soapy water and touch up paint where needed.
6. Magnetic Accent Panels on an Adhesive Steel Sheet
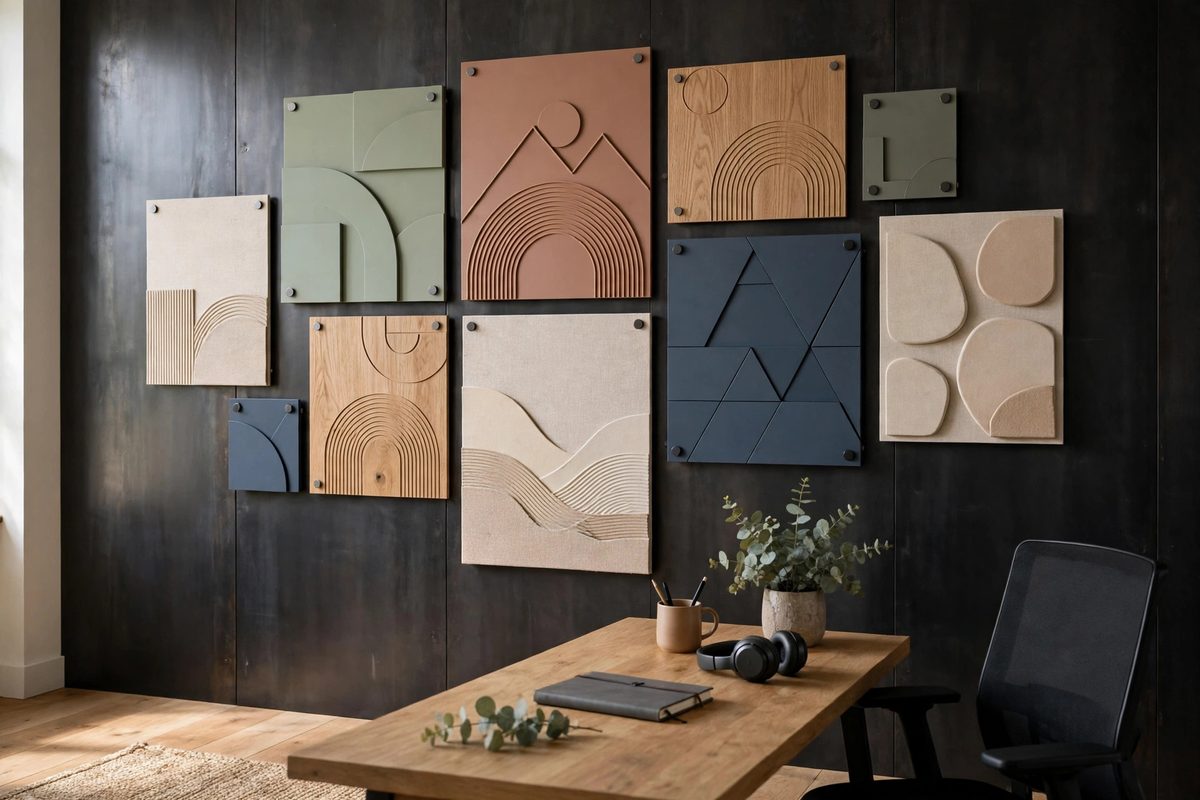
A magnetic accent wall works in two layers. First, a thin steel sheet or magnetic receptive board is bonded to the wall with adhesive strips or panel adhesive. Then decorative panels, art prints on magnetic backing, or fabric panels with sewn-in magnets attach to the steel and swap in seconds. The steel layer costs 40 to 80 dollars for an 8 foot wall, and the swap ability is the point: change the whole wall for a season without touching the adhesive layer again.
The steel sheet is the heavy part, about 1 to 2 pounds per square foot for thin gauge steel, so this method needs a strong adhesive and a smooth wall. Do not use it on textured plaster or wallpaper. A lighter alternative is magnetic receptive paint, brushed on in three coats, which holds light magnetic prints but not heavy panels, and needs 2 weeks of curing before magnets grip fully.
How to make it work
Cut the steel sheet into manageable sections, no larger than 2 by 4 feet, so one person can hold each section while the adhesive sets. Apply heavy duty adhesive strips rated for at least 5 pounds per strip, using one strip per square foot, and press each section for 60 seconds. Wait 72 hours before loading the wall with panels, since adhesive strips reach full strength slowly. Attach decorative panels with flat disc magnets, not bar magnets, which concentrate force and dent thin steel. To remove, peel the steel sections with heat and a wide putty knife, then remove strip residue by rolling it off slowly.
7. Peel-and-Stick Wood Planks
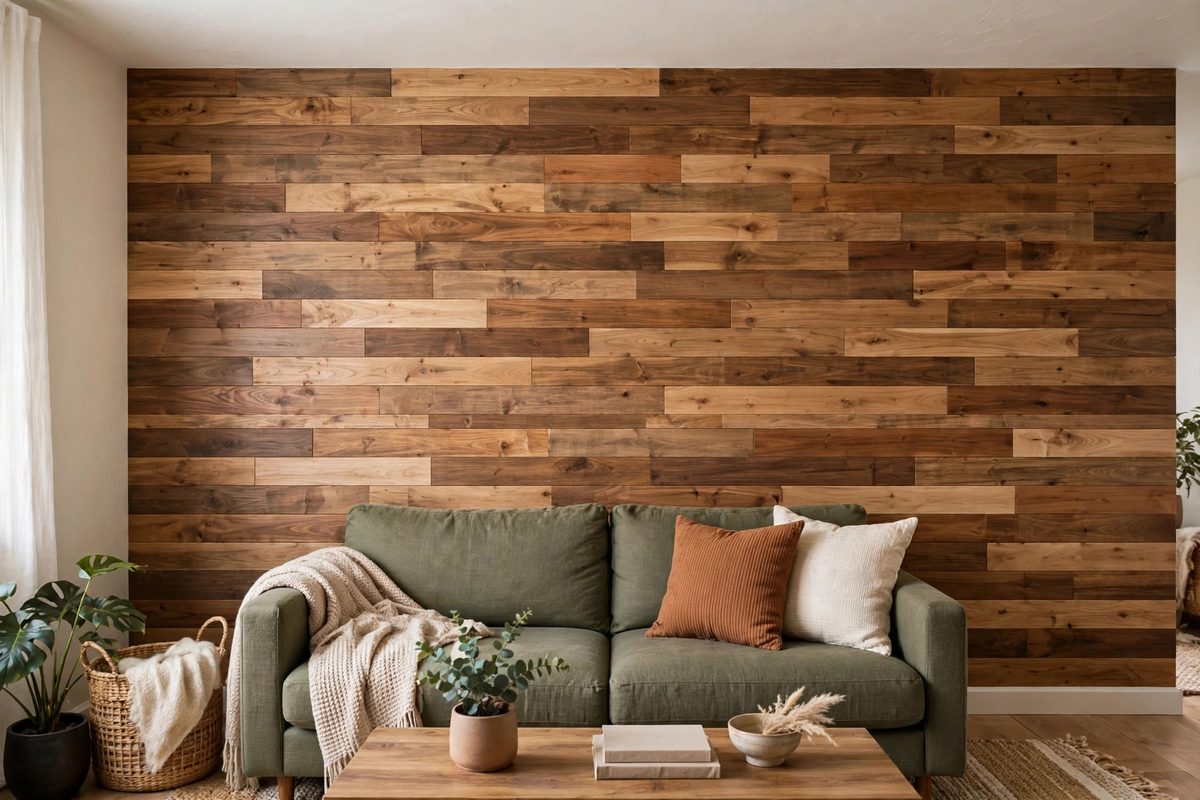
Peel-and-stick wood planks are thin real wood veneer or vinyl planks with a pressure sensitive backing, cut to plank lengths of 2 to 4 feet. They give the wood slat look with far less work than individual slats, since each plank covers more area and needs no separate adhesive. A full wall costs 100 to 200 dollars, the priciest glue method here, but installation takes 2 to 4 hours and needs no curing time.
Plank adhesion is strong, which is good for holding and bad for removal if you skip the test patch. Some vinyl plank adhesives bond so well to fresh paint that they lift it after a year, especially on walls painted within the last 30 days. Wait at least 30 days after painting before applying any peel-and-stick product, and always test one plank for 48 hours first.
How to make it work
Start at the bottom center of the wall and work outward, staggering plank ends so no vertical seam lines up with its neighbor. Press each plank with a J-roller or a rolling pin to activate the adhesive evenly, and cut end planks with a utility knife and a straightedge. Leave a 1/8 inch gap at the ceiling and floor for expansion, hidden later by trim or caulk. To remove, warm each plank with a hair dryer for 30 seconds, peel slowly from one end, and clean residue with warm soapy water or a citrus adhesive remover tested on a hidden spot first.
8. Glue-Up Cork Tiles for a Warm, Sound-Softening Wall
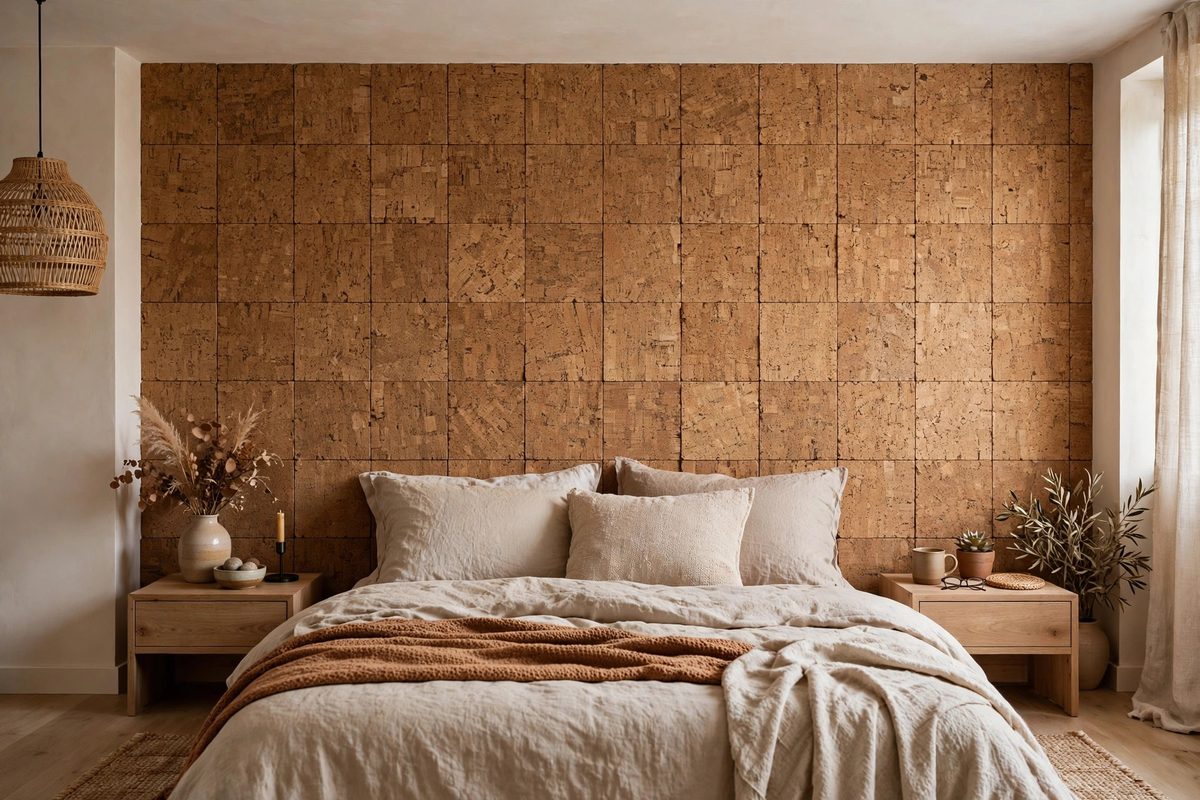
Cork tiles, 12 by 12 inches and about a quarter inch thick, glue to the wall with cork adhesive or spray adhesive and add warmth, texture, and real sound softening. A full wall costs 60 to 110 dollars, and cork suits bedrooms and home offices where echo and hard surfaces make a room feel cold.
Cork is porous, so it absorbs cooking smells and bathroom moisture. Keep it out of kitchens and bathrooms, and seal bedroom cork with a clear matte sealer if you want to wipe it clean. Unsealed cork stains easily, and a stained accent wall is harder to explain at move-out than a plain one.
How to make it work
Acclimate tiles in the room for 48 hours before installation, since cork expands and contracts with humidity. Apply adhesive to the tile back in a thin, even coat, press the tile firmly for 30 seconds, and use spacers or a level line to keep rows straight, since cork edges are soft and rows drift easily. Seal after 24 hours with two thin coats of matte sealer, drying 4 hours between coats. To remove, warm tiles, peel them off, and scrape adhesive with a plastic scraper, then sand lightly and touch up paint.
9. Freestanding Slat Panel That Leans, Not Glues
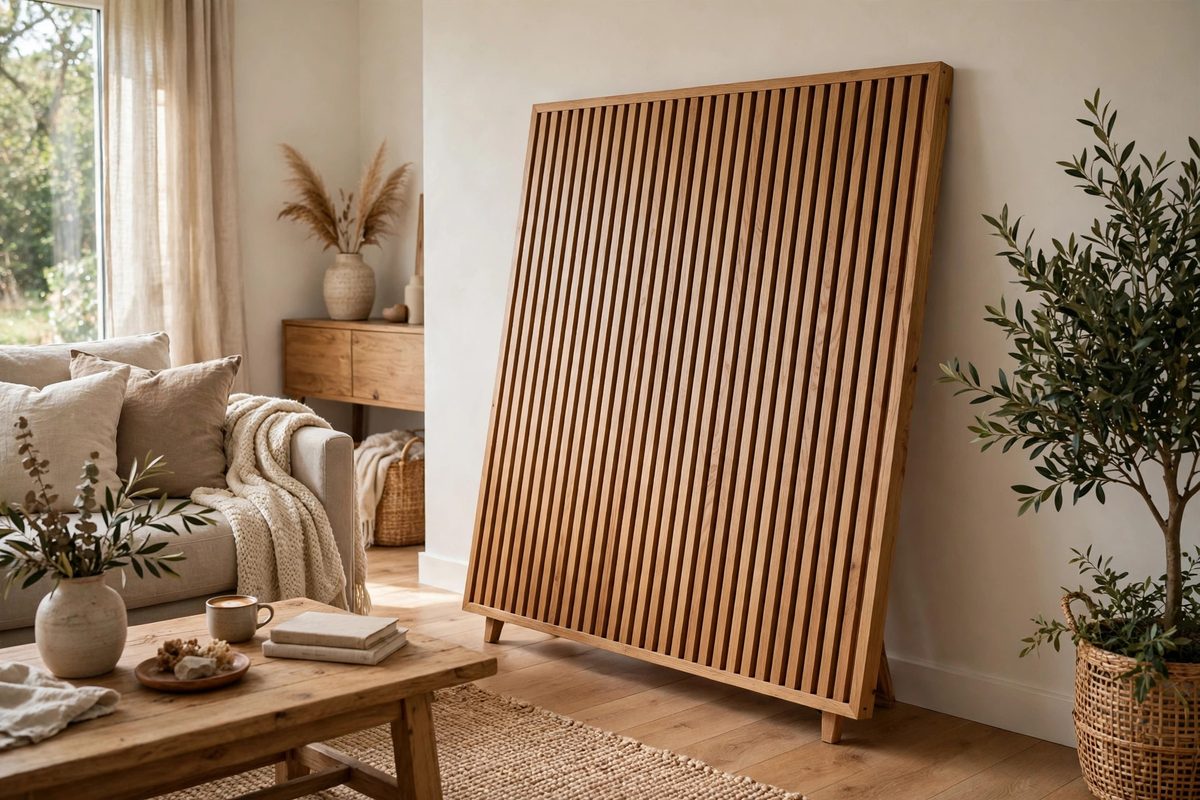
A freestanding slat panel is a wood slat wall built on its own frame, then leaned against the wall like a large piece of furniture. It uses no glue on the wall at all, which makes it the safest method in this list for strict leases and fragile plaster. Build the frame from pine battens, screw slats to the battens (screws go into your own frame, never the wall), and add rubber feet. Materials cost 70 to 130 dollars for a 6 foot wide panel.
A leaning panel must be stable. A tall, narrow panel tips forward if pulled, so keep the panel at least 4 feet wide or add side feet that extend 12 inches out from the wall, which widens the footprint and stops tipping. Keep heavy items off the top of the panel, and do not lean it on a wall with a radiator behind it, where heat dries the wood and warps slats over time.
How to make it work
Build the frame flat on the floor: two vertical battens and three horizontal battens, screwed together, then screw slats to the battens with 1 inch screws, spaced half an inch apart for the classic slat gap. Add rubber pads to the bottom feet and felt pads where the frame touches the wall, so neither surface scratches. Lean the panel at about 5 degrees, with feet 8 to 10 inches out from the wall, and test stability by pressing the top rail firmly. To remove, simply lift the panel away. There is no wall repair at all, which is the whole advantage.
10. Removable Wallpaper Panels Mounted on Foam Board
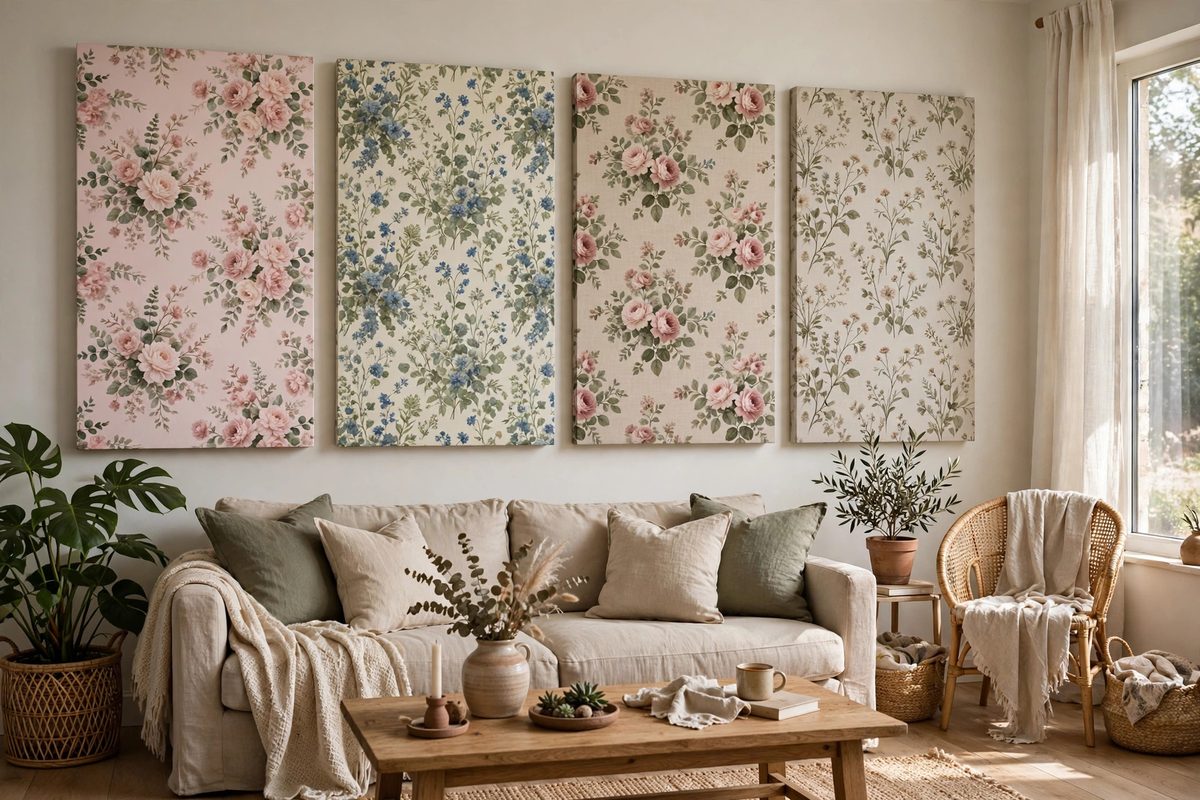
Removable wallpaper is designed to peel off clean, but on some paints it still lifts color, and on textured walls it bubbles. Mounting it on foam board first removes both risks: you paste or stick the wallpaper to boards you own, then hang the boards with adhesive strips like large art panels. A wall of six 20 by 30 inch boards costs 40 to 80 dollars in wallpaper and board, and the boards can move with you to the next apartment.
Board seams are the visual challenge. If boards butt tightly, seams nearly disappear from a few feet away, but a gap of even a quarter inch reads as a grid. Cut boards to identical sizes with a metal ruler, align the wallpaper pattern across boards before cutting, and hang boards with a level and a small spacer to keep gaps even.
How to make it work
Apply wallpaper to each board on a flat table, smoothing from the center outward and wrapping edges to the back. Let boards dry flat for 24 hours so they do not warp. Hang each board with two large adhesive strips rated for at least 4 pounds each, since a wallpapered board weighs 2 to 3 pounds. Press strips for 30 seconds and wait 1 hour before hanging. To remove, pull strip tabs straight down slowly, lift boards off, and wipe any strip residue with warm water. For more ideas on pairing an accent wall with the rest of a small room, see small living room accent wall ideas and renter-friendly peel-and-stick backsplash ideas.
A glue accent wall is a commitment to a removal plan, not just an installation plan. Test your wall, match the adhesive to your lease length, and write down which product you used, since removal is far easier when you know exactly what is on the wall. Do that, and the wall that made your rental feel like home comes down in an afternoon, leaving the paint and the deposit exactly as you found them.