Two-Tone Wall Paint Ideas: 10 Paint-Only Splits With Crisp Lines
Two tone wall paint ideas using paint alone: horizontal and vertical splits, chair-rail lines, ratios, and color pairings, plus how to get a crisp line without panels or glue.
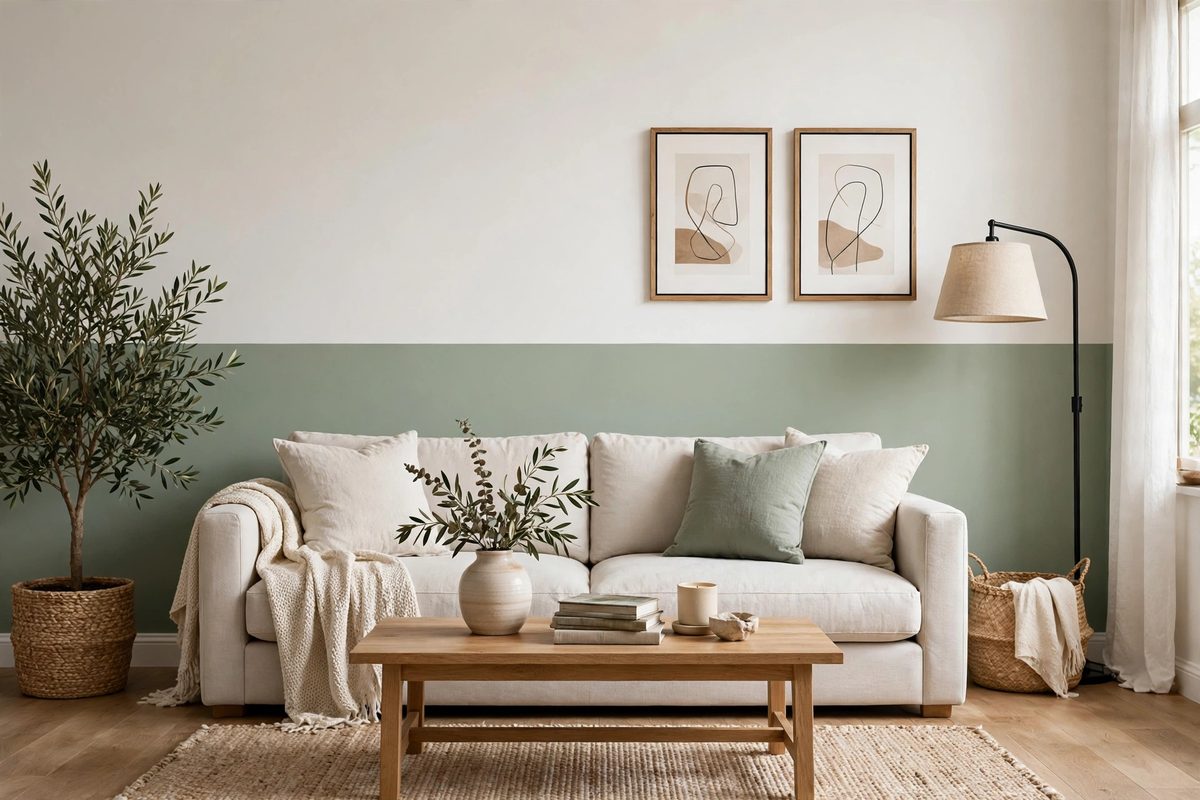
Living room wall painted in two tones with a crisp horizontal split, light color above and sage green below
In This Guide
Two-tone wall paint is paint doing the work of architecture: one wall, two colors, and a line between them that changes how the room reads. Done with paint alone, it costs little more than a second gallon, needs no panels, no glue, and no screws, and it comes off with a roller when you change your mind. That last point matters for renters, since this is a fully reversible project if you keep the original paint code.
This post is paint only. If you want a textured accent wall built from panels or molding, the glue-based project in renter-friendly accent wall with glue, no screws covers that method, and it is a different project from everything here. The ideas below use two paint colors and a taped line, nothing stuck to the wall. For how a two-tone split affects perceived room size, see how to make a room look bigger with paint.
1. The Classic Horizontal Split at Chair-Rail Height
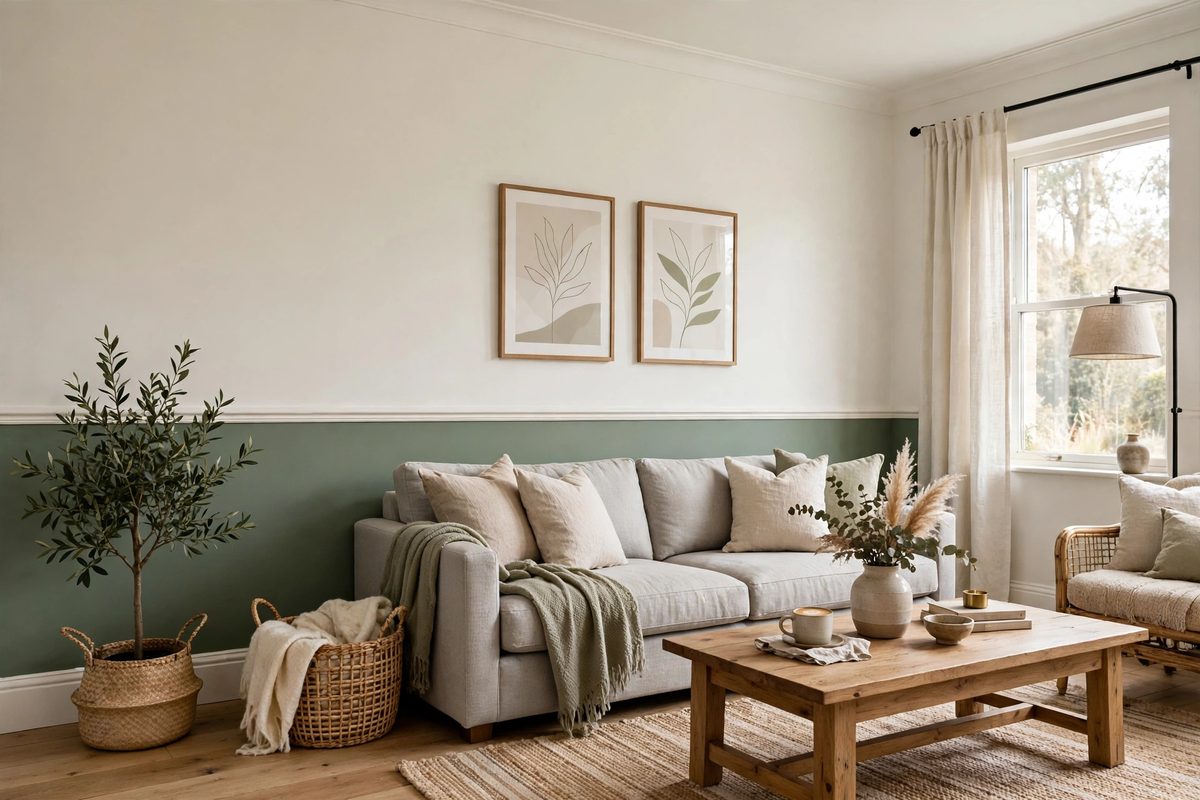
The classic split puts the darker color below a line at 32 to 36 inches and the lighter color above. It mimics a chair rail without any molding, and it grounds the room by anchoring the lower wall in a deeper tone. This split suits larger rooms and dining areas, where the lower color can handle scuffs from chairs and feet.
In a small room, be careful: a low split cuts the wall in half and can make the ceiling feel lower. If your room is under 8 feet tall, use the high split in idea 2 instead, or keep the two colors close in value so the line reads as shading, not a stripe. Use eggshell on both colors for consistent light reflection.
How to make it work
Measure 34 inches from the floor at several points, since floors are rarely level, and mark the line with a laser level. Tape the line, paint the lighter color first, then the darker color, and pull the tape while the second color is still slightly tacky.
2. The High Split That Raises the Ceiling
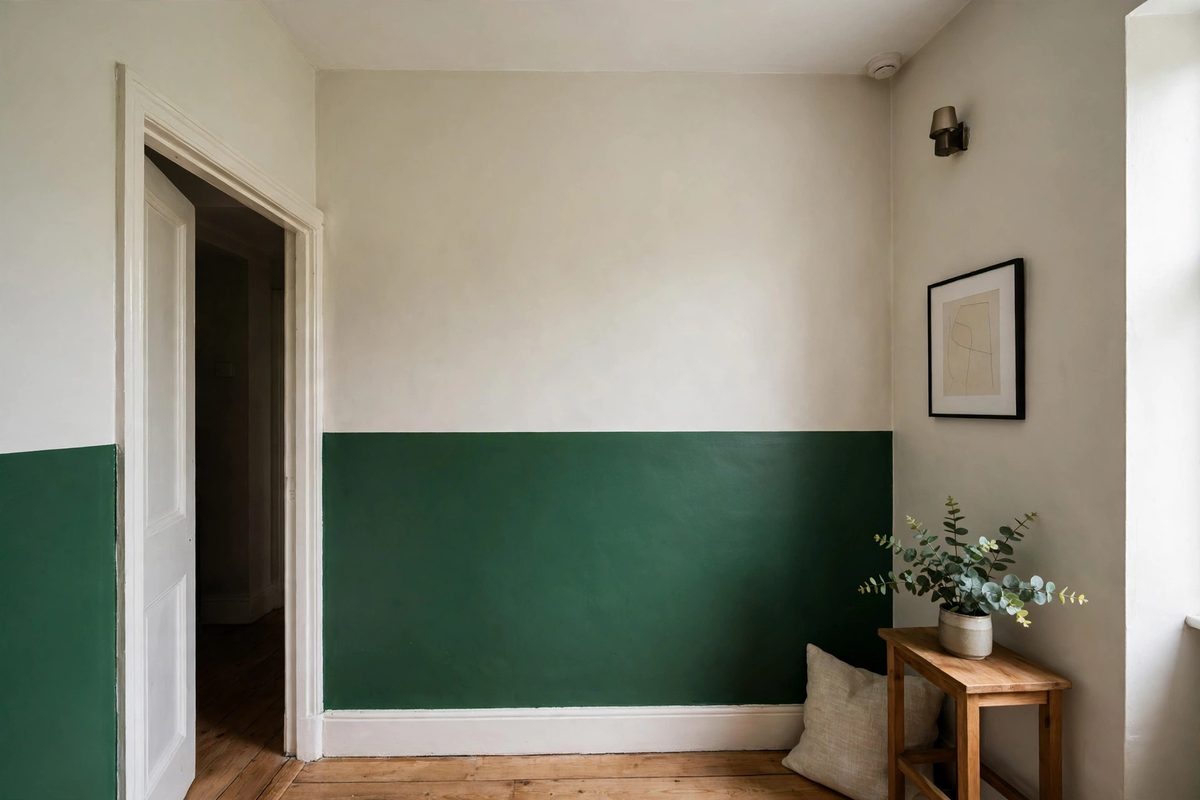
A high split places the line at 75 to 80 percent of wall height, with the lighter color on top. The large light upper section pushes the eye upward, which makes the ceiling feel taller, while the deeper lower band adds color without overwhelming the room. This is the two-tone split best suited to small apartments.
Keep the two colors within two shades of each other on the same paint strip for a subtle effect, or go one step bolder with a soft sage below and a warm white above. The line itself becomes the feature, so it must be level and crisp. A wobbly high line is far more visible than a wobbly low one.
How to make it work
Mark the split height on every wall, not just one, and check it with a long level before taping. Paint the upper color first, let it dry fully, then tape and paint the lower color.
3. The Vertical Split for Narrow Walls
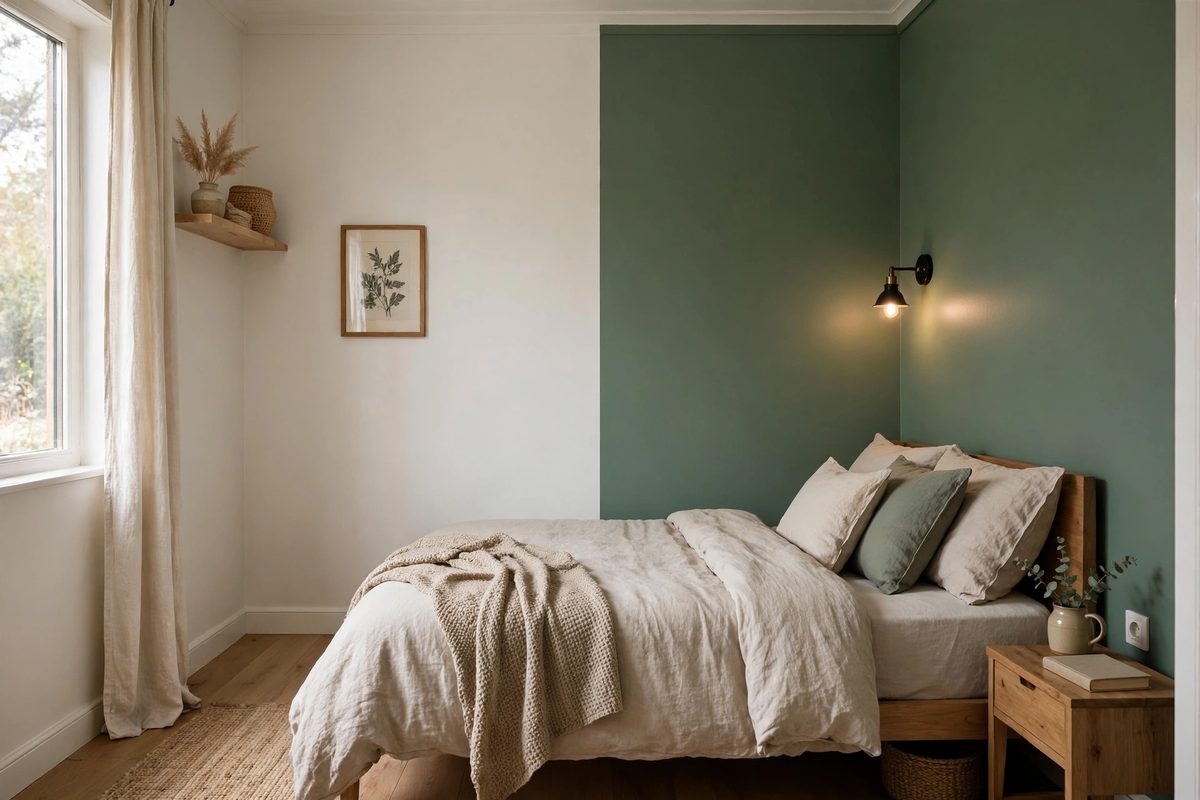
Learning how to divide a wall with two paint colors vertically is useful on narrow walls, alcoves, and the wall beside a door, where a horizontal split would chop the height. A vertical split divides the wall left to right, usually at the center or at a one-third/two-thirds ratio, and it can visually widen a narrow wall by giving it two distinct zones.
The classic use is a bedroom wall where the bed sits against one side: paint the bed zone in the deeper color and the rest in the light color, and the bed area reads as a deliberate nook. Keep the vertical line perfectly plumb with a level, since a leaning vertical line is immediately obvious. Use the deeper color on the smaller section, not the larger one, or the room tips dark.
How to make it work
Mark the vertical line with a plumb laser or a level held vertically, tape both edges of the line, and paint the lighter color first. Remove tape while the second color is tacky, pulling at a 45 degree angle away from the fresh paint.
4. The One-Third / Two-Thirds Ratio
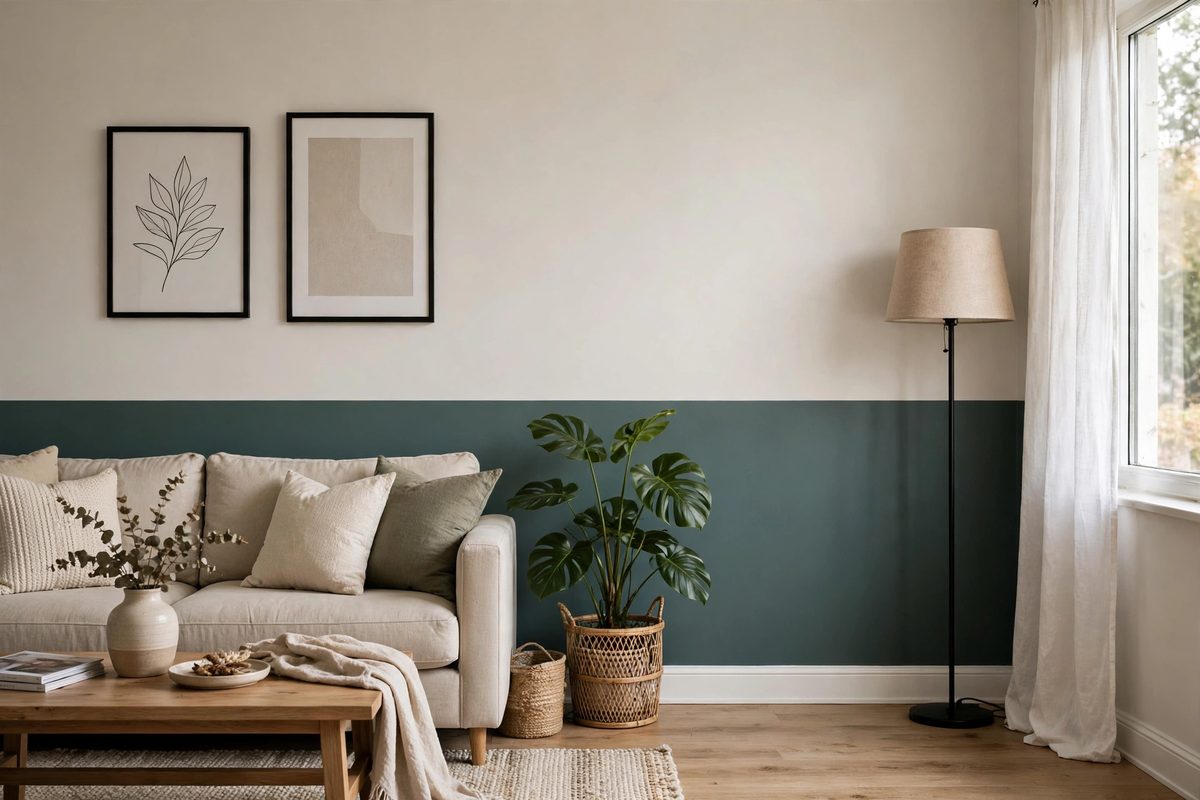
Ratios make or break two-tone walls. A 50/50 split reads as a stripe and fights with furniture placement, while a one-third/two-thirds ratio reads as intentional design. The deeper color takes the smaller share, the lighter color takes the larger share, and the room keeps its light.
This ratio works for both horizontal and vertical splits. Horizontally, the deeper color takes the bottom third. Vertically, it takes one side third. The rule holds even when the colors are close in value: the lighter color should always dominate the wall area, or the room feels darker than the swatches promised.
How to make it work
Measure the wall, calculate one third, and mark it before taping. If furniture will cover part of the deeper section, shift the ratio so the visible deeper area still reads as roughly one third.
5. Color Blocking Behind the Bed
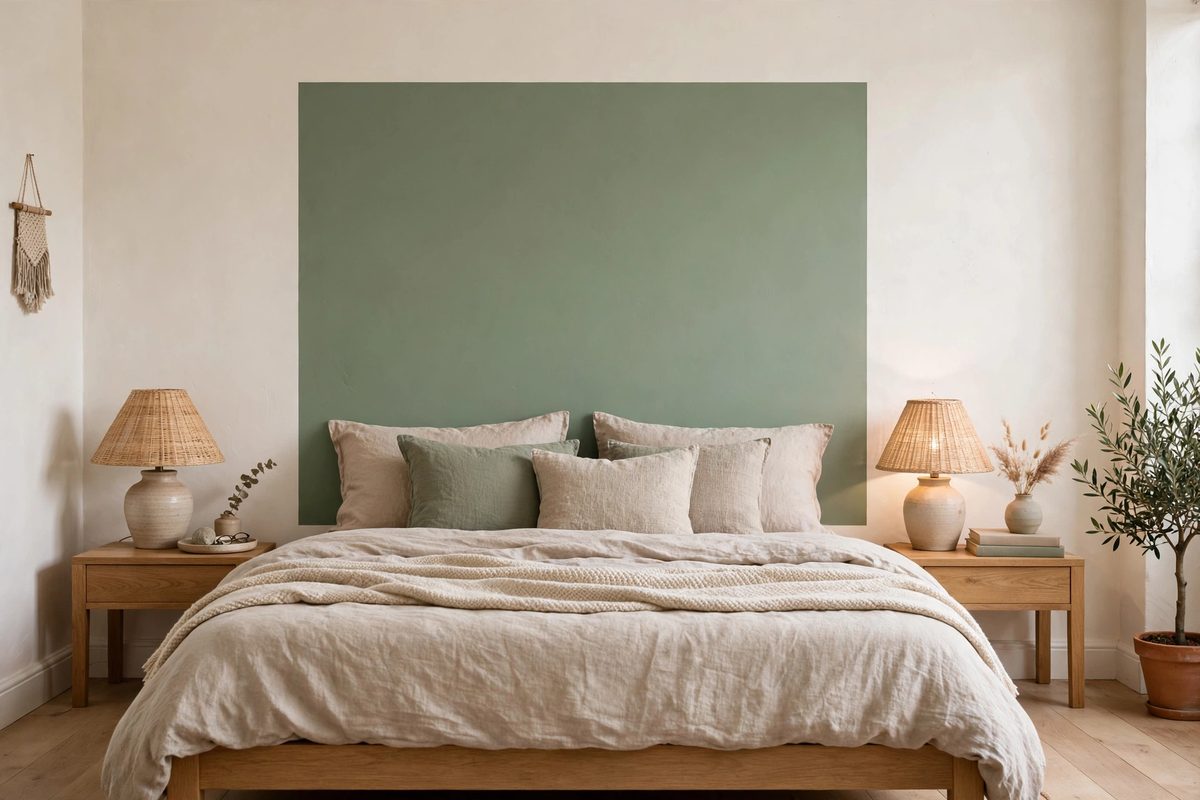
A painted color block behind the bed acts as a headboard without buying one. Paint a rectangle, roughly 6 inches wider than the bed on each side and 12 inches above the pillow line, in a deeper color, and leave the rest of the wall light. The block frames the bed and gives a small bedroom a focal point for the cost of a quart of paint.
This is the most renter-friendly two-tone idea here, since repainting one rectangle at move-out is a 30 minute job. Use painter’s tape and a level for all four edges, and paint two coats for even coverage. A soft sage, dusty blue, or warm terracotta works well as the block color against warm white walls.
How to make it work
Tape the rectangle, paint the block color, and pull tape while tacky. Hang art inside the block, not across its edge, so the painted shape stays clean.
6. The Half-Wall With a Ledge Effect
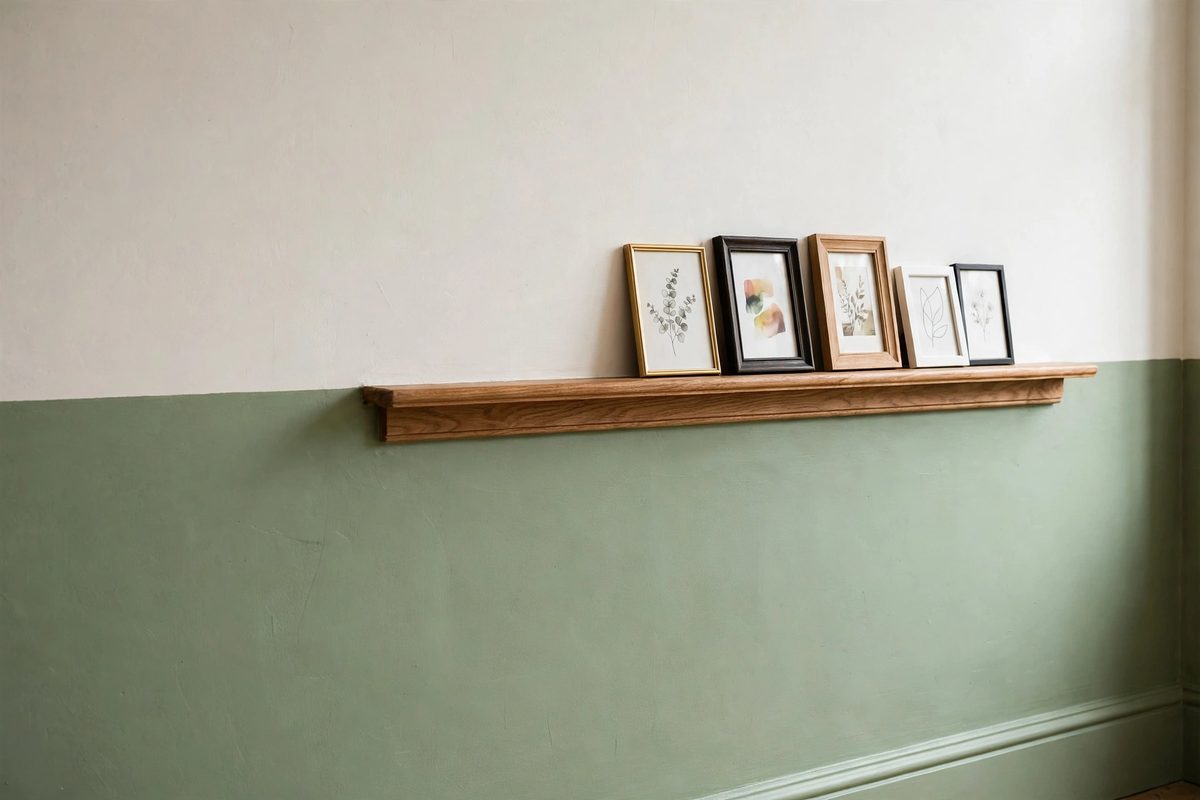
A half-wall split at 48 to 54 inches, roughly picture-ledge height, creates a natural shelf line for leaning art and small frames. The lower color grounds the wall, the upper color keeps it light, and the line itself becomes a display edge. This split suits living rooms and hallways where you want to lean frames without hanging them.
Keep the lower color mid-tone, not dark, since a half wall of dark color in a small room closes the space in. A soft green, warm gray, or dusty blue below and a warm white above is a safe pairing. If you lean frames on the line, use felt pads on the frame backs so they do not scuff the paint edge.
How to make it work
Choose the split height to match the frames you plan to lean, usually 50 inches. Tape the line, paint the lower color, and let it cure a full 24 hours before leaning anything against it.
7. Two-Tone With a Thin Accent Stripe
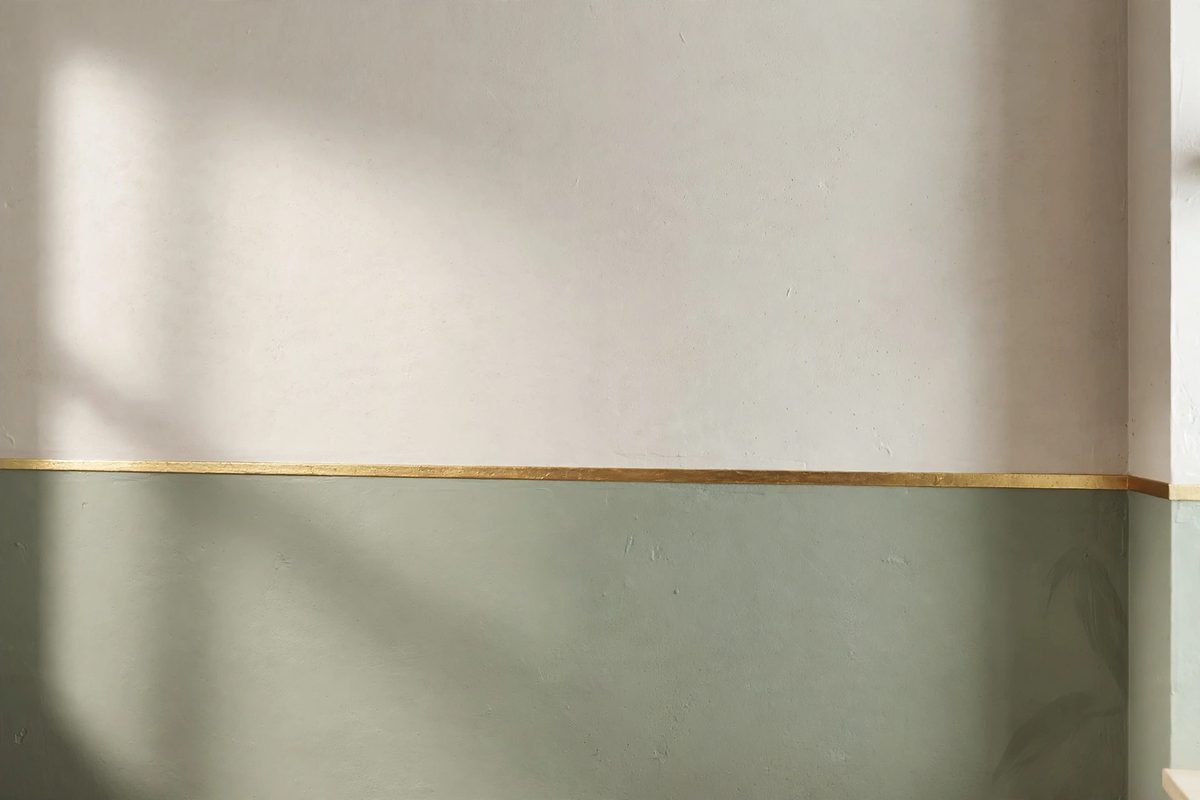
A thin stripe, 1 to 2 inches wide, painted along the split line in a third color or a metallic paint, turns a simple two-tone wall into a finished design. Gold, brass-toned, or deep charcoal stripes work with most pairings, and the stripe hides any minor wobble in the main split line.
This is the fussiest technique in the post, so reserve it for one feature wall, not a whole room. Tape both edges of the stripe, paint it with a small roller or brush, and pull tape while tacky. A stripe wider than 2 inches stops reading as an accent and starts reading as a third color block.
How to make it work
Paint the two main colors first and let them dry fully, at least 24 hours. Then tape the stripe lines, paint the stripe color in two thin coats, and remove tape immediately after the second coat.
8. Vertical Two-Tone in a Hallway or Entry
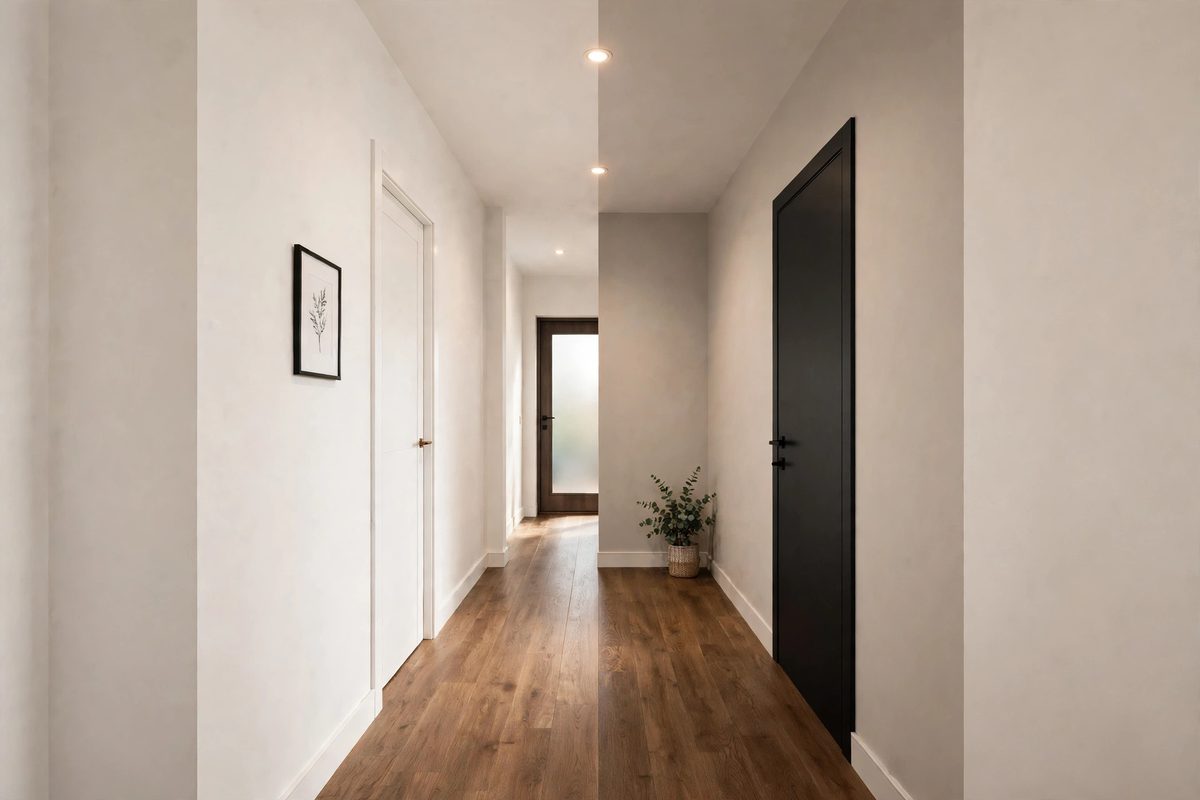
Hallways are the best place for a vertical split, because they are narrow and a horizontal line would make them feel like a tunnel. A vertical split on the long hallway wall, with the lighter color facing the entry and the deeper color farther in, draws the eye down the hall and makes it feel less like a corridor.
Keep both colors light to mid-tone in a hallway, since hallways get little natural light. A warm white and a soft greige, or a pale sage and a warm white, will open the hall without darkening it. Use satin finish in hallways, since walls there get brushed by bags, coats, and hands.
How to make it work
Split the wall at a door frame or architectural break if one exists, rather than mid-wall, so the line has a natural reason to be there. If no break exists, use the one-third ratio from idea 4.
9. Ceiling as the Second Tone
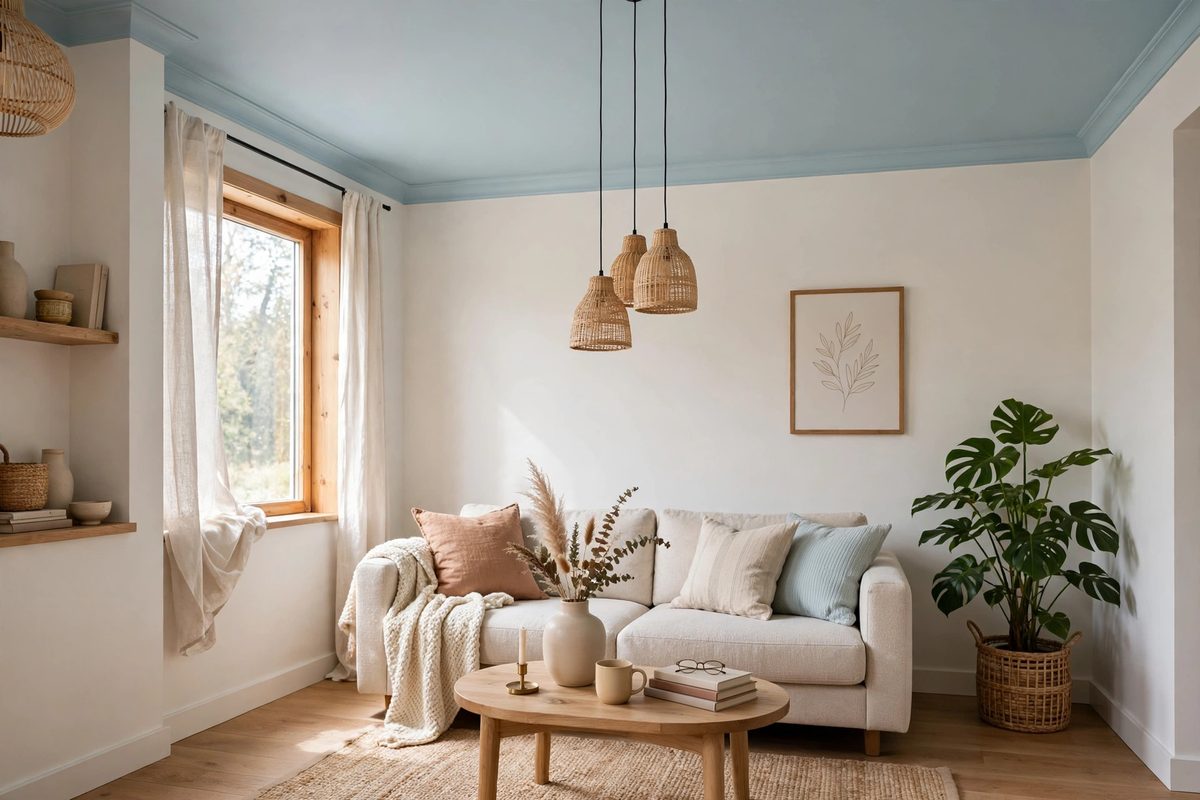
The ceiling counts as a second tone. Painting the ceiling a soft color, a pale blue, blush, or sage, while walls stay warm white, adds color overhead without touching wall space at all. This suits rooms where wall space is already busy with art and shelving, and it makes a plain ceiling a feature.
Keep the ceiling color very pale, at least two shades lighter than any wall color you would consider, or the ceiling will feel lower. Use flat ceiling paint to avoid glare, and cut in carefully at the wall joint since there is no white ceiling line to hide mistakes. This technique pairs well with the ceiling guidance in how to make a room look bigger with paint.
How to make it work
Test the ceiling color on a large ceiling patch and check it from the doorway, not just from directly below. Ceiling colors look darker from an angle, so pick one shade lighter than you think you need.
10. The Crisp Line Method: Tape, Seal, Paint
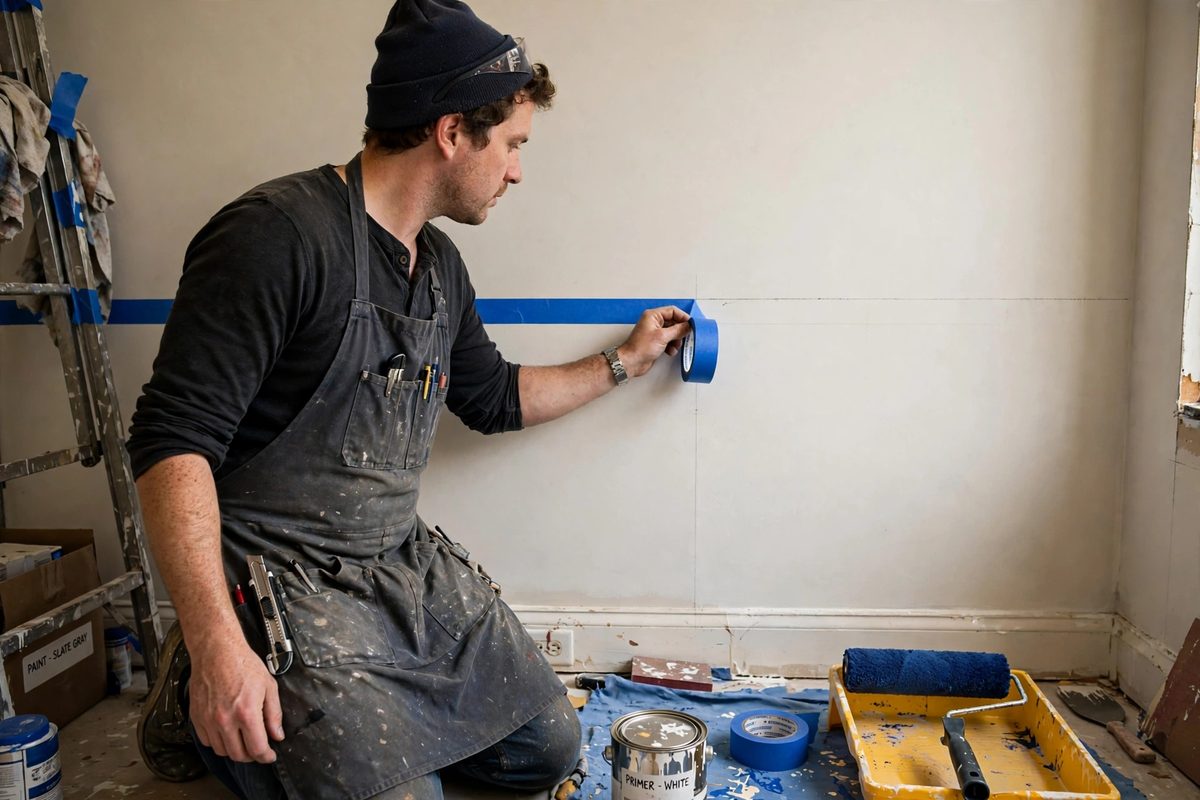
Every idea above depends on one skill: a crisp line. The method is the same each time. Start with a clean, dry wall. Mark the line with a level or laser, never by eye. Apply quality painter’s tape, burnish the edge firmly with a credit card or putty knife, and seal the tape edge by painting over it with the existing base color and letting it dry. That seal coat fills any gaps under the tape, so the second color cannot bleed through.
Then paint the second color in two coats, and pull the tape while the second coat is still slightly tacky, pulling slowly at a 45 degree angle away from the fresh paint. If you wait until fully dry, the paint film can tear and take tape with it. Touch up any bleed with a small artist’s brush and the base color, not by re-taping. For more accent wall context, including when a painted split beats a decorated wall, see small living room accent wall ideas and small living room wall decor ideas.
How to make it work
Budget an extra hour for taping and sealing on a feature wall. That hour is the difference between a line that looks professional and one that looks improvised. Use fresh tape, not a roll that has sat open for months, since old tape adhesive fails and bleeds.
Color Pairings That Work
Warm white above with soft sage below, warm white above with dusty blue below, light greige above with warm taupe below, and pale blush above with warm white below are all safe starting points. In every pairing, the lighter color takes the larger share, the split sits where it helps the room’s proportions, and the finish stays consistent across both colors. Two-tone paint rewards patience at the tape stage and restraint in the color choice. Get those two right, and one wall of paint does the work of a renovation.