10 Small Kitchen Fridge Organization Ideas That Make Food Easier to See
10 small kitchen fridge organization ideas that make food visible and reachable, with bins, labels, zones, and a weekly reset routine.
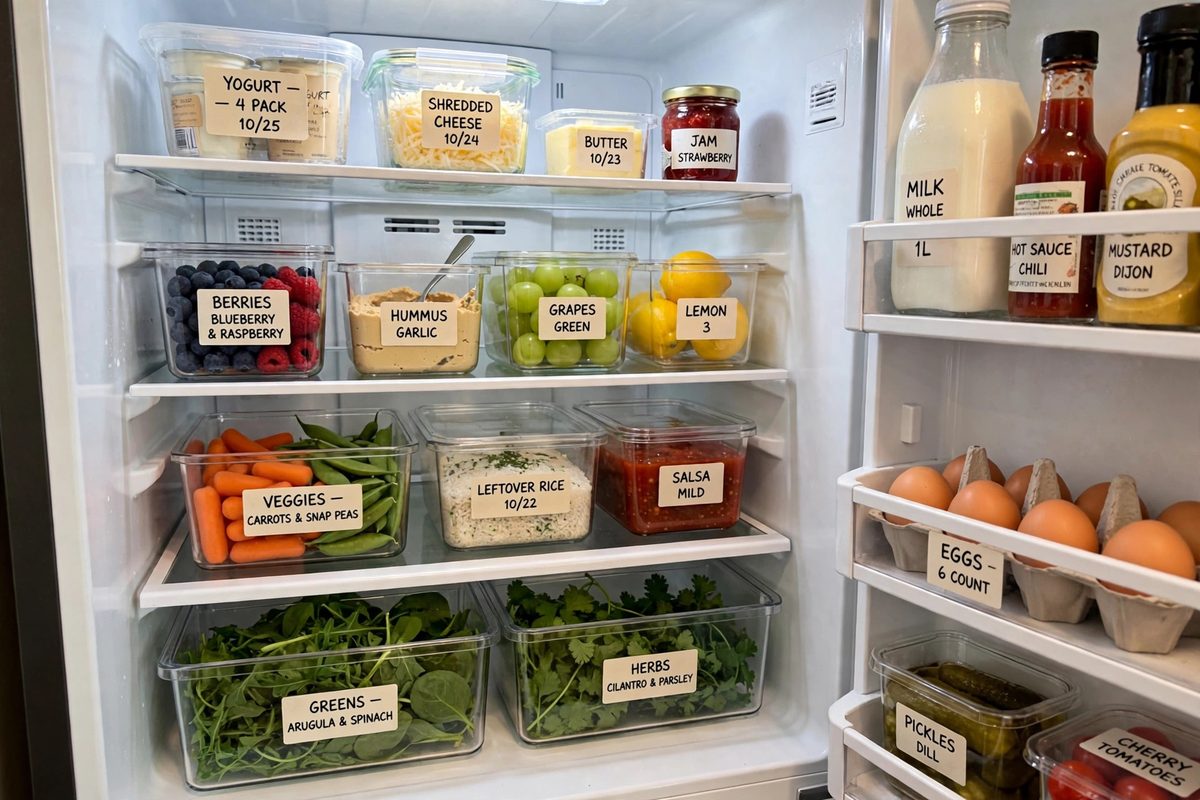
Organized small kitchen fridge with clear bins, labeled containers, and visible food on every shelf
In This Guide
A disorganized fridge wastes food, money, and time. When you cannot see what you have, you buy duplicates, forget leftovers until they spoil, and spend minutes digging behind jars every time you cook. In a small kitchen fridge, which is often a single door or a compact top freezer model, the problem is worse, since every inch counts and there is no spare shelf to absorb the mess.
The fix is not more containers. It is visibility and zones. Every item should have a zone, every zone should be visible from the front, and nothing should hide behind something else for more than a few days. The ideas below build that system, and they pair with the bathroom privacy ideas in small bathroom window privacy ideas and the garland ideas in Christmas garland ideas for small apartments.
1. The Zone System
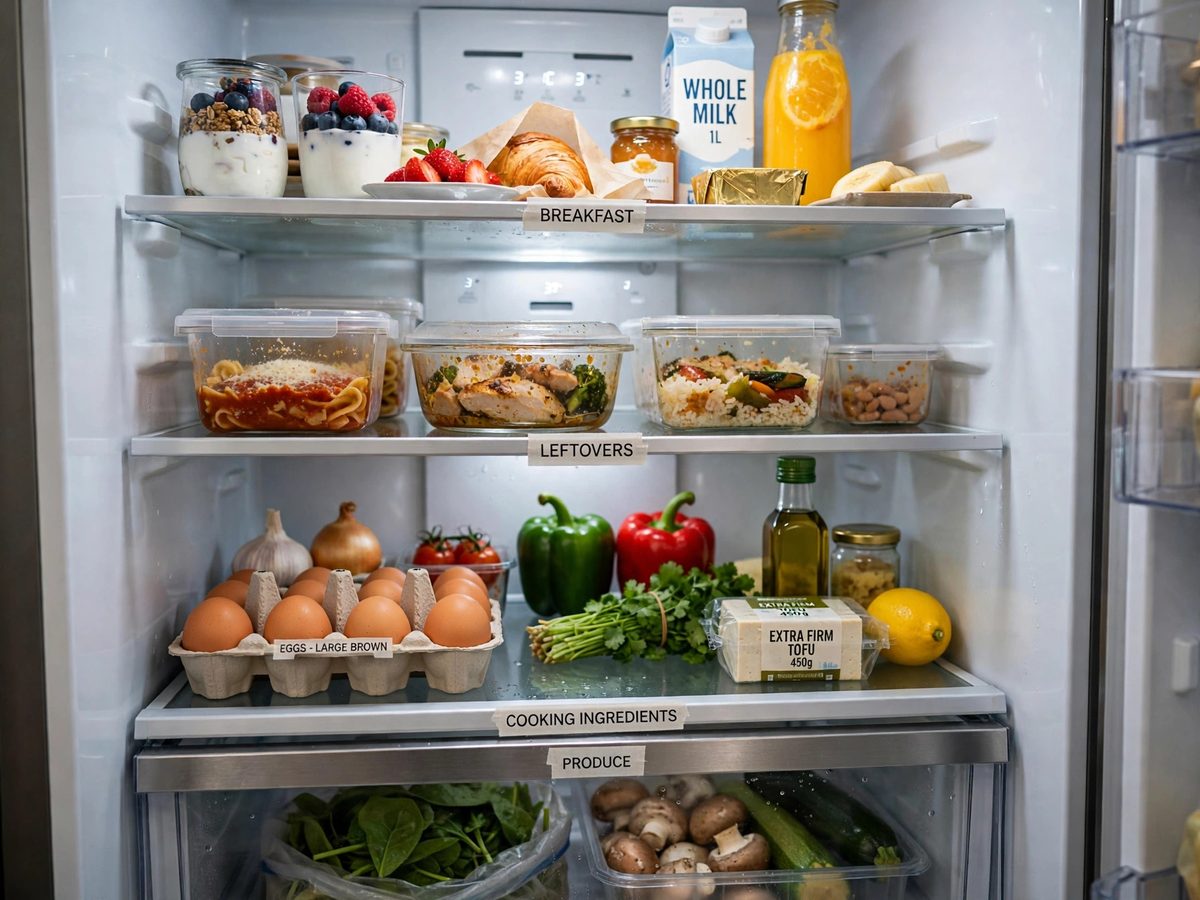
Divide the fridge into zones by use, not by food type alone. A typical small fridge needs five zones: daily breakfast, cooking ingredients, leftovers, drinks, and condiments. Assign each zone a shelf or a section of a shelf, and keep items in their zone every time you unpack groceries.
Zones work because they reduce searching. When you want breakfast, you look at one shelf, not the whole fridge. When you cook, you pull from the cooking zone. When you need a sauce, you check the condiment zone, not three different shelves. Write the zones on a small list inside a cabinet door until the habit sticks.
How to make it work
Put the daily zone at eye level, since that is the zone you use most. Put leftovers at eye level too, or they will be forgotten, which is the most common fridge waste problem. Put rarely used condiments on the door or a lower shelf, where they can sit without blocking daily items. Reassign zones if your habits change, for example if you start meal prepping, add a prep zone.
2. Clear Bins for Categories
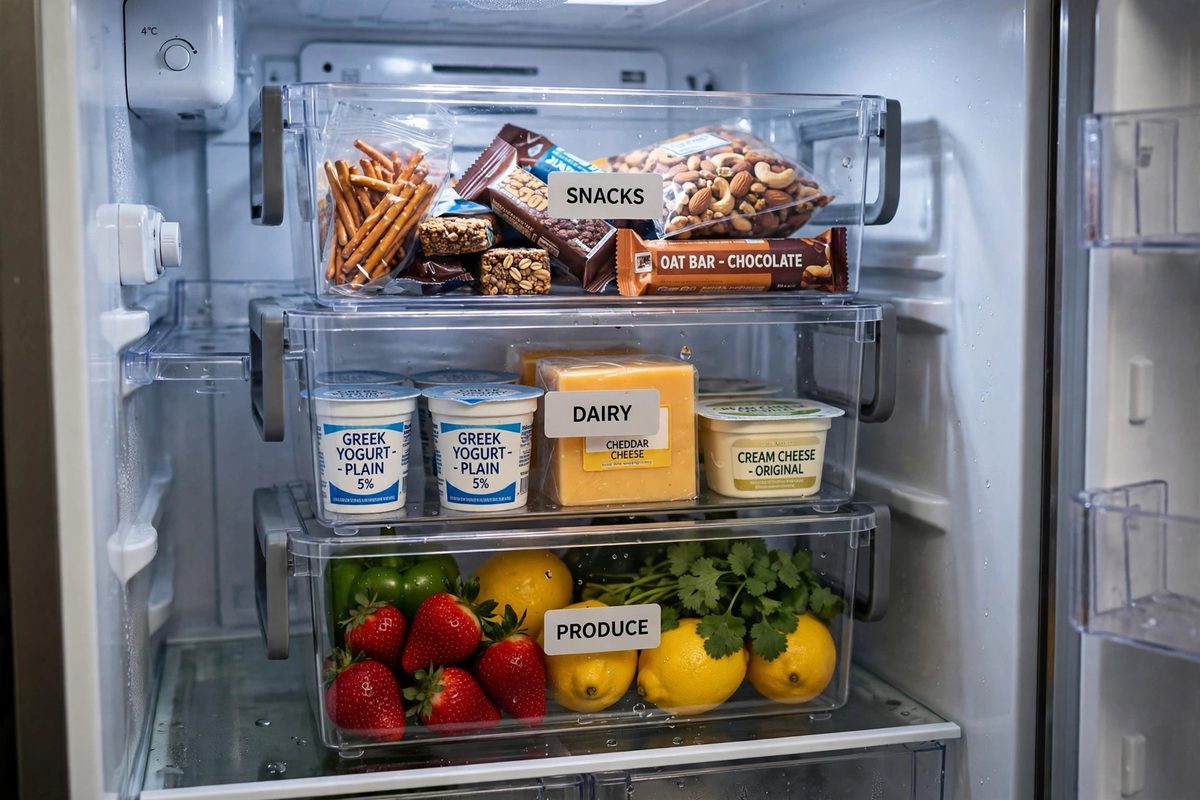
Clear bins, 6 to 10 inches wide, turn a deep fridge shelf into pull out drawers. Instead of reaching behind a row of jars, you pull the bin out like a drawer and see everything at once. This is the single most effective visibility tool for a small fridge, especially a deep one where items migrate to the back.
Buy bins that fit your shelf depth with an inch to spare, and choose bins with handles so they slide easily. A set of four bins costs 20 to 35 dollars and transforms a fridge in under an hour. Use one bin for snacks, one for dairy, one for produce, and one for leftovers or meal prep.
How to make it work
Label each bin on the front with a label maker or masking tape, so everyone in the household puts items back in the right bin. Do not overfill bins, since a bin stuffed to the top is no easier to search than a shelf. Leave a finger width of space above the contents so you can see what is inside without lifting everything out.
3. The Eat First Box
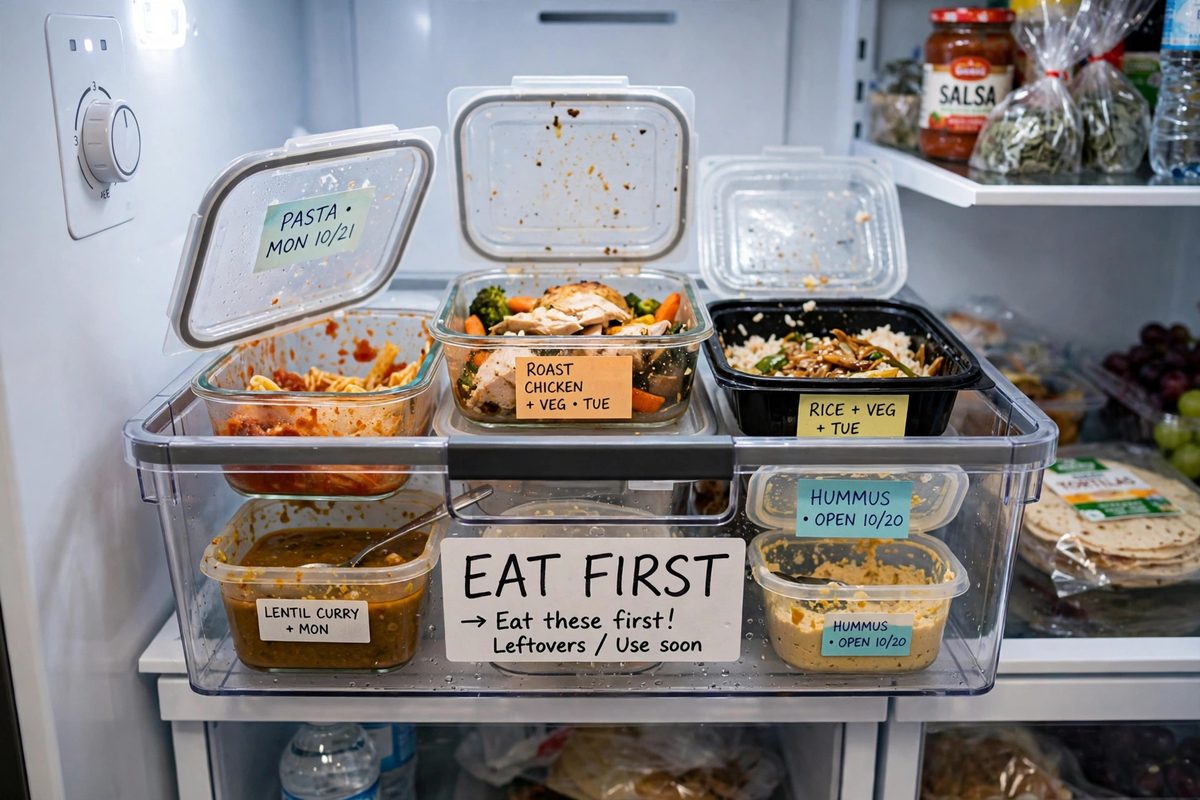
An eat first box is a single clear bin, labeled Eat First, that holds leftovers, opened items, and food nearing its use by date. Everything in the box needs to be eaten within 2 to 3 days, and the rule is simple: eat from this box before opening anything new.
This idea alone can cut food waste dramatically, since most fridge waste comes from leftovers that were stored, forgotten, and found too late. Put the eat first box at eye level, front and center, so it is the first thing you see when you open the fridge.
How to make it work
Move items into the eat first box as soon as they become leftovers, not days later when you notice them. Check the box daily when you plan meals, and toss anything that has been in the box for more than 4 days, or sooner for seafood and cooked rice. Clean the box weekly, since spills and drips collect fast.
4. Turntables for Condiments and Jars
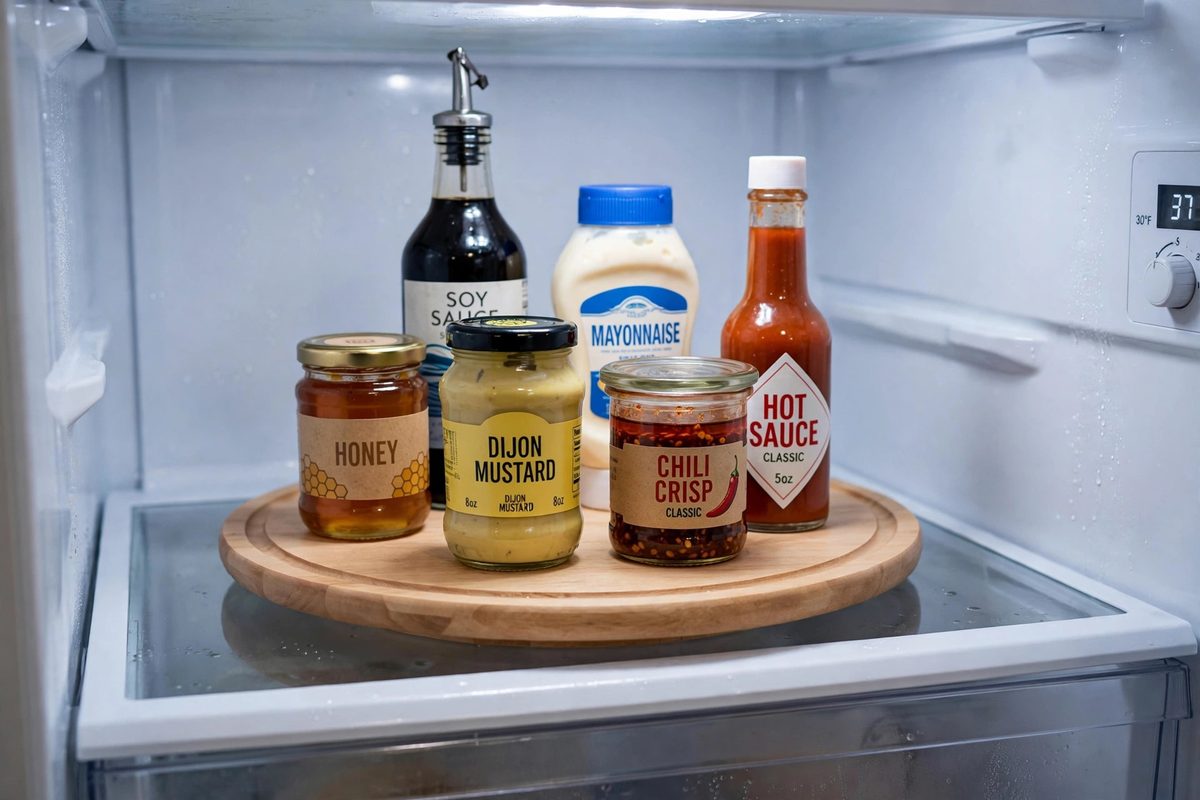
A turntable, 10 to 12 inches in diameter, lets you spin a group of condiments or jars to the front instead of moving five jars to reach the one at the back. This is ideal for the door shelf or a deep fridge shelf where condiments collect, and it costs 8 to 15 dollars per turntable.
Choose a turntable with a non slip base and a low rim, so jars do not slide off when you spin it. A turntable works best for small, similar sized items, like sauces, jams, and dressings. It does not work well for tall bottles, which tip when spun.
How to make it work
Group similar items on one turntable, for example all salad dressings, or all Asian sauces, so you spin once and find what you need. Keep the turntable on a shelf you can reach easily, not a high shelf where spinning requires a step stool. Wipe the turntable weekly, since condiment drips make it sticky and hard to spin.
5. Label Everything With Dates
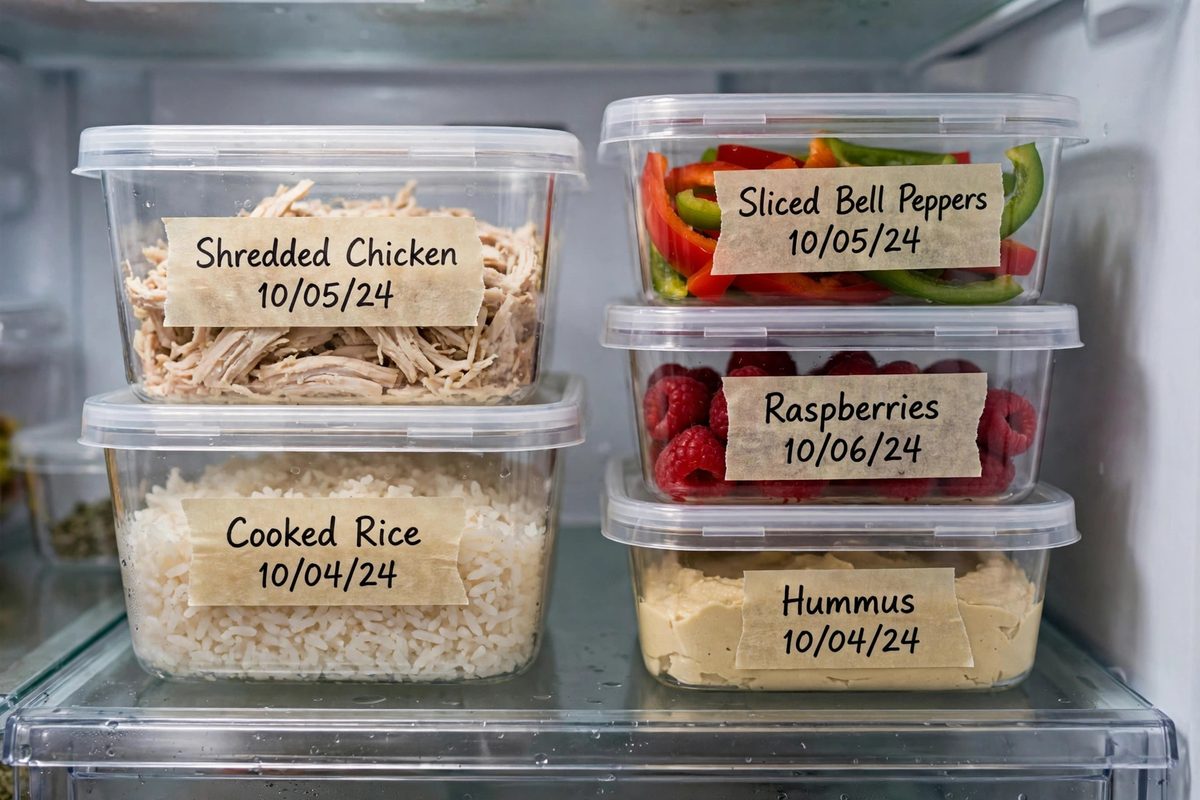
Labels with dates turn a mystery container into a decision. A piece of masking tape with the contents and the date, written in marker, tells you what is inside and when it was made, without opening it. This is especially important for leftovers, soups, and sauces that all look similar in opaque containers.
Use clear containers where possible, so you can see the food as well as the label, and label the lid and the side, since lids get separated. A roll of masking tape and a marker cost under 5 dollars and last for months. For more labeling and storage ideas, see small kitchen food container storage ideas.
How to make it work
Write the date the food was cooked or opened, not the date you think it expires, since that is easier to remember and more accurate. Use a simple format, like “Chili 10/20”, so the label is quick to write and read. Remove old labels when you reuse a container, or labels pile up and become confusing.
6. The Door Shelf Rule
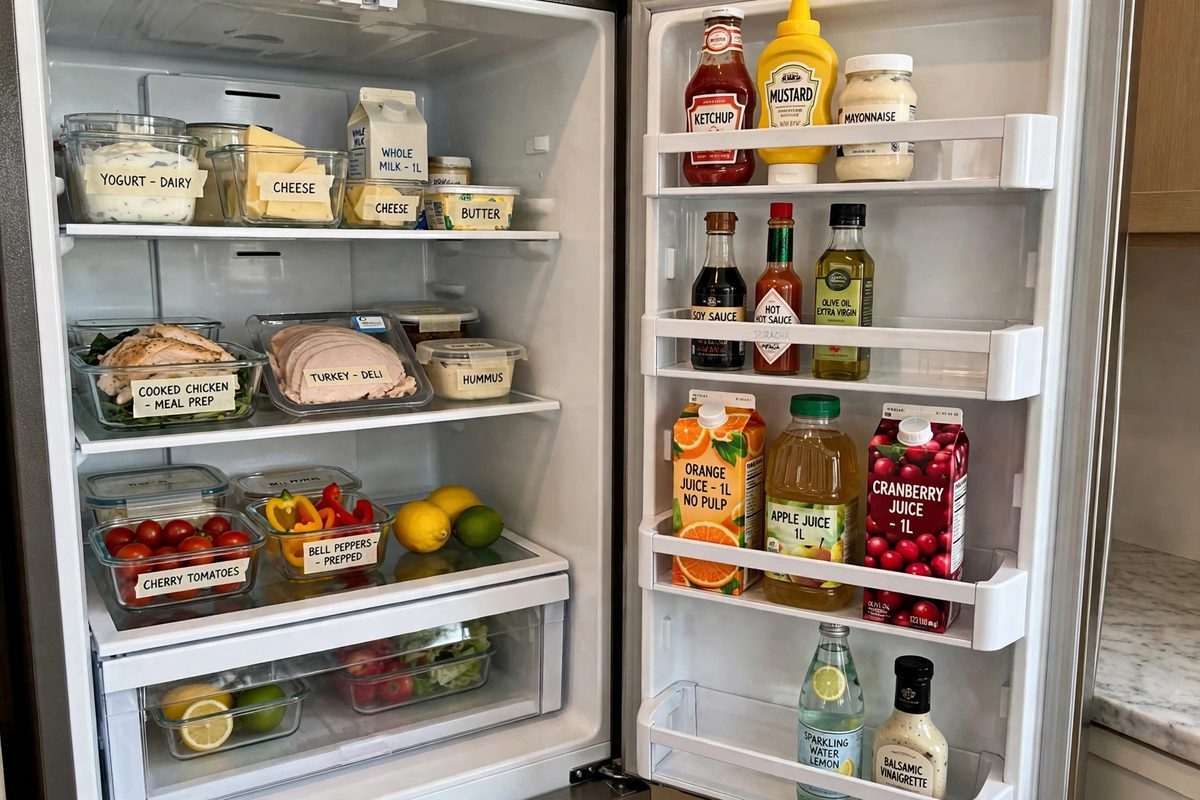
Fridge door shelves are the warmest part of the fridge, since the temperature fluctuates every time the door opens. They are fine for condiments, juices, and butter, but not for milk, eggs, or raw meat, which need a stable cold temperature on an interior shelf.
Organize door shelves by frequency: daily condiments on the top door shelf, less used sauces in the middle, and large bottles on the bottom door shelf. Use small bins or a door shelf organizer to keep small items from falling when the door closes.
How to make it work
Move milk and eggs off the door to an interior shelf, even if the door has a molded egg holder, since the interior stays colder and more stable. Check door shelf weight limits, since overloaded door shelves sag and can break. Keep the door shelves to one layer deep where possible, so nothing hides behind another bottle.
7. Stackable Containers for Leftovers
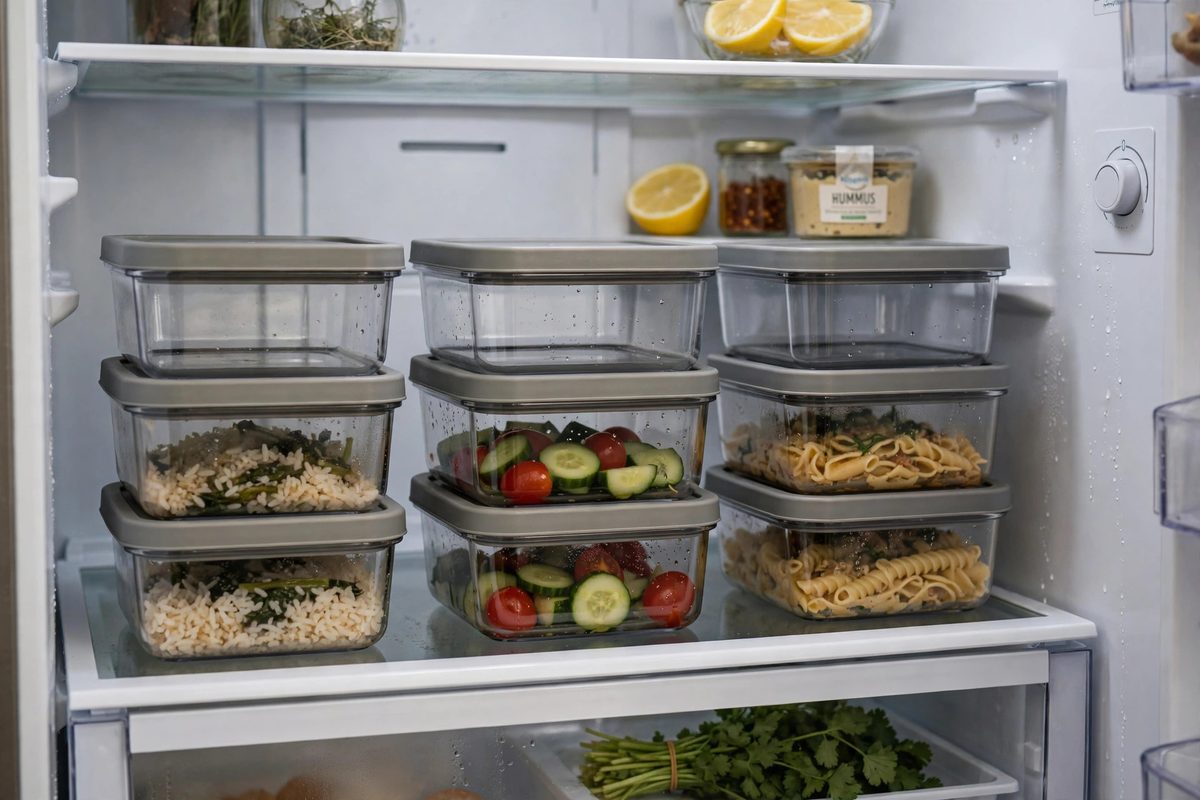
Stackable containers, all the same brand and size family, save space and make leftovers visible, since they stack neatly instead of forming a wobbly tower of mismatched tubs. Choose square or rectangular containers, which use shelf space more efficiently than round ones, and buy a set with lids that stack too.
A set of 10 to 12 containers costs 15 to 30 dollars, and it replaces the random collection most fridges accumulate. Keep only containers you actually use, and recycle or donate the rest, since a drawer full of orphan lids helps nobody.
How to make it work
Decant leftovers into a container sized to the amount, not the largest container you own, since a small amount in a large container wastes space and dries out faster. Stack containers with the oldest on top, so you use them first. Keep lids in a separate small bin or on a lid organizer, so you can find a matching lid without digging.
8. Produce Drawers With a System
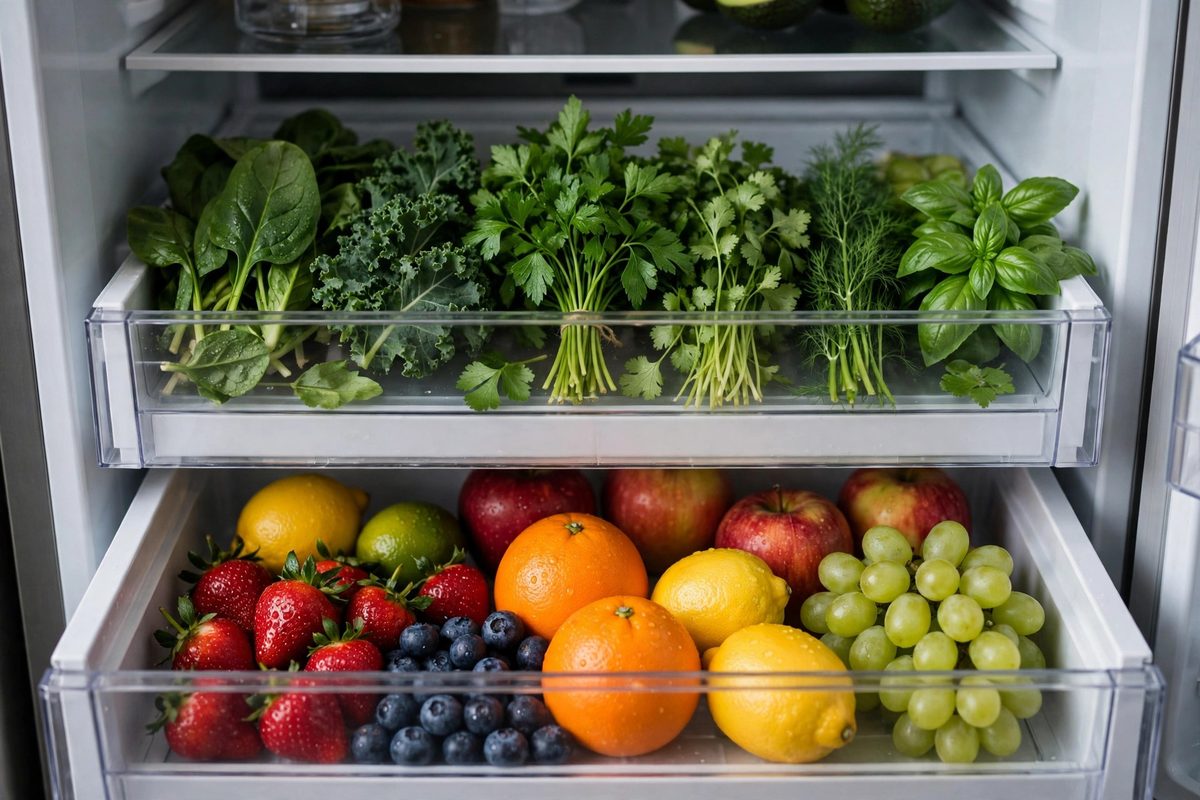
Produce drawers, often called crisper drawers, work best when you sort by humidity need, not by random placement. High humidity, for leafy greens and herbs, and low humidity, for fruits and items that rot in moisture, are the two settings most drawers offer. Use them correctly and produce lasts days longer.
If your fridge has one drawer, use it for the most perishable produce, like greens and berries, and store hardier produce, like carrots and apples, on a shelf in a bag. If you have two drawers, set one to high and one to low humidity and label them, since most people forget which is which.
How to make it work
Line drawers with a paper towel or a produce saver liner to absorb moisture and reduce spoilage. Store herbs upright in a jar of water, like flowers, with a bag over the top, which keeps them fresh for up to two weeks. Check produce drawers twice a week and remove anything soft or spoiled before it affects neighboring items.
9. A Weekly Fridge Reset
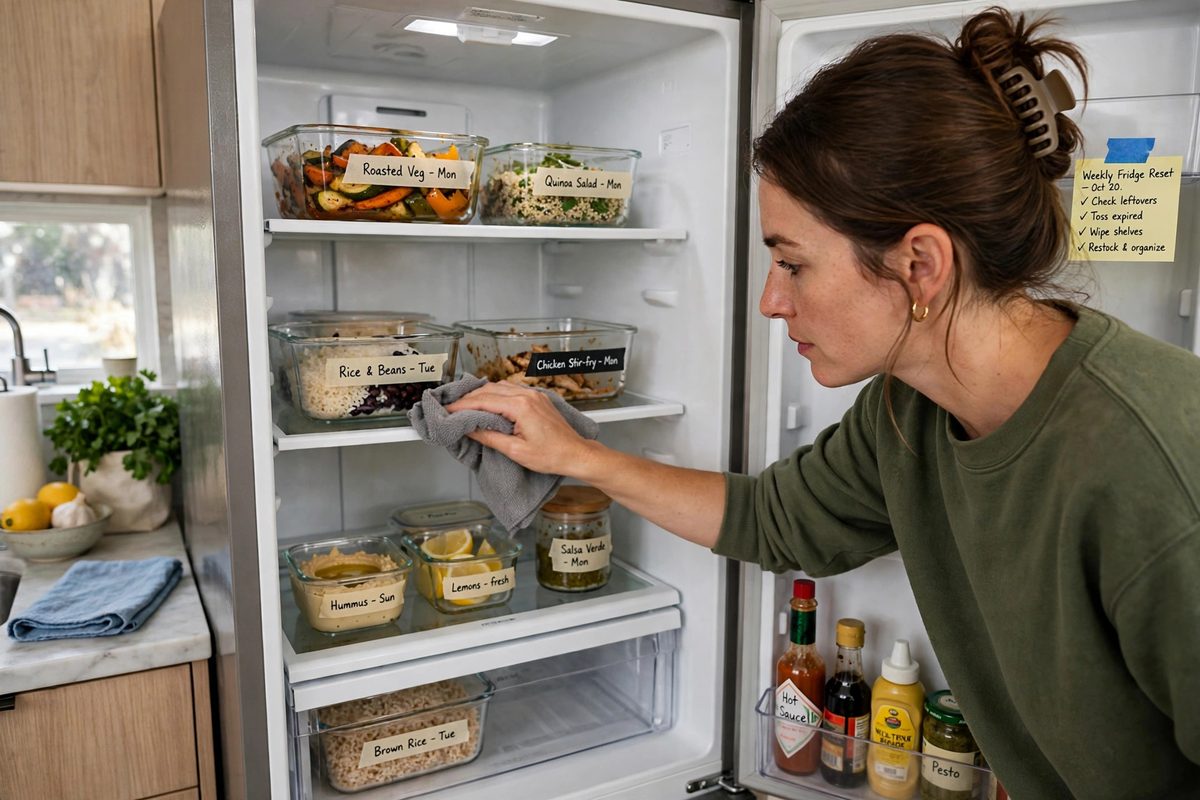
A weekly fridge reset, 10 minutes once a week, keeps any organization system working. Without it, even the best bins and zones drift back into chaos within a month. Pick a consistent day, like Sunday evening or the day before grocery shopping, and make the reset a habit.
The reset has four steps: toss anything expired or spoiled, move eat first items to the front, wipe one shelf or bin, and note what needs to be used up in the next few days. That last step turns the reset into a meal plan, since you cook from what you already have before buying more.
How to make it work
Set a phone reminder for the reset until it becomes automatic. Keep a small trash bag and a cloth nearby so the reset is fast, not a project. If you share the fridge, make the reset a shared task, or assign it to one person weekly, since a system nobody maintains is worse than no system at all.
10. See Through the Door With a Fridge Inventory
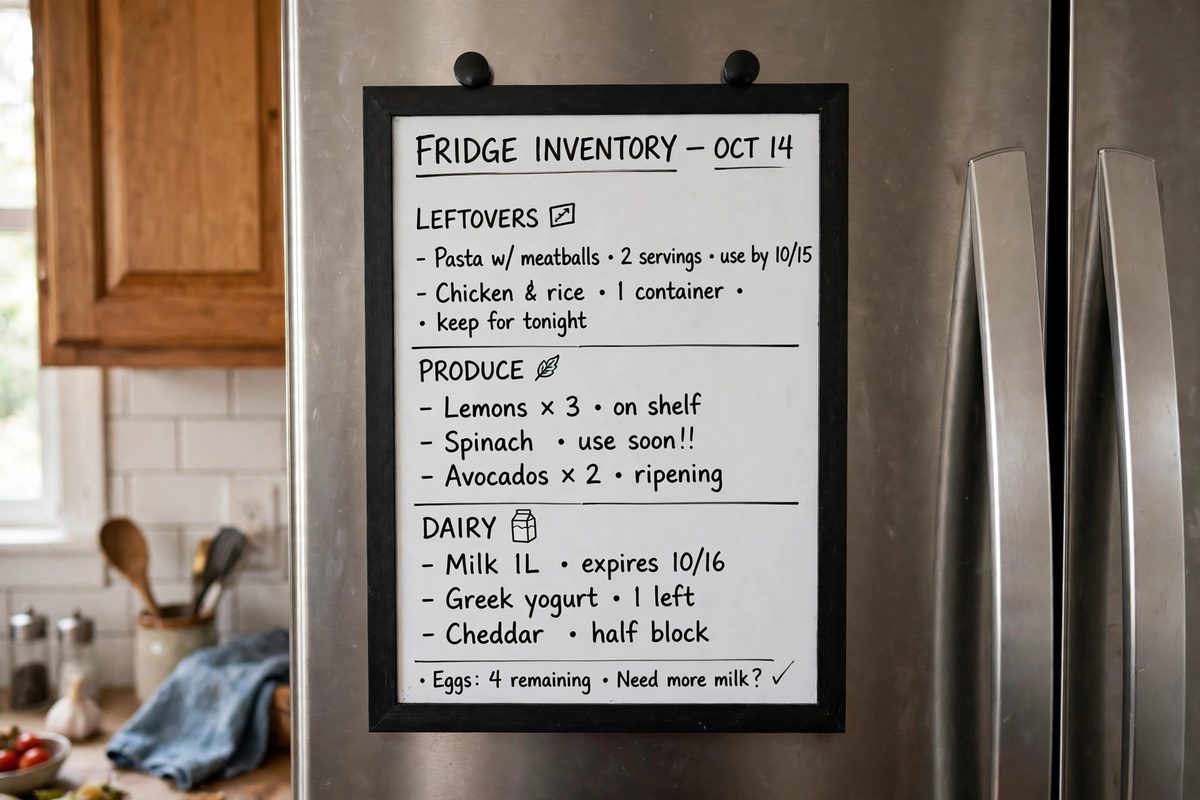
A fridge inventory, a simple list on the fridge door or on your phone, tells you what is inside without opening the door. This is especially useful for a small fridge shared by multiple people, or for anyone who shops without checking the fridge first and buys duplicates.
Keep the inventory simple: a whiteboard on the fridge, a magnet notepad, or a notes app list with sections for leftovers, produce, dairy, and freezer items. Update it when you unpack groceries and when you finish an item, which takes seconds if the list is short.
How to make it work
Do not list every condiment and spice, since a long inventory is a chore to maintain and quickly goes stale. List only the items you forget: leftovers, opened packages, and produce that spoils fast. Review the inventory before shopping, and cross off items as you use them. If the inventory feels like work, simplify it until it takes under a minute to update.
An organized fridge is not about perfect bins or matching containers. It is about seeing what you have, eating what needs eating first, and stopping the cycle of buying duplicates and tossing spoiled food. Set up zones, add a few clear bins, label with dates, and reset weekly. Your fridge will stay visible, and your food will stop disappearing into the back.