9 Small Bathroom Interior Ideas That Make a Basic Bathroom Feel Custom
Make a basic bathroom feel more considered with 9 small bathroom interior ideas featuring coordinated finishes, tile details, texture, and thoughtful design.
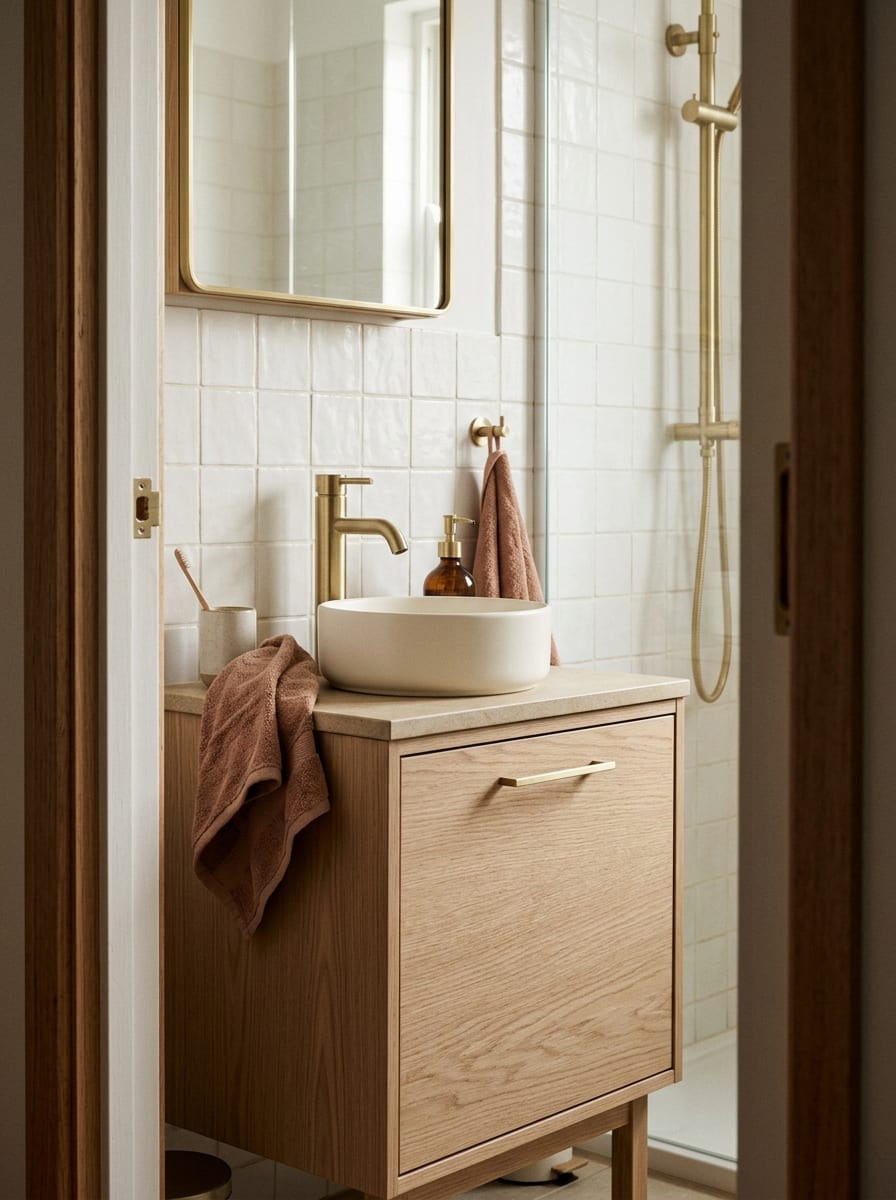
Small bathroom featuring coordinated brushed brass metal finishes, warm white surfaces, and pale oak accents
In This Guide
A small bathroom does not need an expensive renovation to look thoughtfully designed. Sometimes, the difference between a room that feels unfinished and one that feels custom comes down to details: the way metal finishes relate to one another, where the tile ends, how materials meet, and whether the smallest accessories feel connected to the rest of the room.
These details matter in compact bathrooms because there is less visual space to absorb mismatched finishes, awkward transitions, or too many competing accents. When every element seems to belong, even a basic rental bathroom can feel more polished.
The goal is not to make every surface expensive or perfectly coordinated. It is to give the room a clear design direction and repeat a few choices with intention.
These nine small bathroom interior ideas explore how to create that effect through material transitions, architectural details, texture, and thoughtful finishing touches. Some can be achieved through removable accessories and simple styling, while others are best considered during a renovation or with a landlord’s permission.
1. The Coordinated Metal Finish
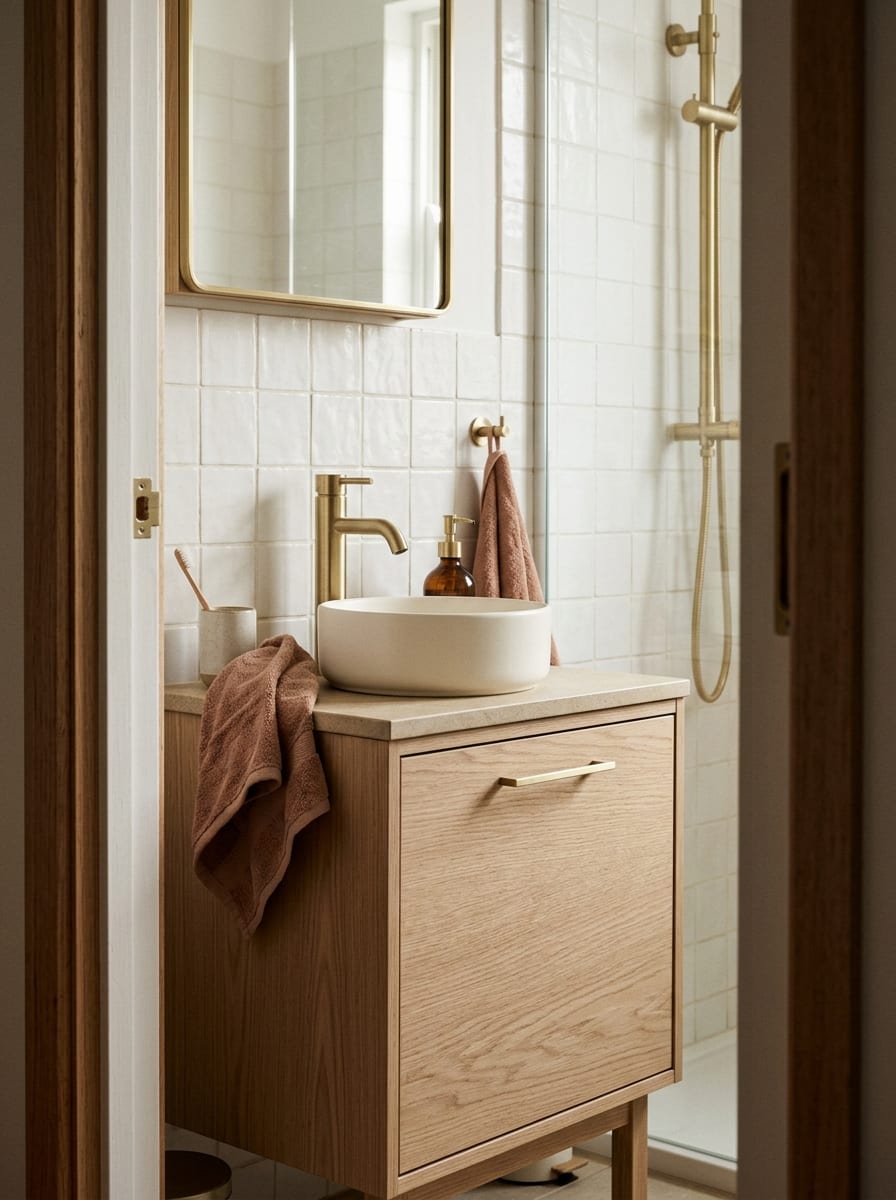
One of the simplest ways to make a bathroom feel more intentional is to create a consistent relationship between its visible metal finishes. A faucet, cabinet pull, towel hook, shower fitting, and exposed hardware can look disconnected when each appears to have been chosen independently.
Choose one dominant finish for the elements that are visible together. Brushed brass can warm up ivory tile and pale oak, while brushed nickel creates a quieter, cooler effect. Matte black can introduce contrast against warm-white surfaces, and polished chrome can suit a clean, reflective interior.
You do not necessarily need every metal in the room to match. A deliberate mix can work beautifully, particularly when one finish dominates and the second appears sparingly. The important distinction is between a controlled combination and a collection of unrelated finishes.
How to make it work
- Identify the finishes that are most visible from the bathroom entrance.
- Choose one primary metal finish and repeat it across compatible fixtures or accessories.
- Keep the surrounding materials simple enough for the finish to stand out.
- If replacing fixtures is not possible, coordinate the smaller removable accessories instead.
For example, a warm-white bathroom with pale-oak cabinetry, brushed-brass hardware, and one restrained terracotta accent can feel considered without requiring a complete makeover.
Small-space detail: Repetition creates visual continuity. You do not need more decorative objects when a few existing elements already work together.
2. The Intentional Tile Stop
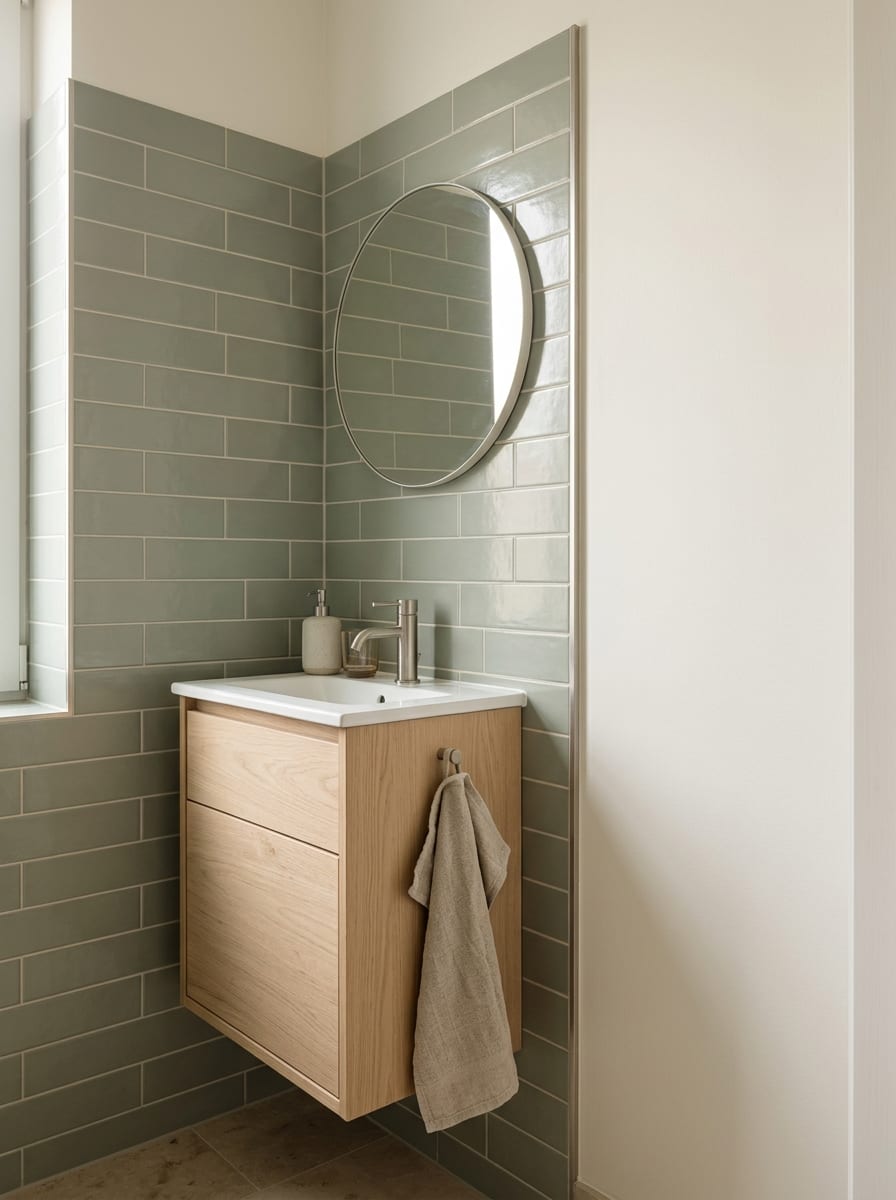
Tile does not have to cover every wall to look deliberate. In fact, an awkward stopping point can make a bathroom appear unfinished, especially when the edge ends at an arbitrary height or cuts across a visually prominent area.
An intentional tile stop gives the boundary between tiled and painted surfaces a clear purpose. The tile might define the shower zone, form a continuous lower-wall treatment, or create a carefully planned backdrop behind the basin.
The key is to treat the boundary as part of the design rather than an afterthought.
How to make it work
- Decide which area needs the protection and cleanability of tile.
- Plan the tile boundary in relation to nearby fixtures, wall edges, and other architectural lines.
- Use an appropriate finished edge, trim profile, or other compatible transition detail.
- Keep the adjoining surface suitable for its exposure to moisture.
A soft sage tile field with a clean edge against warm-white walls can look more polished than a larger tiled area with an awkward termination. A vertical tile section can also help define the shower area without visually enclosing the entire room.
If the bathroom is already tiled, a change in styling or a coordinated wall color may be more practical than removing existing finishes.
Small-space detail: Before starting a renovation, view the planned tile boundary from the doorway. That is often where the relationship between the wet area and the rest of the room is easiest to judge.
3. The Grout-Grid Detail
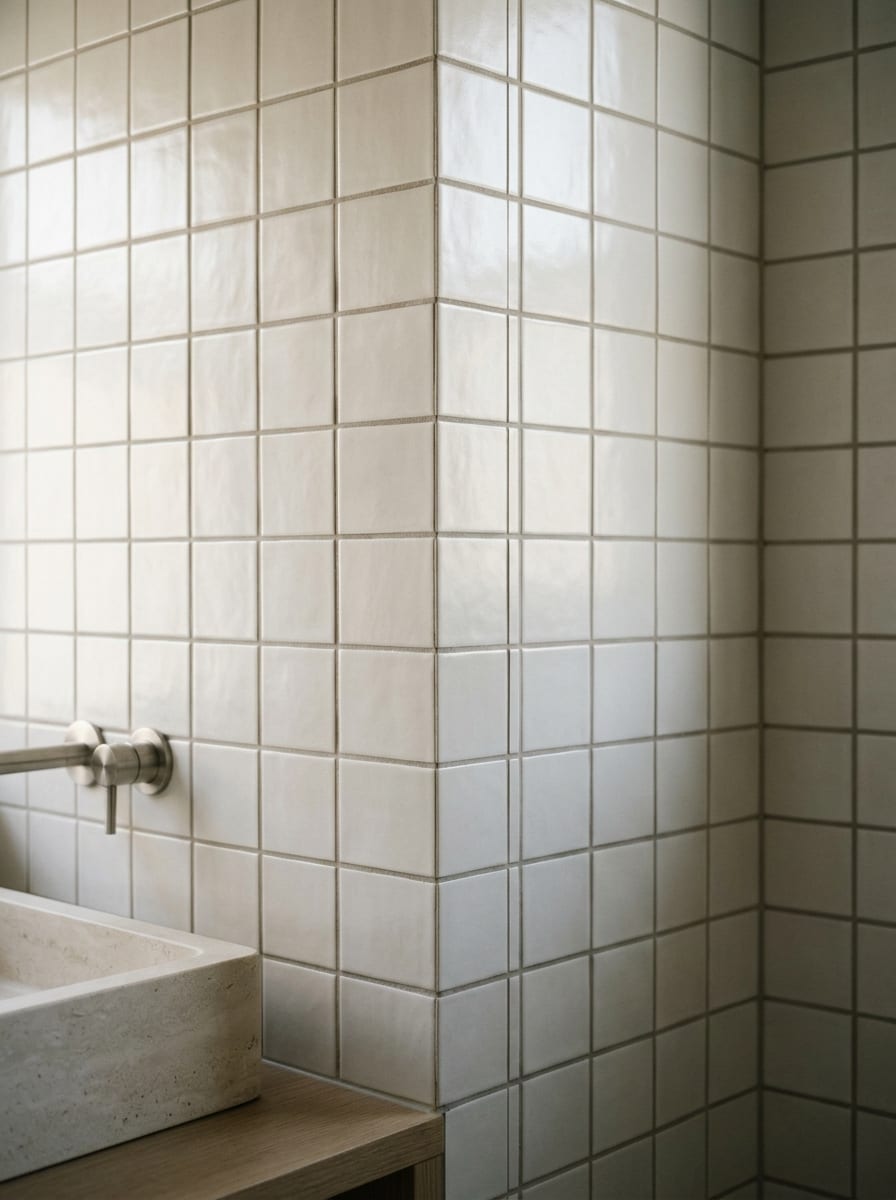
Grout is easy to overlook, but its color and alignment can significantly influence how a tiled bathroom looks. It creates a visible grid that can either blend into the background or become a deliberate part of the design.
A close grout-to-tile match produces a quieter, more continuous surface. A carefully selected contrasting grout emphasizes tile shape and layout, giving even a simple tile a more graphic appearance.
Neither approach is universally better. The right choice depends on the tile shape, room proportions, desired mood, and how much visual detail the bathroom can comfortably handle.
How to make it work
- Use a close tonal match when you want the tile surface to read as a calmer field.
- Consider a controlled contrast when the tile shape or pattern deserves emphasis.
- Coordinate grout with the surrounding finishes rather than selecting it in isolation.
- Follow the tile and grout manufacturer’s recommendations for compatibility, installation, and maintenance.
For a small bathroom, a warm-white tile with a softly contrasting warm-gray grout can introduce definition without creating a strong checkerboard effect. Deep green or muted blue tile with a carefully selected compatible grout can create a more expressive look.
Remember that grout appearance can change with lighting and use. Sample the actual tile and grout together before committing to a large area.
Small-space detail: The grid is already a pattern. If the tile layout is visually strong, keep nearby decorative patterns more restrained.
4. The Color-Wrapped Doorway
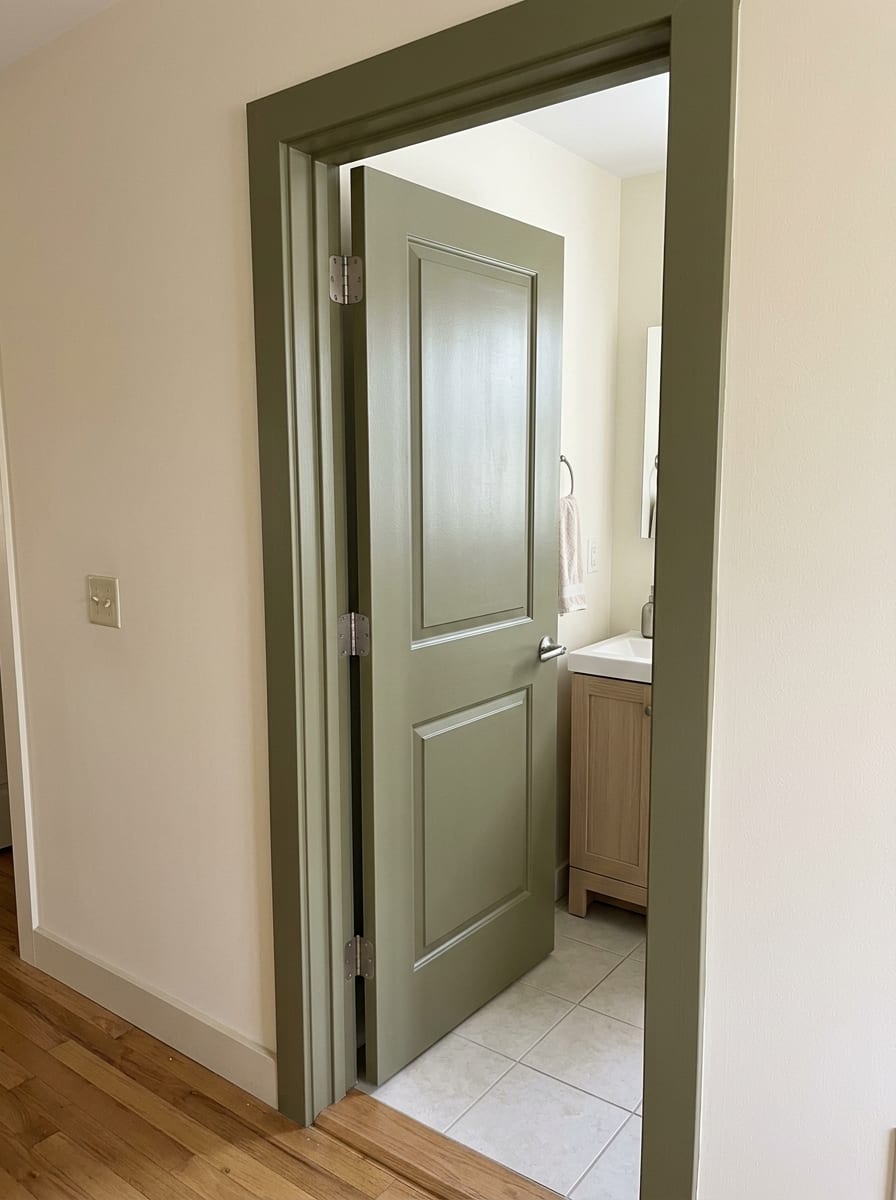
Bathroom doors, frames, and trim are often treated as separate from the room’s overall design. Yet these edges occupy a prominent position in a compact space, particularly when the door is visible from the hallway or bedroom.
A color-wrapped doorway creates continuity by repeating a carefully chosen wall color across compatible trim or door surfaces. Rather than allowing the doorway to feel like an unrelated white rectangle, the treatment makes it part of the room’s visual composition.
This can be especially effective when the bathroom has a distinctive but restrained palette.
How to make it work
- Choose a color that relates to the bathroom’s tile, cabinetry, or other permanent finishes.
- Test how the color looks under both daylight and artificial lighting.
- Keep the surrounding surfaces simple enough for the doorway treatment to feel intentional.
- Use paint suitable for the surface and conditions, following the manufacturer’s preparation and ventilation guidance.
A muted olive doorway against warm-white walls can create a subtle architectural moment. A soft blue-green frame can also connect a bathroom to a similarly colored hallway without requiring the entire bathroom to be painted.
For renters, this idea may require permission. If painting is not allowed, a similar sense of continuity can come from removable artwork, coordinated textiles, or accessories in the same color family.
Small-space detail: The aim is not to make the doorway disappear at all costs. It is to make the transition between the bathroom and the adjoining room feel considered.
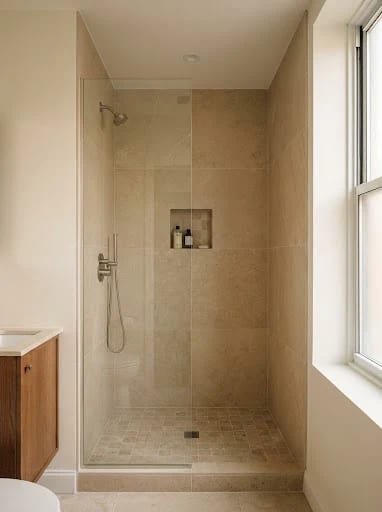
5. The Built-In Shower Niche
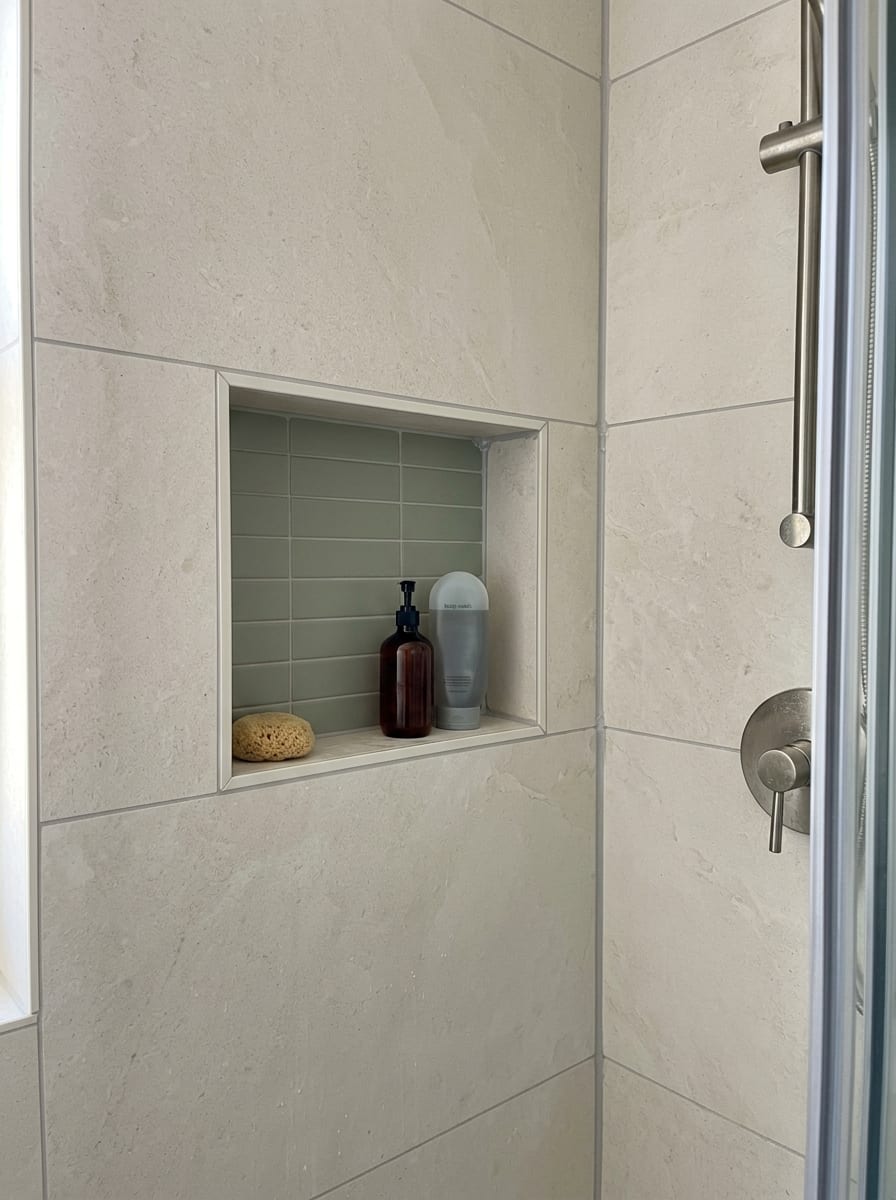
A recessed shower niche can make a bathroom feel more architectural because it gives everyday products a defined place within the wall rather than relying entirely on hanging baskets or freestanding organizers.
Its visual effect comes from the way it relates to the surrounding tile. A niche that repeats the main tile can feel seamless, while a contrasting interior finish can create a restrained focal point.
This is a renovation-level feature rather than a simple decorative upgrade. A recessed niche needs suitable wall construction, waterproofing, and detailing, especially in a shower area.
How to make it work
- Plan the niche around the shower’s actual use and the products that need to fit inside.
- Consider its position in relation to the shower fittings, tile grid, and user’s reach.
- Coordinate the niche’s edges and interior finish with the surrounding materials.
- Use an appropriate waterproofing system and installation method for the specific wall assembly.
A niche lined in the same pale stone-look tile as the shower can make the wall appear continuous. A muted sage interior against warm-white tile can introduce color without requiring an entirely different surface treatment.
If a renovation is not possible, a well-chosen shower organizer can still create a more orderly appearance. Choose one that fits the shower safely and does not obstruct movement or interfere with fixtures.
Small-space detail: A niche should solve a genuine storage need. Adding a decorative recess where there is no practical need can create unnecessary construction and maintenance.
6. The Continuous Vanity Ledge
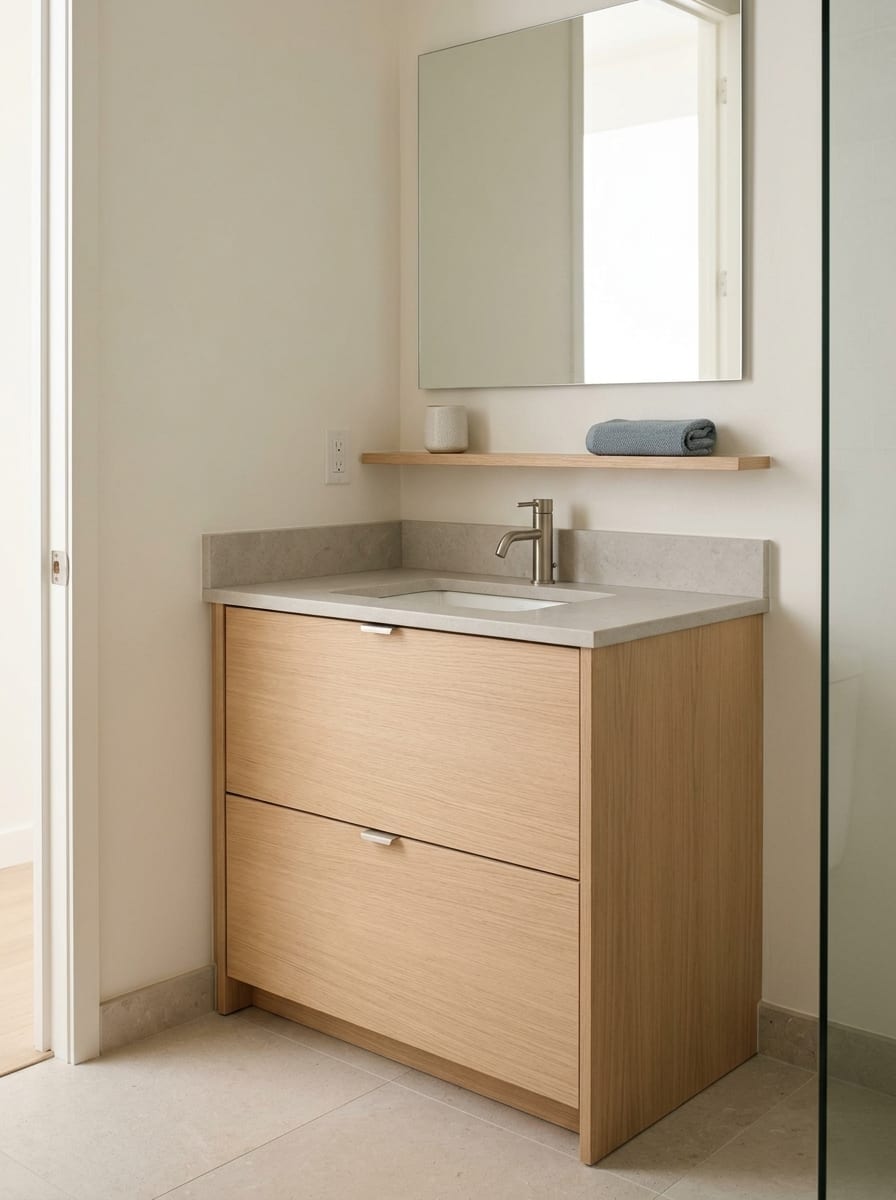
A continuous ledge can visually connect separate elements in a compact bathroom. It might be a properly designed vanity countertop, a narrow shelf that follows the basin area, or a simple horizontal line that links a mirror, storage, and adjacent wall finishes.
The appeal is not simply extra storage. It is the sense that the elements have been planned together instead of added one by one.
How to make it work
- Align compatible edges where practical, such as a countertop with nearby cabinetry or a shelf with a defined tile boundary.
- Keep the surface deep enough for its intended use without unnecessarily narrowing the room.
- Choose materials suitable for the level of moisture and cleaning they will encounter.
- Leave useful working space around the basin and keep frequently used items accessible.
For example, a pale-oak vanity with a slim matching shelf and a warm-white wall can create a quiet horizontal rhythm. A contrasting stone-look surface can provide definition without introducing several unrelated materials.
Do not extend a shelf into the basin’s working area or create a ledge that obstructs taps, drawers, doors, or cleaning access.
Small-space detail: One well-positioned horizontal line can make a room feel more organized than several small shelves scattered across different walls.
7. The Three-Texture Balance
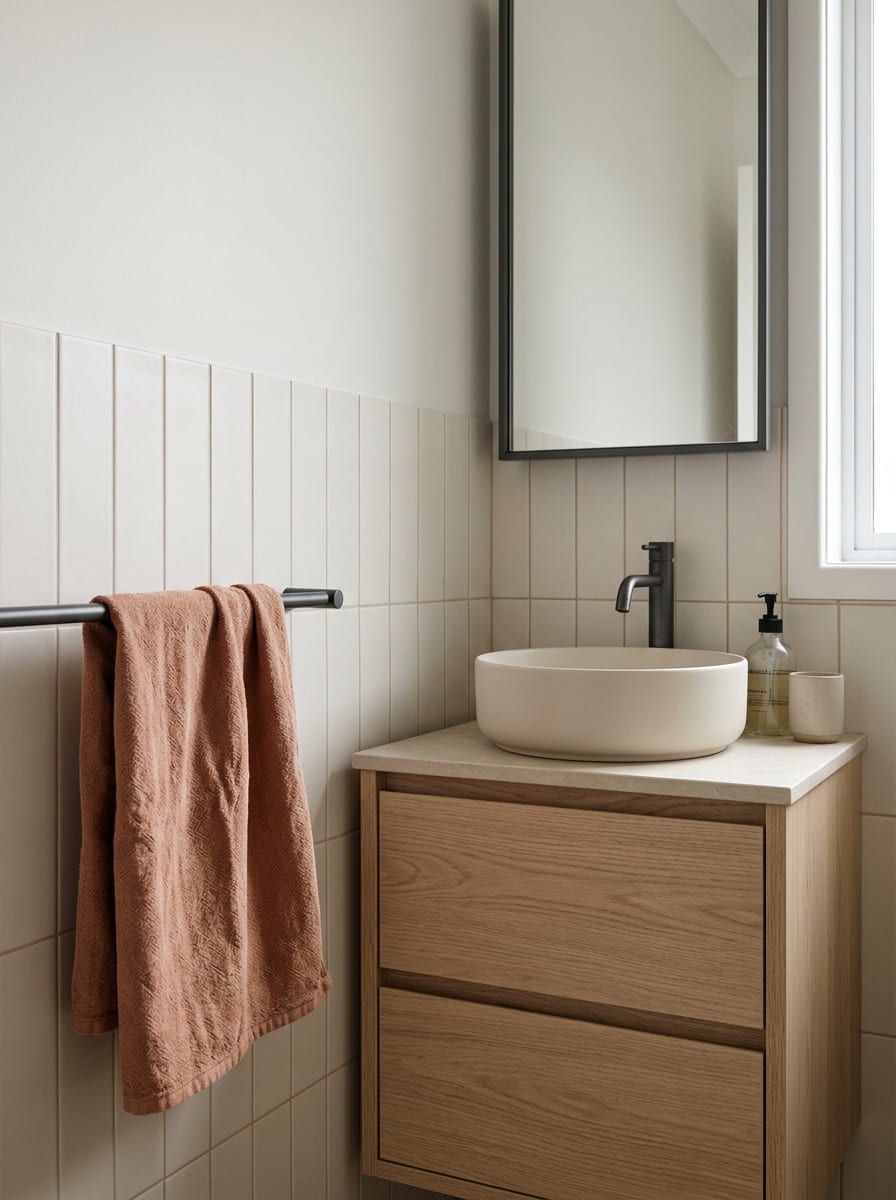
A bathroom can feel flat when every surface has the same finish, but it can also become visually crowded when too many materials compete. A useful middle ground is to work with three complementary textures at different scales.
For example, a smooth ceramic surface can be paired with a subtle stone texture and a softer textile. The materials do not need to be identical in color. They simply need to relate in tone, contrast, or visual weight.
This approach adds depth without requiring a collection of decorative objects.
How to make it work
- Begin with the largest existing surface, such as the wall tile or floor.
- Introduce a second material with a different visual texture, such as pale oak or a restrained stone finish.
- Add a softer element through a bath mat, hand towel, or washable textile suitable for the space.
- Repeat a color or undertone so the textures feel connected.
A warm-white bathroom might combine matte ceramic tile, pale-oak cabinetry, and a muted terracotta textile. A cooler palette could use soft gray tile, brushed metal, and a powder-blue fabric accent.
Choose materials according to their intended use. Surfaces exposed to regular splashing need appropriate moisture resistance, and textiles should dry properly between uses.
Small-space detail: Texture is most effective when each material has a clear role. Avoid adding multiple decorative finishes simply because each looks attractive on its own.
8. The Deliberately Framed Shower
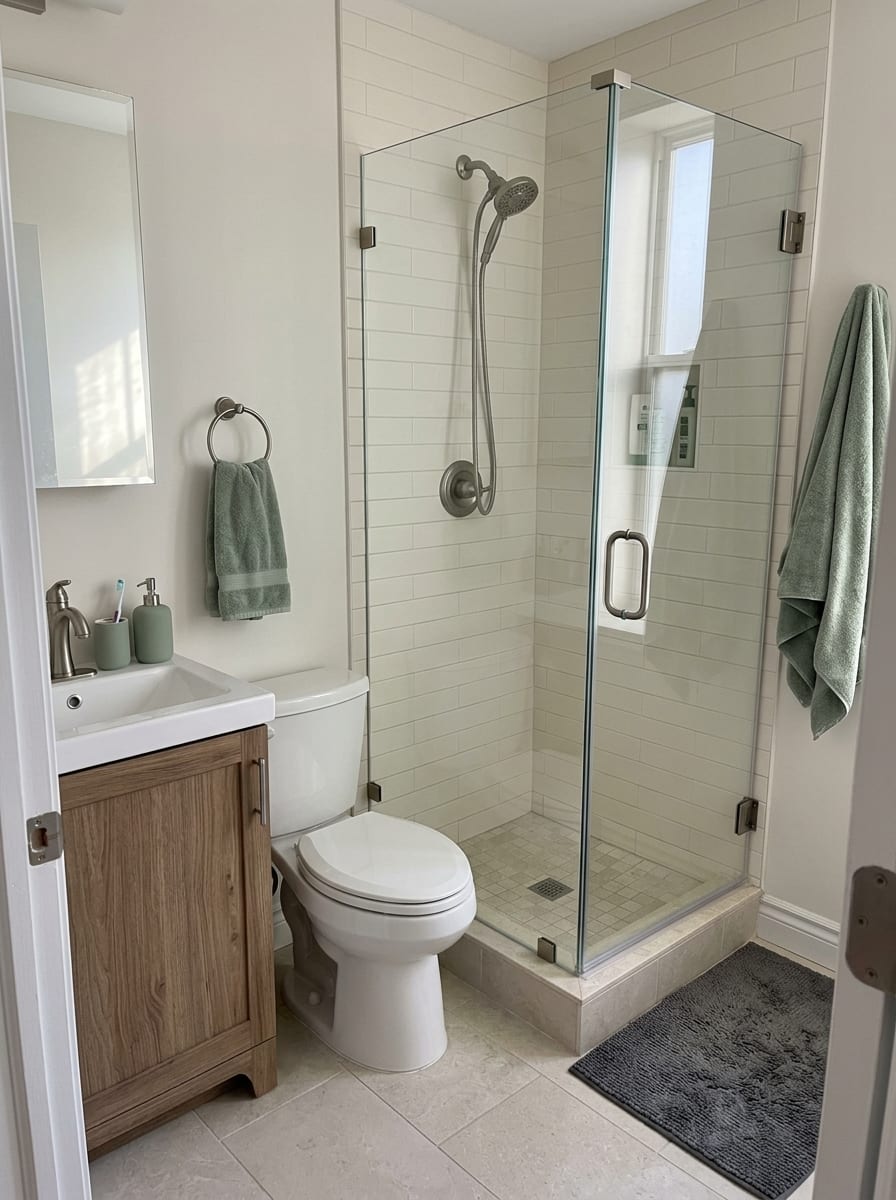
The shower occupies a substantial visual area in many compact bathrooms. When its edges, fittings, and surrounding surfaces look unrelated, the room can feel pieced together. A deliberately framed shower creates a clearer relationship between the wet area and the rest of the bathroom.
Depending on the existing layout, that frame might come from a simple glass enclosure, a consistent metal finish, a clearly defined tiled zone, or a shower curtain chosen to complement the surrounding materials.
The goal is a clean visual boundary, not an elaborate enclosure that makes the bathroom feel smaller.
How to make it work
- Choose a shower boundary that suits the room’s layout and existing plumbing.
- Repeat the dominant hardware finish where compatible.
- Keep tile edges and enclosure lines visually coordinated.
- Make sure the design allows adequate access, cleaning, and water containment.
A simple glass enclosure with restrained hardware can let the surrounding tile remain the main visual feature. In a bathroom where a curtain is more practical, a plain textile in a related color can create a similarly deliberate boundary.
The right option depends on the room’s dimensions, existing construction, ventilation, and household needs.
Small-space detail: Avoid introducing a strong frame, a contrasting tile pattern, and several competing hardware finishes all at once. One clear design feature is often enough.
9. The One-Focal-Point Finish
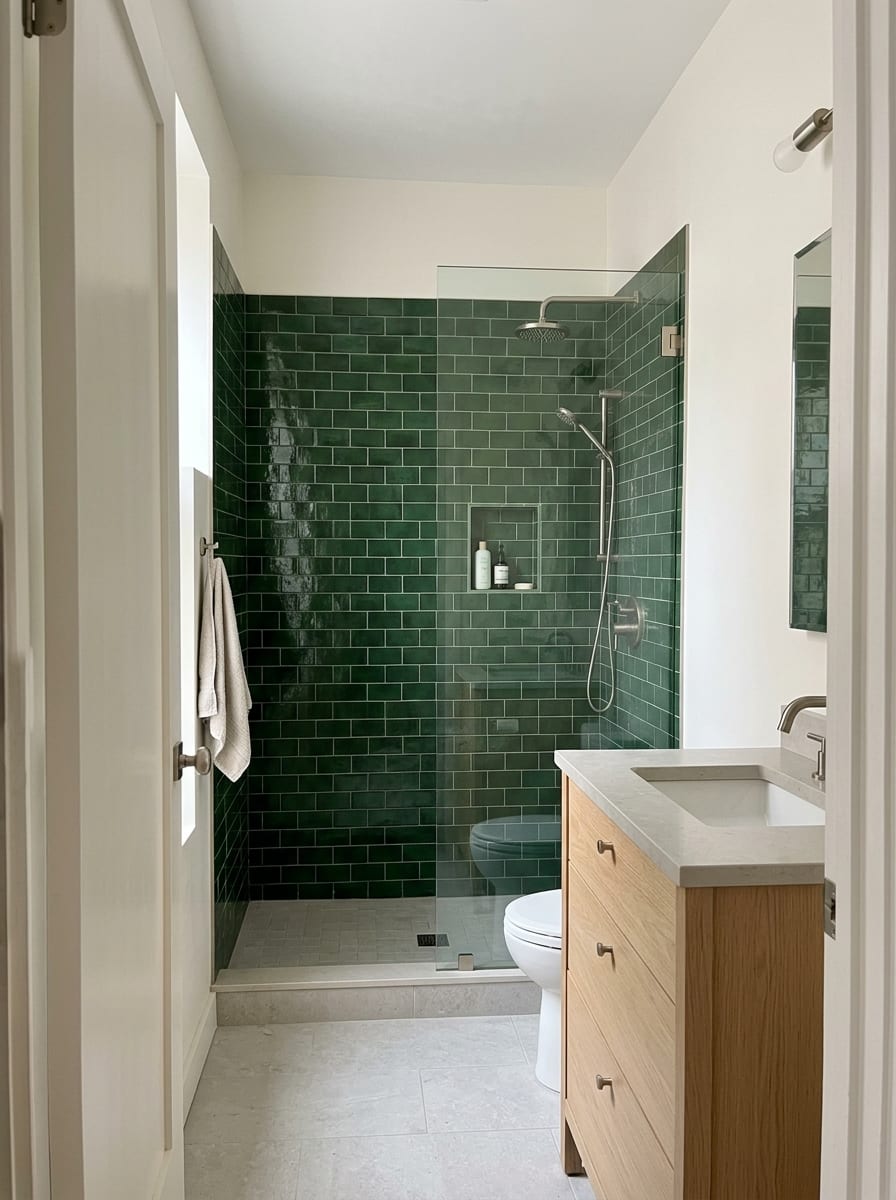
A custom-looking bathroom does not need a statement on every wall. In a small room, a single focal point can give the design direction while allowing the rest of the surfaces to remain quiet.
That focal point might be a distinctive tile treatment, a sculptural basin, a carefully chosen mirror, or an architectural wall detail. The important part is how the surrounding finishes support it.
How to make it work
- Choose one feature that deserves attention from the doorway.
- Keep the main surrounding surfaces comparatively restrained.
- Repeat one or two colors or materials from the focal point elsewhere in the room.
- Avoid adding several unrelated accents that compete for attention.
For example, a deep-green tiled shower wall can become the primary feature when the remaining walls, countertop, and accessories are kept simple. Alternatively, a distinctive basin can stand out against quieter finishes and coordinated hardware.
If you want to explore a specific feature in more depth, see our guides to small bathroom color schemes, small bathroom mirrors, and small bathroom vanities.
Small-space detail: Give the focal point enough visual breathing room. A feature loses impact when every nearby surface demands equal attention.
How to Make a Basic Bathroom Feel More Custom Without a Full Renovation
You do not need to change every fixture to improve the room’s overall design. Start by identifying which details can be changed safely and which belong to the existing building.
If you rent
- Coordinate removable accessories and textiles.
- Use a consistent finish family where replacement accessories are practical.
- Introduce one restrained color or texture through removable decor.
- Check your lease before painting, drilling, replacing fixtures, or modifying tile.
- Do not use adhesive products in wet areas unless they are specifically suitable for that application.
If you own your apartment
- Consider tile boundaries and grout as part of the overall design.
- Plan any recessed niche or built-in feature with suitable waterproofing and installation.
- Coordinate visible metal finishes before purchasing new fixtures.
- Review how doors, drawers, shower enclosures, and walking routes interact before making layout changes.
Start with the details you notice most
Stand at the bathroom entrance and identify the first three things you see. Perhaps the metal finishes do not relate, the tile ends awkwardly, or the shower looks visually disconnected from the rest of the room.
Choose one issue to address first. A coordinated finish or better-defined transition may have more impact than purchasing several new accessories.
Small Bathroom Interior Design Mistakes to Avoid
- Mixing finishes without a plan: Different metals can work together, but repeating one dominant finish usually creates a more cohesive starting point.
- Treating every surface as a feature: Bold tile, patterned textiles, contrasting grout, and statement accessories can compete in a compact room. Choose a clear focal point.
- Ignoring material transitions: Tile edges, trim, and the boundaries between wet and dry areas should look intentional and use suitable materials.
- Adding decorative storage that obstructs the room: Shelves and niches should remain accessible and should not interfere with fixtures, doors, or movement.
- Choosing materials based on appearance alone: Consider cleaning, moisture exposure, ventilation, durability, and manufacturer guidance alongside aesthetics.
- Assuming a custom look requires custom construction: Coordinated finishes, thoughtful placement, and restrained material choices can improve the appearance of an existing bathroom without rebuilding it.
Conclusion
The most convincing small bathroom interior ideas are not necessarily the most expensive. They are the ones that make the room feel connected: a consistent finish, a deliberate tile boundary, a useful architectural detail, and a balanced relationship between smooth and textured surfaces.
Start with the features that already exist in your bathroom. Decide which elements should blend together and which one deserves attention. Then make a few considered changes rather than introducing a new feature everywhere you look.
Whether you are updating a rental or planning a renovation, the aim is the same: a compact bathroom that feels purposeful, practical, and thoughtfully finished.