9 Studio Apartment Bed Placement Ideas That Create Separation Without Closing Off the Room
Discover 9 studio apartment bed placement ideas that create a defined sleeping area while preserving light, circulation and an open feel in a small studio.
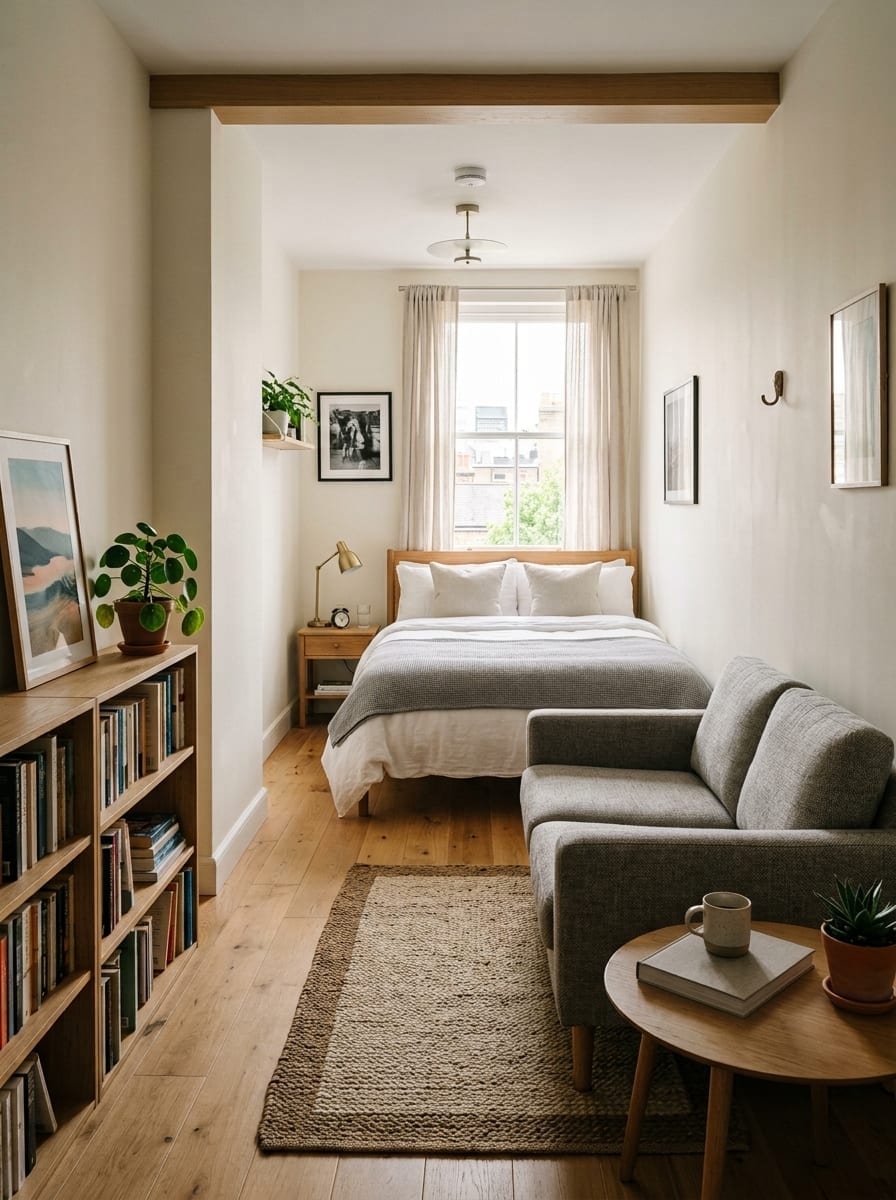
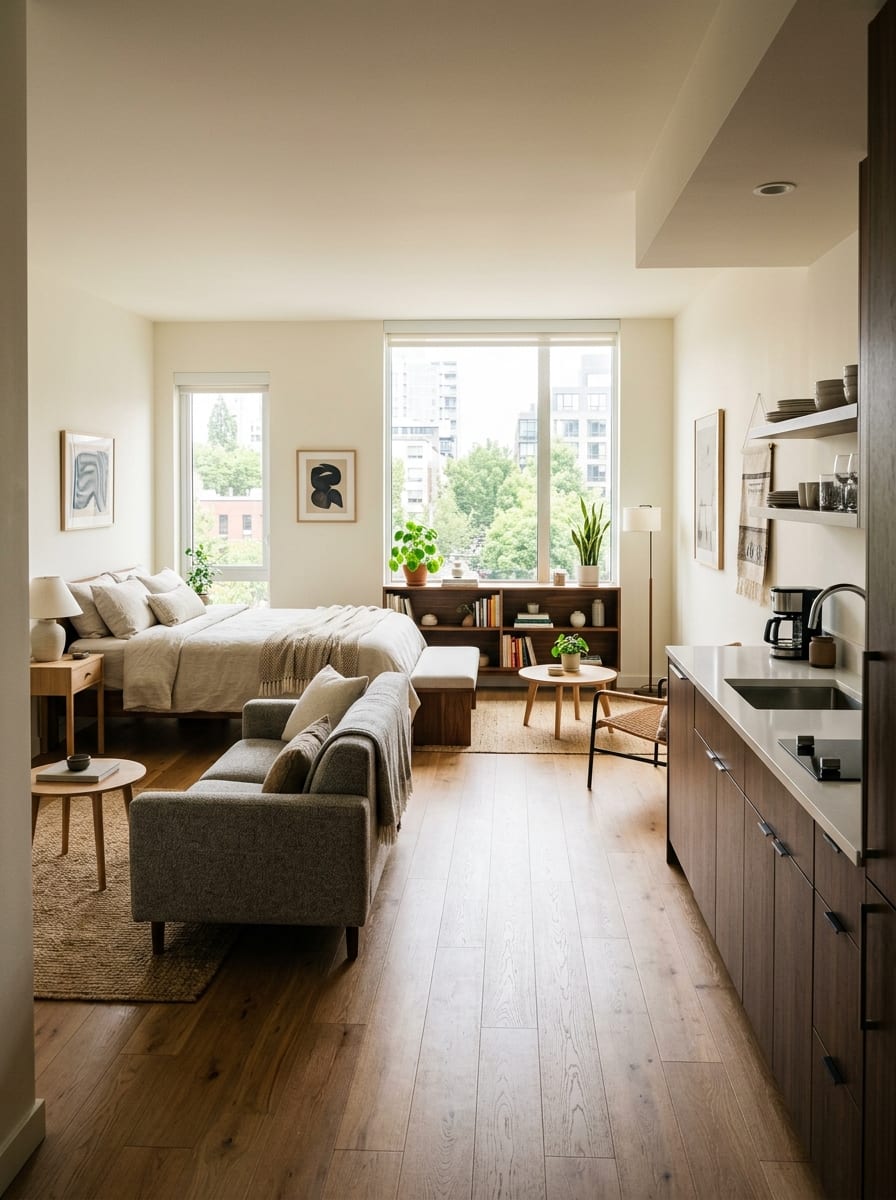
Studio apartment with bed at the far wall creating a clear visual progression from compact living area to sleeping zone
In This Guide
In a studio apartment, the bed is not just bedroom furniture. It is part of the entire floor plan. Move it a few feet and you can change:
- the living-room size
- the main walkway
- how the apartment looks from the front door
- how much natural light reaches the room
- whether the space feels divided or cluttered That is why studio bed placement deserves more thought than simply finding the first wall long enough for the mattress. A good layout should create enough separation that the sleeping area feels intentional without turning a small studio into several dark boxes. Before buying a divider, curtain or shelving unit, start with placement.
1. The Far-Wall Bed Zone
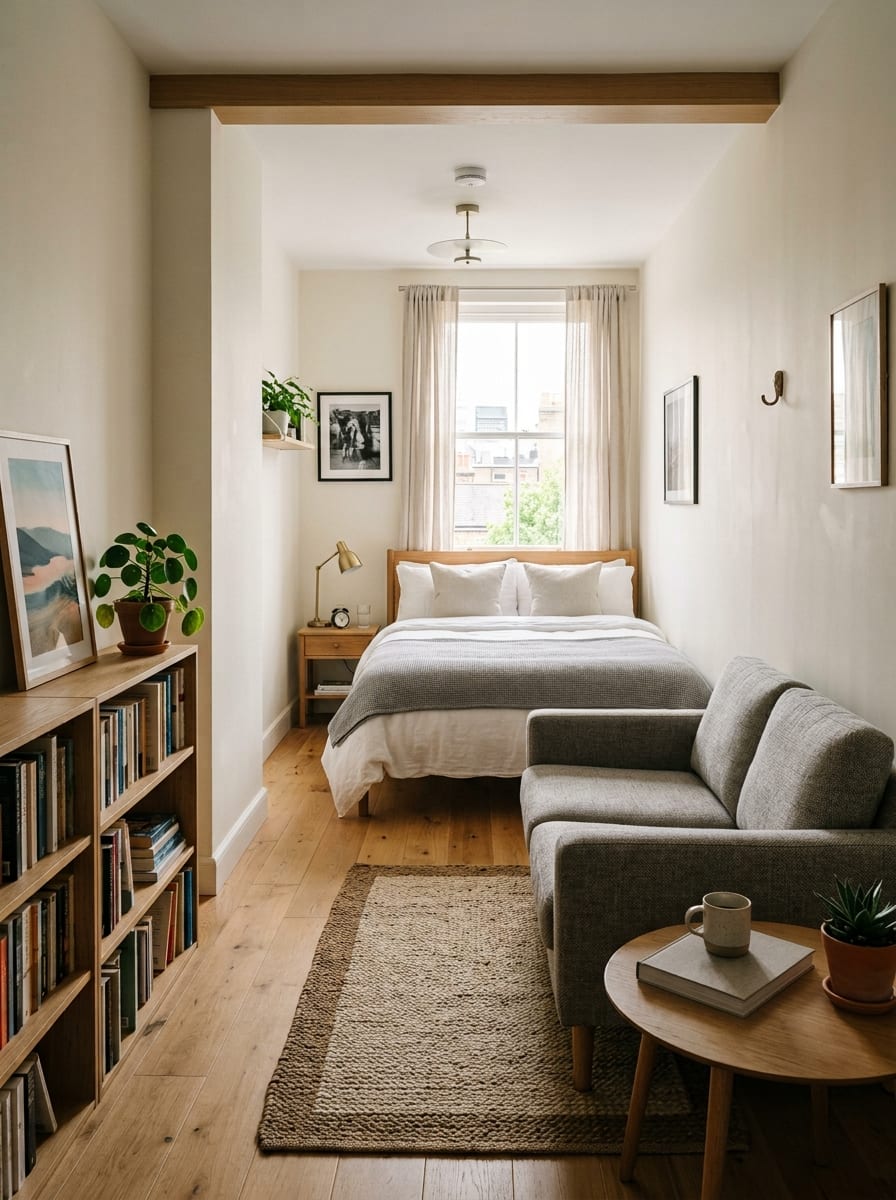
One of the simplest studio layouts is to place the bed at the farthest practical end of the apartment. This lets the sleeping area become the final zone rather than the first thing you walk through.
Why it works
If the studio is somewhat rectangular, the apartment can naturally progress from: entry → kitchen → living → sleeping That sequence makes the space feel more organized.
Keep the bed visually contained
You can reinforce the zone with:
- one rug
- two matching wall lights
- a narrow bedside surface
- distinct bedding palette without adding a physical divider.
Protect the approach
Do not surround the bed with so much furniture that the far end of the apartment becomes difficult to access. Keep at least one clear route to:
- bed
- window
- closet
Best for
This often works well in long studio apartments where the main window or sleeping nook sits toward one end.
2. The Bed-Behind-the-Sofa Layout
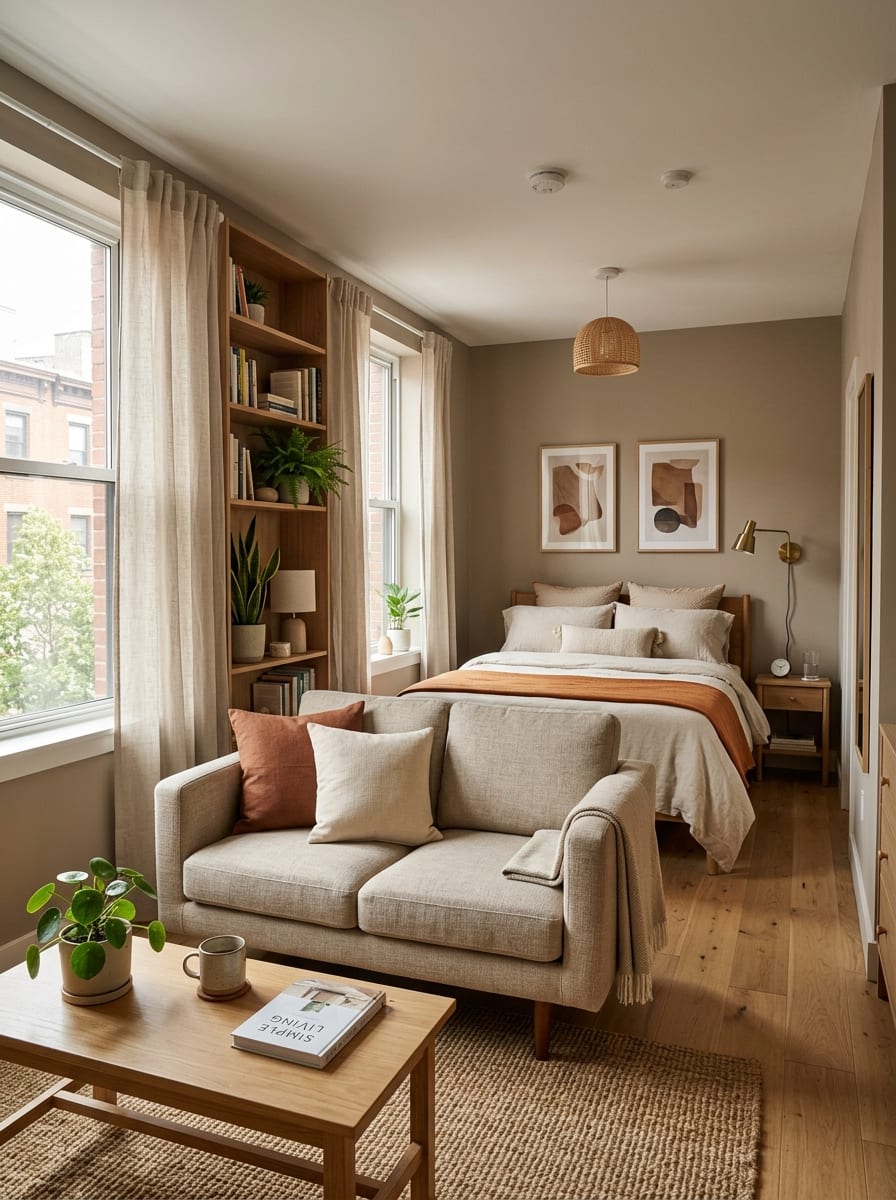
A sofa can act as one of the most useful studio dividers because you already need it. Instead of pushing the sofa against a wall, float it slightly and place the sleeping zone behind it.
Why it works
The back of the sofa becomes a soft boundary. From the living area, the sofa says: this zone ends here. No extra divider is required.
Keep the sofa low enough
A very tall sofa back can make the sleeping area feel boxed in. A lower-profile sofa preserves:
- light
- sightlines
- openness
Leave enough space behind it
Avoid wedging the sofa directly against the bed. The space between them may need to accommodate:
- walking
- making the bed
- small bedside table
Consider the headboard direction
A bed with the headboard toward the far wall usually feels more intentional than one appearing to float randomly behind the sofa.
3. The Window-Side Bed Placement
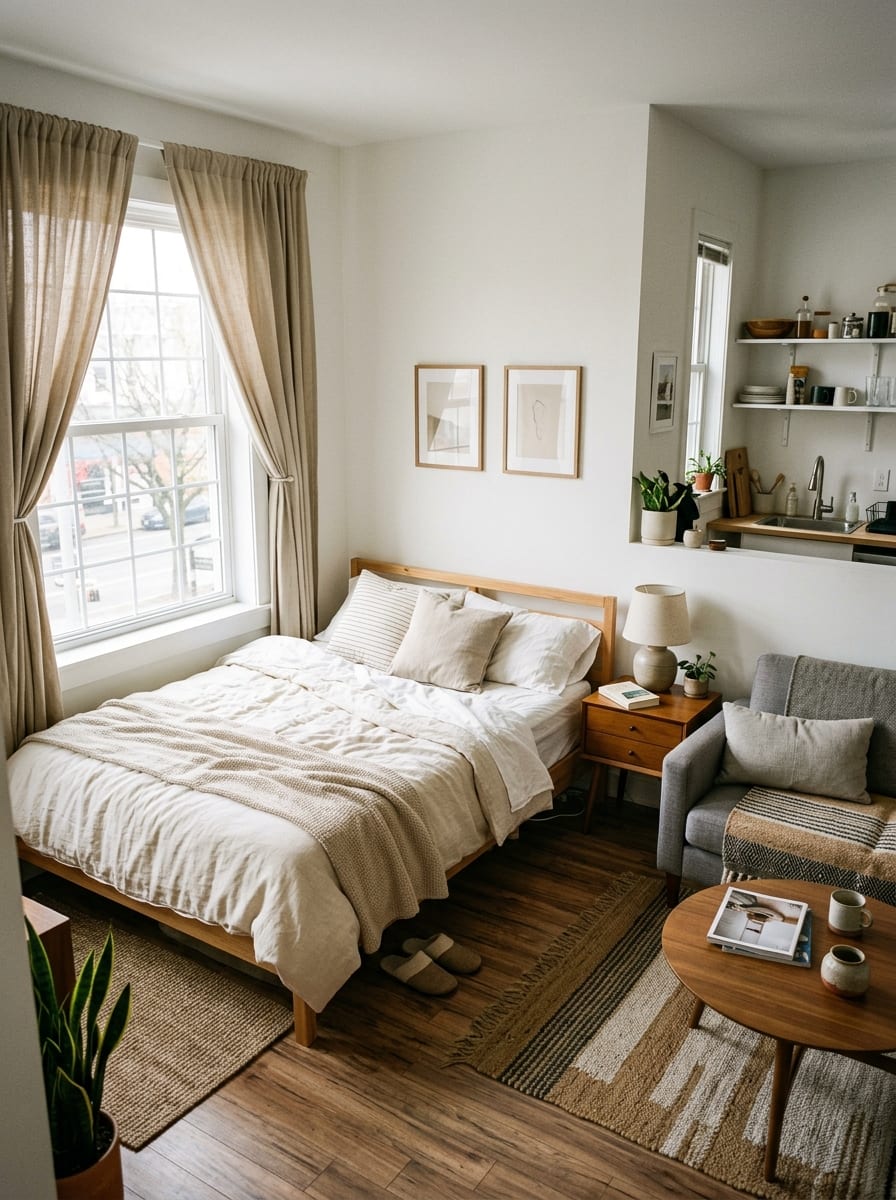
A bed beside a window can make the sleeping zone feel lighter and more intentional. It can also free the darker interior portion of the studio for:
- sofa
- TV
- dining
- storage Why it can work Beds generally need less daytime task lighting than kitchens, desks or dining tables.
Do not block the window
Avoid placing the bed where:
- headboard covers most of the glass
- curtains cannot open
- window hardware becomes inaccessible
Side placement can be better than directly under
If possible, position the bed beside the window rather than completely beneath it.
Watch heating
Check for:
- radiators
- baseboard heaters
- vents before committing to the placement.
4. The Alcove Bed Setup
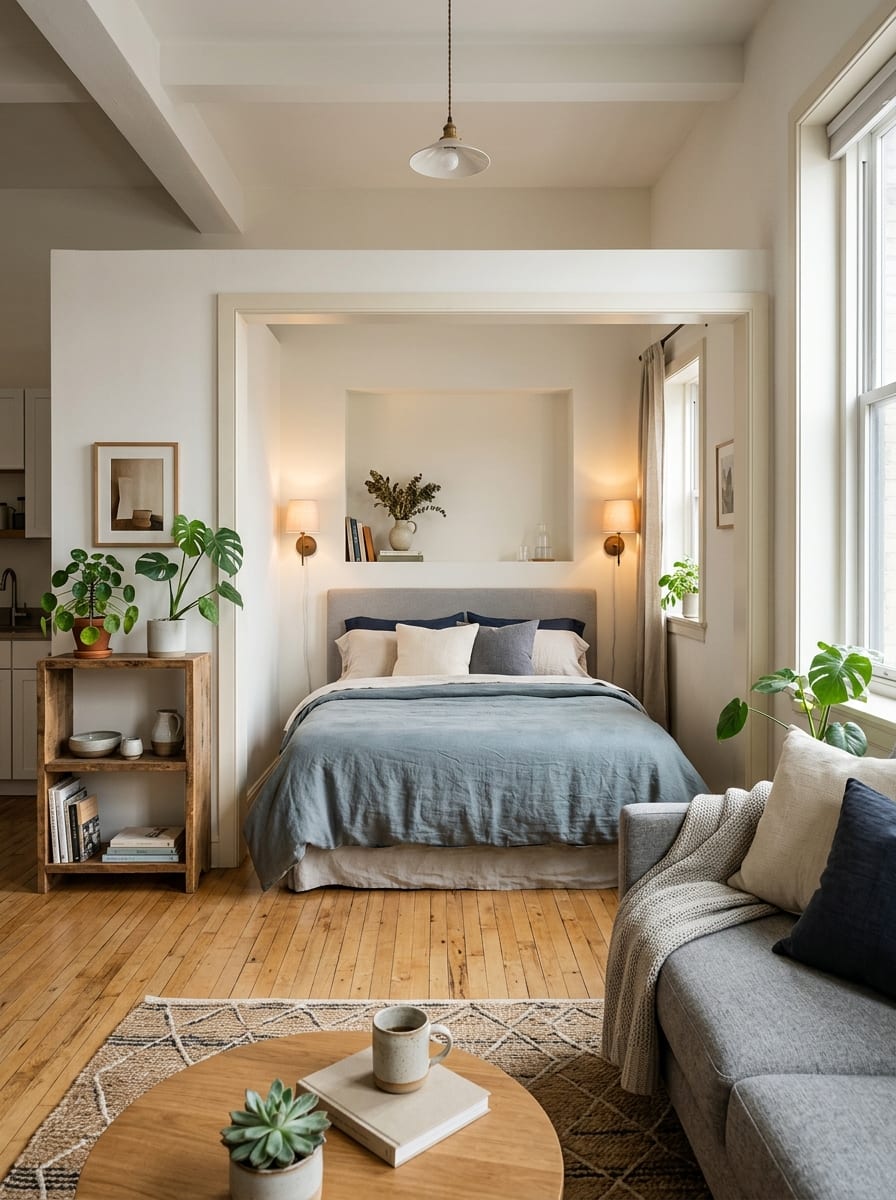
If the studio already has an architectural recess, use it before adding artificial boundaries elsewhere. Even a shallow alcove can make a bed feel like it belongs in its own room.
What counts as an alcove?
It may be:
- recessed wall
- former dining nook
- offset section of the floor plan
- space between two built-in structures
Fit matters
Measure:
- mattress width
- bed frame
- bedside access
- outlet location before deciding the alcove can actually accommodate the bed.
Avoid filling every inch
A bed squeezed tightly between three surfaces can feel more cramped than cozy. Some breathing room is useful if the layout allows it.
Emphasize the architecture
You may not need a divider at all. Use:
- paint
- bedding
- wall light to reinforce the sleeping nook.
5. The Foot-of-Bed Divider Layout
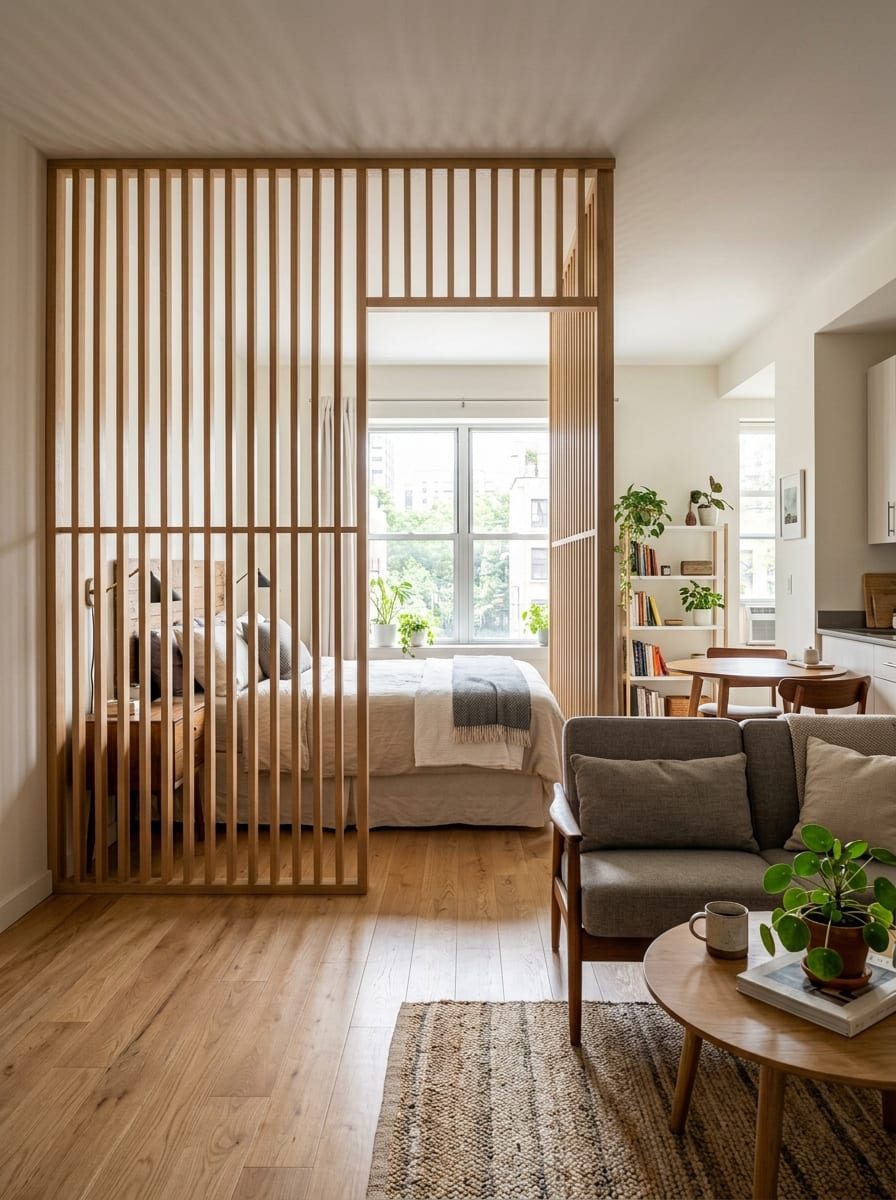
If you want a little more separation, place the divider at the foot of the bed instead of along its entire side. This is often less enclosing.
Why the foot works
You can block the direct view of the bed from:
- entry
- sofa
- dining table without building a full wall around it.
Good divider types
Depending on the apartment, you might use:
- low console
- narrow bench
- slatted screen
- shallow open shelf
Keep it visually light
A solid floor-to-ceiling divider can reduce:
- light
- openness
- flexibility Use only as much separation as needed.
Let the sides stay open
This makes the bed easier to access and keeps the studio from feeling like two tiny rooms.
6. The Open-Shelf Bed Boundary
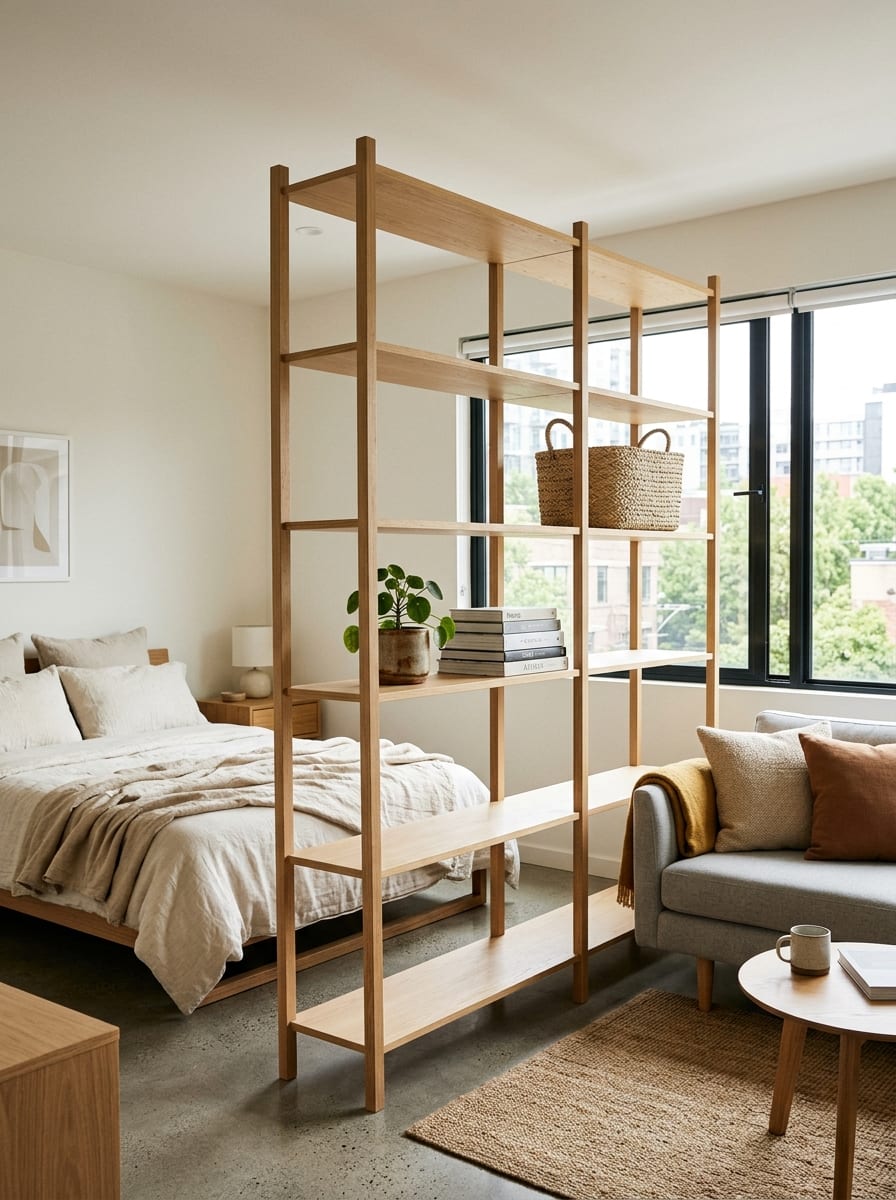
An open shelving unit can create separation while still allowing light and views through. But the shelving itself needs restraint.
Why open shelves work
Unlike a solid wall, they allow:
- light
- depth
- partial visibility between zones.
Do not fill every shelf
If the unit is packed with baskets, books, boxes and decor it becomes almost as visually solid as a wall. Leave intentional empty space.
Use useful storage
Good items might include:
- a few books
- small lamp
- closed basket
- plant
Keep the unit stable
Freestanding furniture used as a divider should be positioned and secured appropriately for its design and household.
Avoid a divider wider than the bed zone needs
The shelf should define the sleeping area, not bisect the entire apartment unnecessarily.
7. The Corner Bed + Open-Side Layout
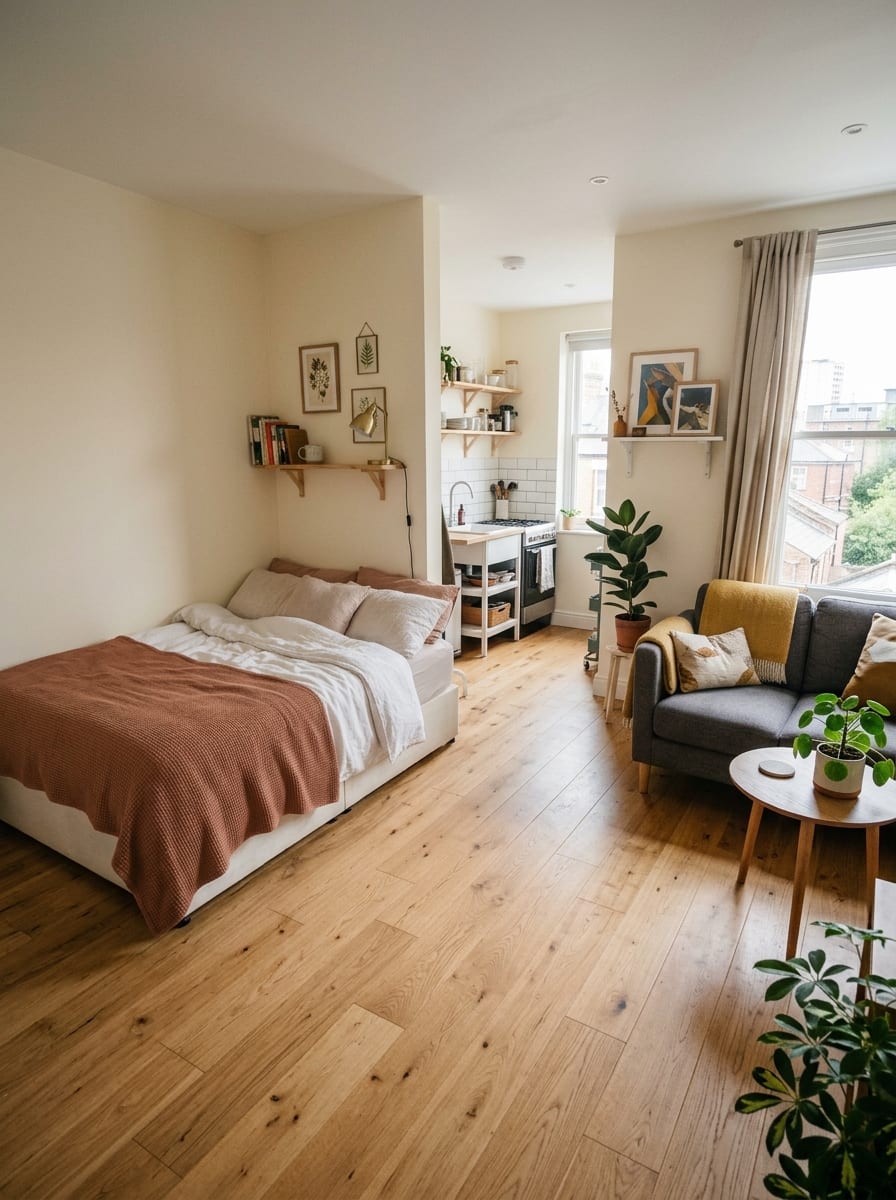
Putting the bed into a corner can free a surprising amount of usable floor. This can be especially effective when the studio is very small and the bed would otherwise sit awkwardly in the center.
Why it works
The bed uses two existing walls as boundaries. That means you may only need to define one open side.
The tradeoff
One side of the mattress may be harder to access. That matters more for couples, larger beds, and people who make the bed frequently than for someone using the studio alone.
Keep the bedding easy to manage
If the bed is against a wall, avoid overly complicated layers that are difficult to reach.
Use the open side carefully
A narrow rug, small bedside table or curtain line can mark the boundary without adding bulk.
8. The Curtain-Ready Bed Zone
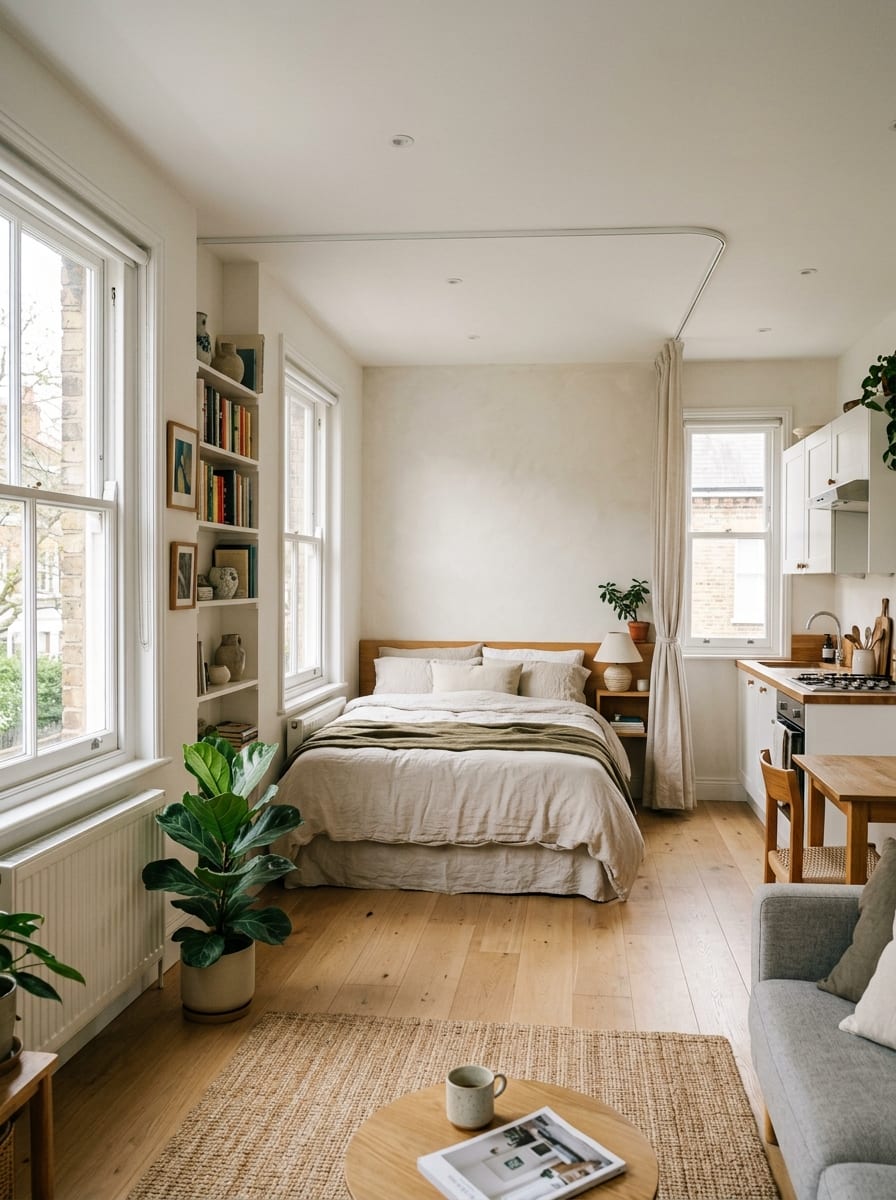
Curtains can create flexible privacy without permanently closing off the room. But the bed still needs a good placement underneath that system.
Start with the bed zone first
Do not hang a curtain around an awkwardly placed bed. The bed should already have:
- sensible access
- clear edges
- practical circulation
Use the curtain as optional privacy
When open: studio feels larger, daylight passes through, zones remain connected. When closed: sleeping area gains privacy, bed can visually disappear.
Avoid heavy visual bulk
In a small studio, a heavy opaque curtain can dominate the room.
Consider ceiling track placement
The curtain line should not create an unnecessarily large rectangle around the bed.
9. The Furniture-First Studio Formula
If none of the layouts seems obvious, stop thinking about the bed by itself. Treat the studio as one complete circulation problem. Use this order: fixed elements → bed → walkway → sofa → table/storage → divider
Step 1: Mark fixed elements
These usually include:
- kitchen
- bathroom door
- closet
- window
- radiator
- entry door You cannot move those.
Step 2: Find the best bed wall
The bed is usually one of the largest objects in the apartment. Give it a logical zone before placing smaller furniture.
Step 3: Protect the main walkway
Make sure there is a natural route from: entry → kitchen → bathroom → living → bed without constantly weaving around furniture.
Step 4: Add the living area
Place the sofa or main seating according to the remaining usable zone.
Step 5: Add only necessary support furniture
Then decide whether you still need:
- coffee table
- dining table
- desk
- dresser
Step 6: Add separation last
Only after the furniture works should you add:
- curtain
- shelf
- screen
- console Sometimes you will discover that no divider is needed.
The Bed Usually Deserves a Zone Before the Sofa
In a studio, the bed is often larger, harder to move and less flexible than the seating. So it can make sense to establish the bed zone first and build the living space around it.
Do Not Automatically Put the Bed Against the Longest Wall
The longest wall may look obvious, but it could also be the best place for the sofa, desk, dining table or storage. Consider the whole apartment.
Look at the Apartment From the Front Door
Open the front door and look inside. Is the bed the first thing you see? Does the apartment have visual depth? Can you see the living area clearly? Does furniture block the path?
Seeing the Bed Is Not Automatically Bad
A studio is a studio. A well-made bed with an intentional headboard and coordinated bedding can be part of the room. The goal is to make it feel like a designated zone rather than an object dropped into the floor plan.
Visual Separation vs Physical Separation
Visual separation can come from rug, lighting, bedding color, furniture orientation and wall color. Physical separation can come from shelving, curtain, screen and divider. Start with visual separation. Add physical separation only if you actually need it.
Too Much Separation Can Make the Studio Feel Smaller
Choosing one or two boundaries is usually enough rather than combining tall shelf, curtain, screen, large sofa and rug boundaries all at once.
Use Furniture Direction to Create Rooms
A bed facing one wall and a sofa facing the TV wall already tells the eye that the two areas have different functions.
The Sofa Back Is a Free Divider
If your layout permits a floating sofa, use it. You are already allocating floor space to the sofa. Let it do another job.
Low Furniture Preserves Sightlines
Consider avoiding oversized headboards, shelving and sofa backs if they sit in the middle of the floor plan.
Keep Tall Storage Against Perimeter Walls
A tall cabinet used as a room divider can create a surprisingly dark, enclosed effect.
What Should Go Between the Bed and Sofa?
Possibly nothing. An empty strip of floor can be a useful transition. If you need a boundary, consider sofa back, rug edge, narrow console or partial shelf.
Use Rugs Carefully
One living-room rug plus a visually defined bed zone is often enough. Too many rugs can break the studio floor into small islands.
Do You Need a Rug Under the Bed?
Not always. If the bed area already feels separate because of corner placement, alcove, curtain or shelving, you may not need another boundary on the floor.
Keep the Main Floor Continuous
Visible continuous flooring helps the apartment feel connected, especially between living, sleeping and dining zones.
Bed Against Wall vs Accessible From Both Sides
Against wall: saves floor, opens central area, easier zoning. Tradeoffs: one side harder to access, harder for two people, bed-making can be awkward. Accessible from both sides: easier daily use, more balanced bedroom feel. Tradeoff: requires more floor.
Full Bed vs Queen Bed in a Studio
A larger bed means less room for walkway, sofa, desk and dining. Measure the floor plan with both mattress footprints before deciding.
What About a Daybed?
A daybed can work if the sleeping setup genuinely suits you. But daily comfort should come before appearance.
What About a Murphy Bed?
Consider installation requirements, wall compatibility, cost, daily setup and rental restrictions. For many studios, smart placement of a normal bed is enough.
What About a Loft Bed?
Loft beds can free floor area below, but they are not automatically appropriate for every ceiling height, user, apartment or lifestyle.
Put the Bed Near the Quietest Zone
If possible, avoid placing it directly beside the entry door, kitchen appliances or high-traffic circulation.
Bed Near the Kitchen
Create visual separation through furniture orientation, simple screen, shelf or curtain while protecting the main path between them.
Bed Near the Front Door
Consider blocking only the direct sightline. A partial screen or open shelf can be enough.
Bed Near the Bathroom
The bed should not block the door, narrow the approach or interfere with nighttime access.
Bed Near the Closet
Open the closet fully before deciding the bed position. Check hinged doors, sliding doors, drawers and clothing access.
Keep Bedside Furniture Minimal
A studio may not need two traditional nightstands. Possible alternatives include one narrow table, wall-mounted shelf, headboard ledge or small C-table.
Move Bedside Lighting Off the Floor
Wall-mounted or other appropriately installed lighting can free bedside space.
Use Bedding to Define the Zone
A restrained palette can help the bed integrate with the rest of the apartment. Try coordinating the bed with the sofa, rug and curtains.
A Calm Bed Usually Works Better Than a Busy One
In a studio you may see the bed from almost everywhere. Strong pattern, many pillows and several blankets can visually dominate the apartment.
Headboard or No Headboard?
Headboard can visually establish the sleeping zone. No headboard can reduce visual weight. A slim upholstered or simple wood headboard can provide definition without becoming a huge wall feature.
Avoid an Oversized Headboard as a Divider
A huge tall headboard may technically separate the bed, but it can also block light and sightlines.
How to Separate the Bed Without Blocking Light
Good options include open shelf, slatted screen, curtain kept open during day, sofa back and low console.
Open Shelves Need Negative Space
A shelf divider should not become a storage wall. Aim for some empty openings so you can see light, depth and the room beyond.
Curtains Should Be Optional, Not Permanent Walls
Keep them open during the day and closed when privacy is useful.
Consider Ceiling Height Before Adding a Curtain Track
A very low room can feel more enclosed with heavy full-height drapery.
Avoid Too Many Dividers
Choose the one boundary that solves the actual problem.
How to Hide the Bed From the Front Door
Block the direct line of sight. From the door, the divider becomes the foreground. Once inside, the bed remains accessible and open.
How to Create a Bedroom Feeling Without Walls
Use dedicated lighting, consistent bedding, headboard, one boundary and clear furniture orientation.
How to Keep a Studio Feeling Bigger
Prioritize long sightlines, continuous floor, clear walkways, fewer tall objects in the middle, lower furniture and visible natural light.
Think in Zones, Not Mini Rooms
Think sleeping zone, living zone, work or dining zone rather than trying to build complete walls around each one.
Protect the Widest Sightline
Avoid blocking the longest visible line through the apartment with tall shelving, wardrobe or opaque divider.
Keep the Window Connected to the Room
Natural light should ideally reach more than just the bed.
Studio Layout for a Long Rectangle
Try: entry → kitchen → living → bed. Use sofa back, rug and low divider to mark transitions.
Studio Layout for a Square Room
Try placing the bed in one corner or along one side and rotate the living furniture away from it.
Studio Layout With an Alcove
Use the alcove for the bed if dimensions and function make sense. Let the architecture do most of the zoning work.
Studio Layout With One Big Window
Avoid placing a solid room divider directly in front of the natural-light source.
Studio Layout With a Dining Table
Place the dining area close to the kitchen if possible.
Studio Layout With a Desk
If you work from home regularly, the desk needs a deliberate zone too. Do not push it into an unusable leftover corner.
Use Painter’s Tape to Test Bed Placement
Mark the mattress footprint and frame footprint on the floor, then add tape for the sofa, walkway and shelf or divider.
Do Not Forget the Bed Frame
Frames can add several inches at sides, large footboard and projecting headboard. Measure the actual furniture.
Walk the Apartment at Night
Imagine getting up from bed, going to the bathroom and walking around furniture in low light. The route should be simple.
Try Making the Bed
If one side sits against the wall, physically test how difficult it will be to fit the sheet, tuck the duvet and reach the corner. Common Studio Apartment Bed Placement Mistakes Putting the bed wherever it fits first. Blocking the only window. Adding a solid divider immediately. Using tall storage in the middle. Ignoring the view from the entry. Blocking closet access. Squeezing the bed beside the sofa. Using too many zoning devices. Creating a bedroom that traps all the natural light. Prioritizing hiding the bed over daily function. A Quick Studio Bed Placement Guide Choose the Far-Wall Zone if: your apartment is long and rectangular. Choose Bed Behind Sofa if: the sofa can float comfortably. Choose Window-Side if: you can keep the window accessible. Choose the Alcove Setup if: the architecture already provides a sleeping nook. Choose the Foot-of-Bed Divider if: you mainly want to block the direct view of the bed. Choose an Open Shelf if: you need separation plus a little storage. Choose the Corner Layout if: floor space matters more than access from both sides. Choose the Curtain-Ready Zone if: you want optional privacy. Use the Furniture-First Formula if: you are rearranging the entire studio. The Simplest Studio Bed-Zoning Formula Start with: one logical bed wall + one clear walkway + one living-room boundary. That boundary might be sofa back, rug or partial shelf. You usually do not need much more. Final Thoughts A studio apartment does not need the bed to disappear. It needs the bed to feel like it belongs somewhere. Start with placement before buying dividers.