9 Gallery Wall Ideas for Small Apartments That Feel Curated, Not Cluttered
Explore 9 gallery wall ideas for small apartments, from tight grids and picture ledges to personal photo displays and renter-conscious art arrangements.
In This Guide
A gallery wall can make a small apartment feel more personal, but it can also become visually overwhelming when every frame competes for attention. The secret is not to use fewer interesting pieces or make everything match. It is to give the collection a clear structure.
A well-planned gallery wall can bring personality to the space above a sofa, make a narrow wall feel intentional, or turn a collection of prints and photographs into a meaningful focal point. The right arrangement also helps the art feel connected to the room instead of looking like a collection of frames squeezed onto whatever wall was available.
These nine gallery wall ideas for small apartments explore different ways to arrange artwork, photographs, frames, and small decorative objects. Each approach has a distinct visual effect, so you can choose one that suits your wall, furniture, and decorating style.
1. The Centerpiece-First Gallery Wall
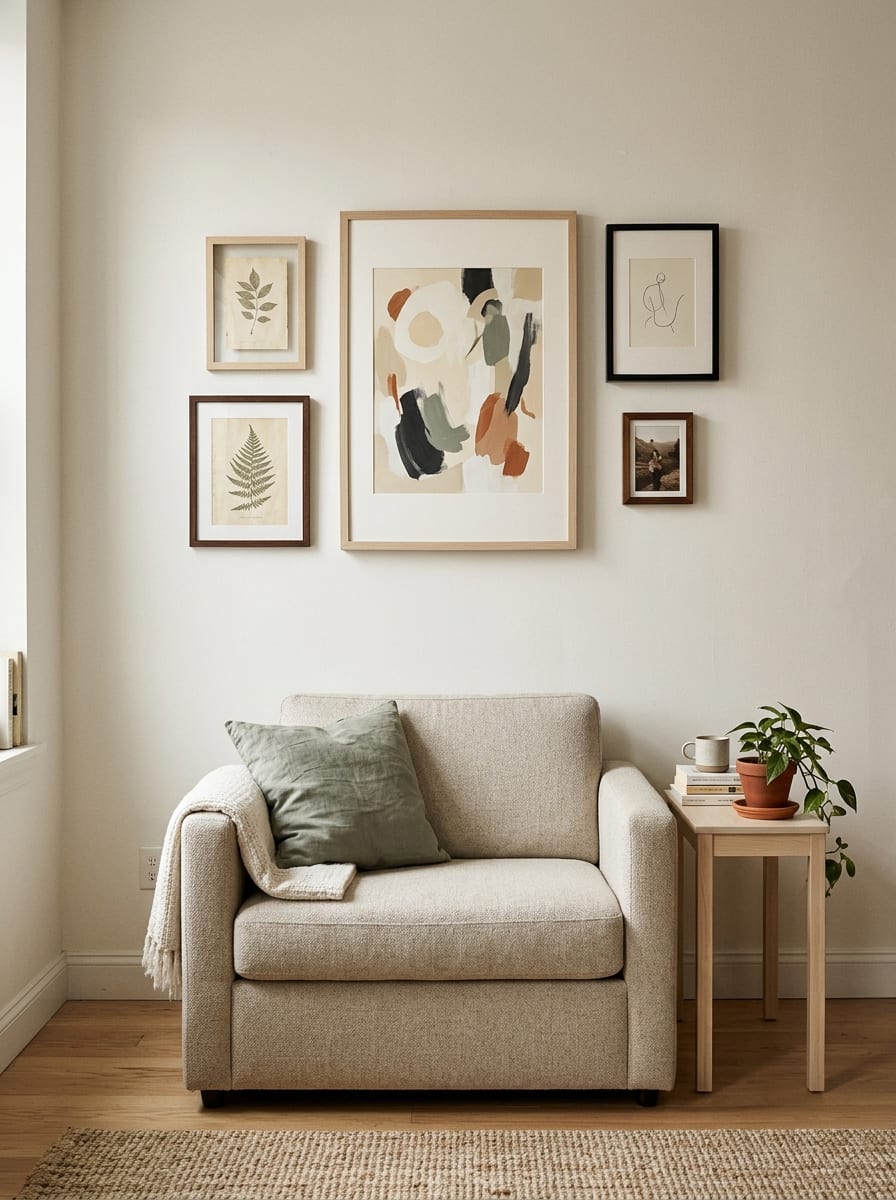
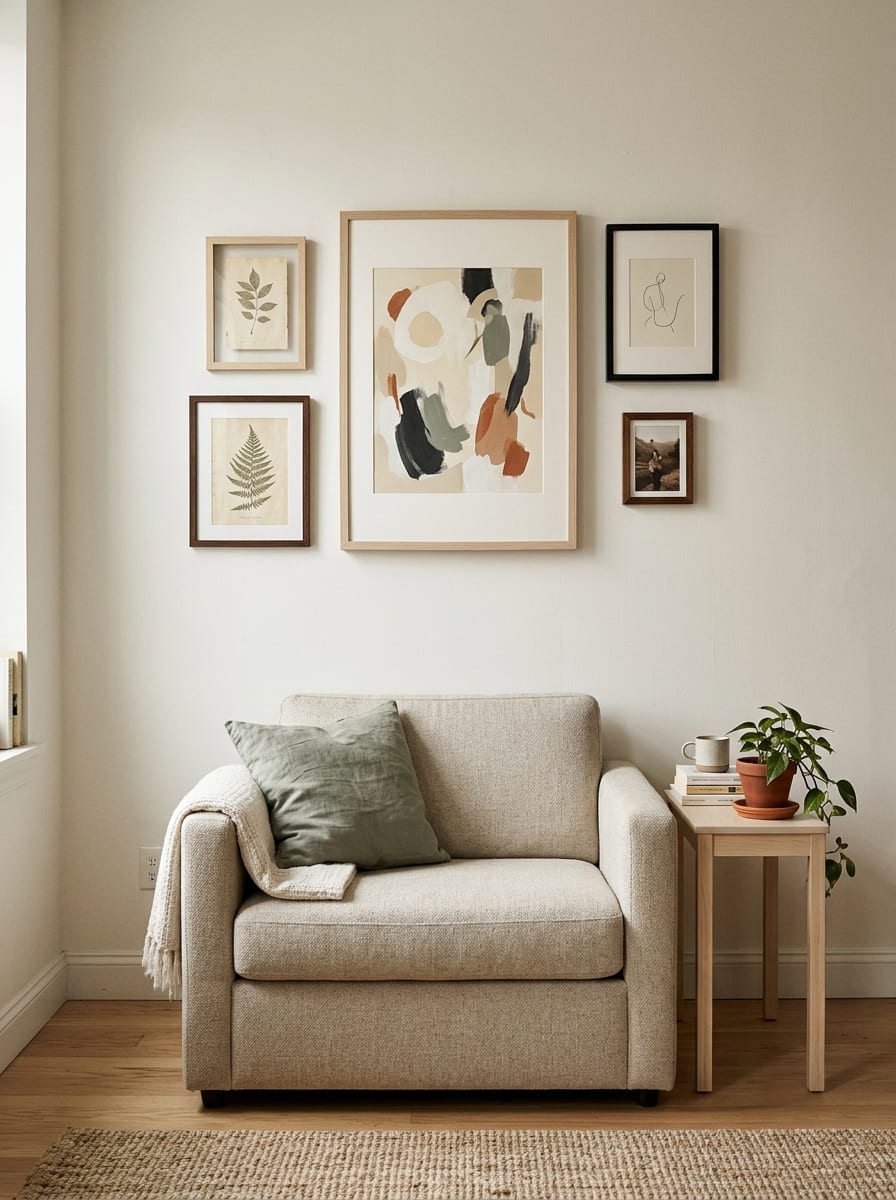
Start with one artwork that establishes the mood, then arrange smaller pieces around it.
Choose a larger print, an abstract painting, a botanical illustration, or a photograph that you genuinely want to look at every day. Place it near the center of the arrangement and build outward with smaller frames. The supporting pieces can vary in subject, but a shared color or visual theme helps the collection feel connected.
This approach works especially well above a compact console, a small loveseat, or a short stretch of living-room wall. The central artwork gives the eye somewhere to land, preventing the arrangement from feeling like a random assortment of pictures.
Before hanging anything, arrange the frames on the floor or cut paper templates to approximate their sizes. Move the smaller pieces around until the overall silhouette feels balanced.
Small-space tip: Make the arrangement fit the wall and furniture beneath it. A gallery wall does not need to extend from corner to corner to make an impact.
2. The Tight-Grid Gallery
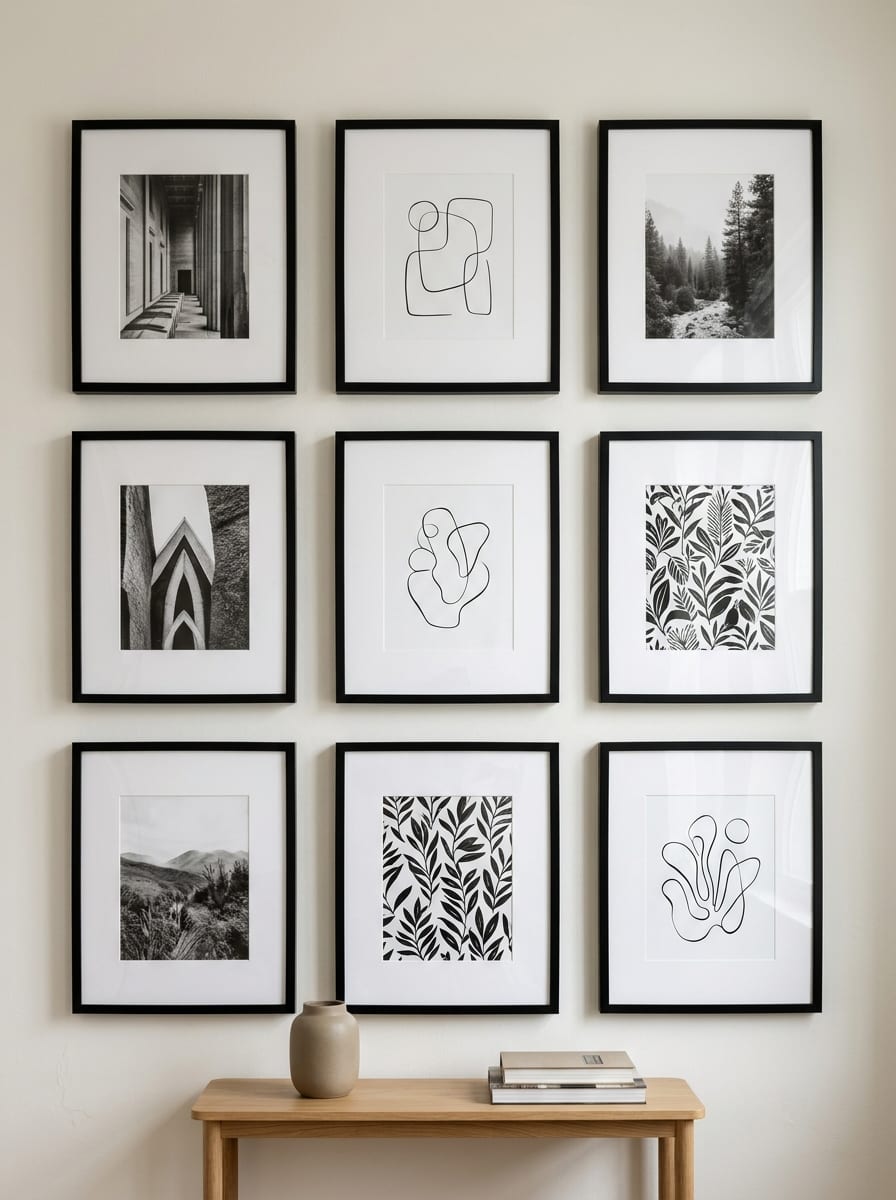
For a cleaner, more architectural look, arrange similarly sized frames in a deliberate grid.
Use matching frame finishes, consistent gaps, and artwork with a related visual language. You might choose black-and-white photography, line drawings, architectural prints, or a collection of colorful illustrations with a consistent background.
A grid is particularly useful when a small room already contains patterned cushions, visible storage, colorful furniture, or several competing textures. Its regular structure introduces order without requiring the artwork itself to be plain.
Measure the arrangement before hanging it. Start by deciding how many columns and rows will fit the wall, then check the full outside dimensions. A smaller, carefully spaced grid is often more effective than forcing too many frames into the available area.
Small-space tip: Use the grid to create a strong visual rectangle above a desk or narrow console. Keep enough surrounding wall visible so the arrangement does not feel squeezed into the corner.
3. The Picture-Ledge Layer
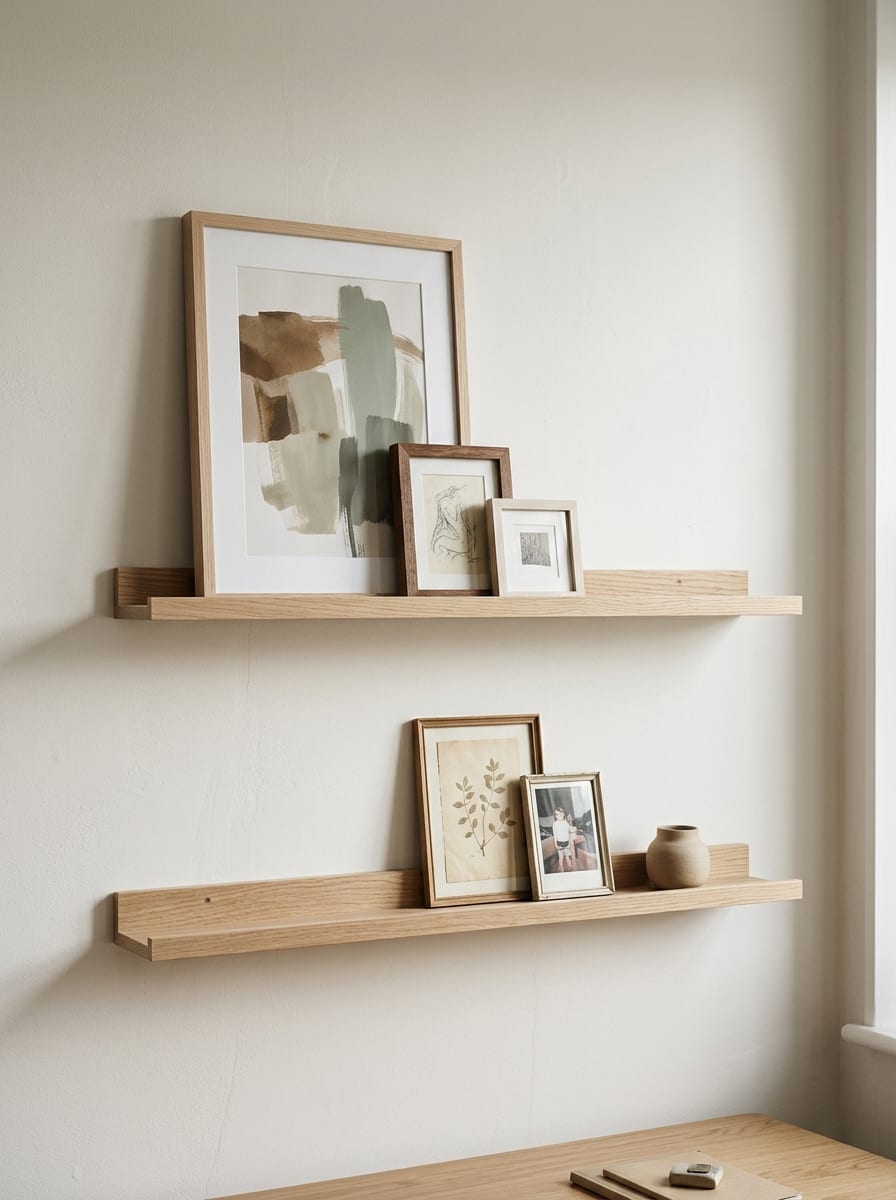
If you like changing artwork regularly, use one or two picture ledges instead of permanently fixing every frame to the wall.
Lean framed prints against the wall, placing the tallest pieces toward the back and smaller frames in front where they remain visible. A restrained combination of artwork, a small framed photograph, and one lightweight decorative object can create a layered gallery effect without requiring a large collection.
Picture ledges are useful for renters and anyone who likes refreshing a room seasonally. You can swap a print, add a new photograph, or change the color story without redesigning the entire wall.
Keep the arrangement shallow and avoid stacking so many frames that the artwork becomes difficult to see. Check the ledge’s rated capacity, secure it according to the manufacturer’s instructions, and keep heavy objects away from the edge.
Small-space tip: A single ledge can be enough above a desk, bed, or narrow console. Multiple rows work best when the wall has enough vertical room to keep the display from crowding nearby furniture.
4. The One-Color Frame Mix
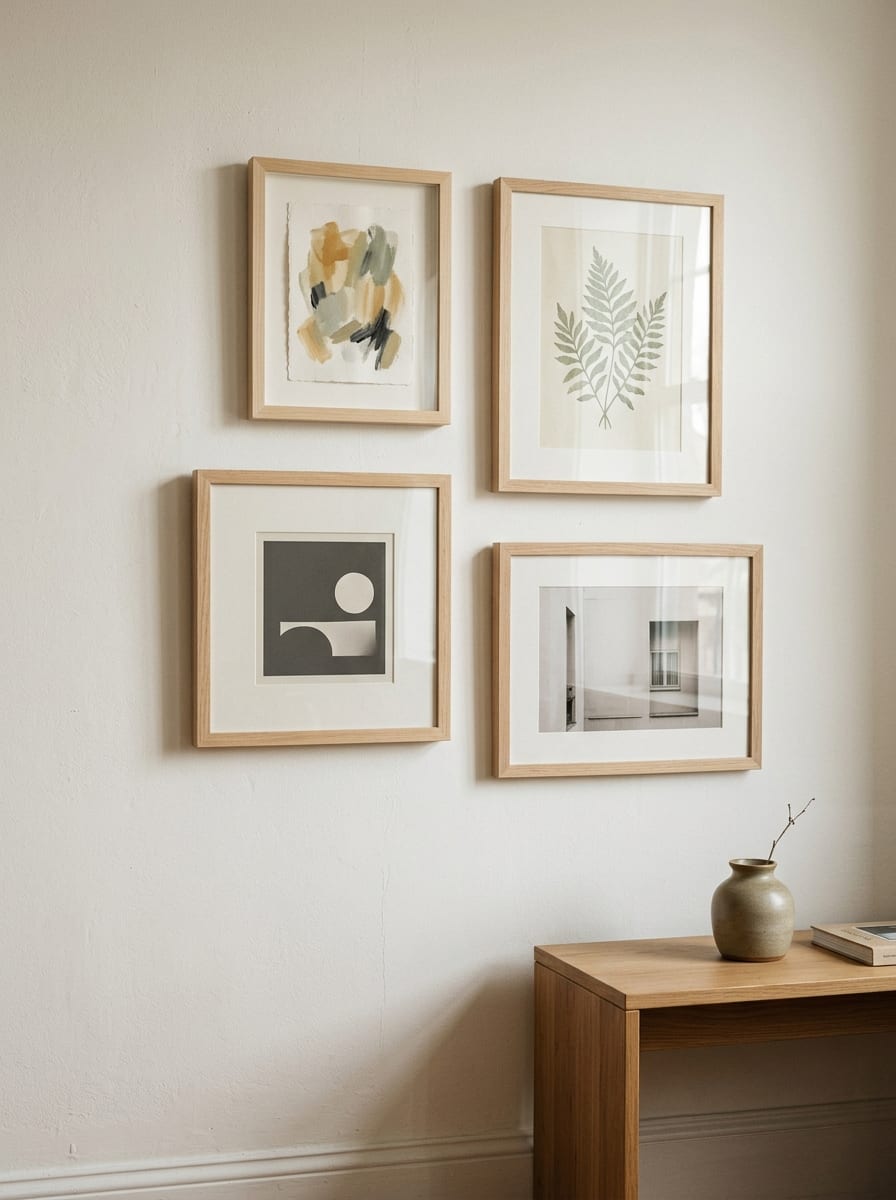
Mix frame shapes, sizes, and artwork styles while keeping the frames within one color family.
Black frames can create a crisp, graphic collection. Natural wood can soften a room with warm flooring or wooden furniture. White frames can help delicate artwork blend into a pale wall, while a single muted color can make an eclectic collection feel deliberate.
The point is not to make every print identical. A family photograph, a graphic poster, and an abstract piece can sit together when a consistent frame color creates a visual connection.
This approach is especially useful if you have collected art over time and do not want to replace everything to achieve a coordinated look. Work with the frames you already own, then fill any gaps with pieces that complement the collection.
Small-space tip: If your apartment already has strong wood tones or black accents, repeat one of those finishes in the frames. This creates continuity without adding another major color to the room.
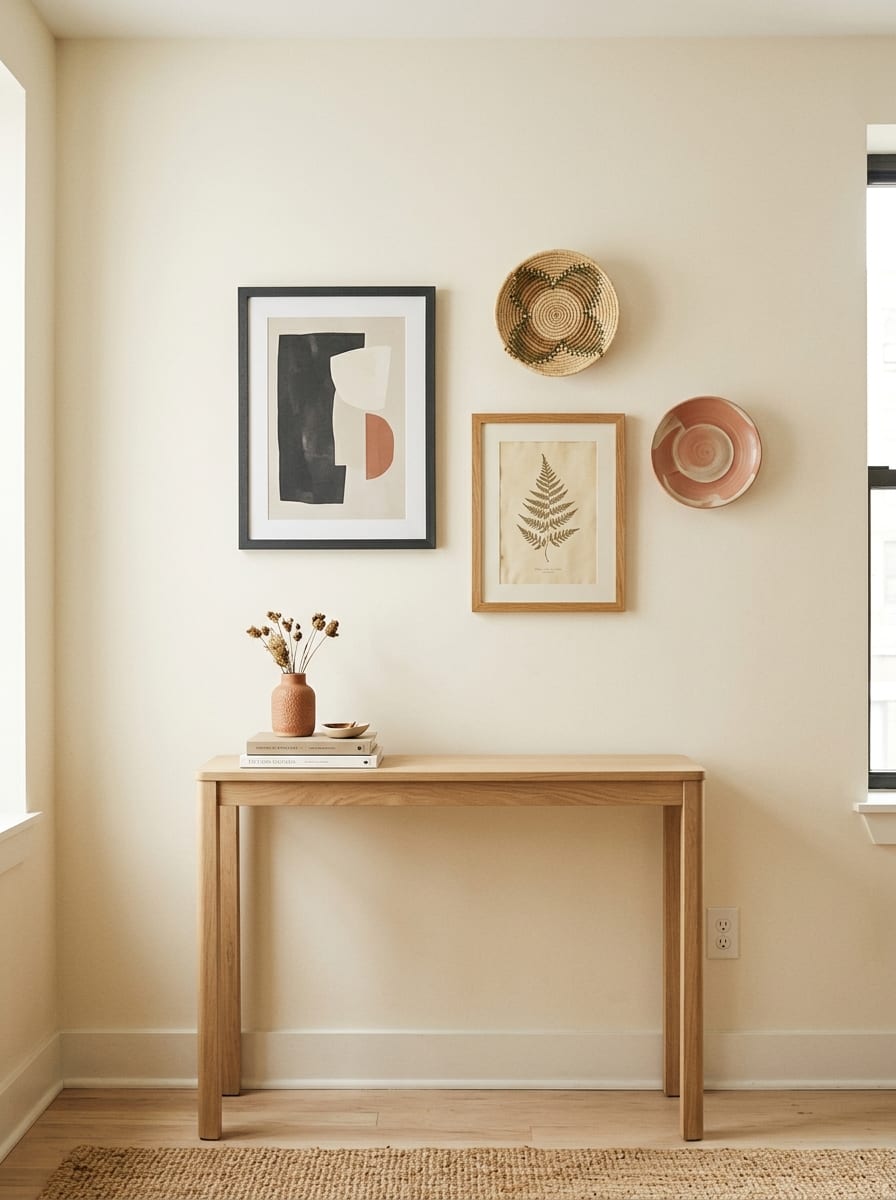
5. The Art-and-Object Gallery
Combine framed artwork with a few carefully chosen three-dimensional pieces for a gallery wall with more texture.
A small woven wall piece, a shallow decorative plate, a lightweight sculptural object, or a compact wall basket can break up a sequence of flat frames. Choose objects that relate to the art through color, material, subject, or shape.
This arrangement works well in rooms that feel a little too flat or where most of the decor consists of framed prints. The contrast between flat artwork and dimensional objects makes the wall more interesting without requiring a large number of pieces.
Plan the heavier or protruding objects carefully. They need secure mounting, and they should not project into a narrow walkway or sit where a door could strike them. In a small apartment, a few dimensional pieces usually work better than filling every gap.
Small-space tip: Keep the dimensional objects concentrated within the overall composition. Scattering them too far apart can make the gallery feel disconnected.
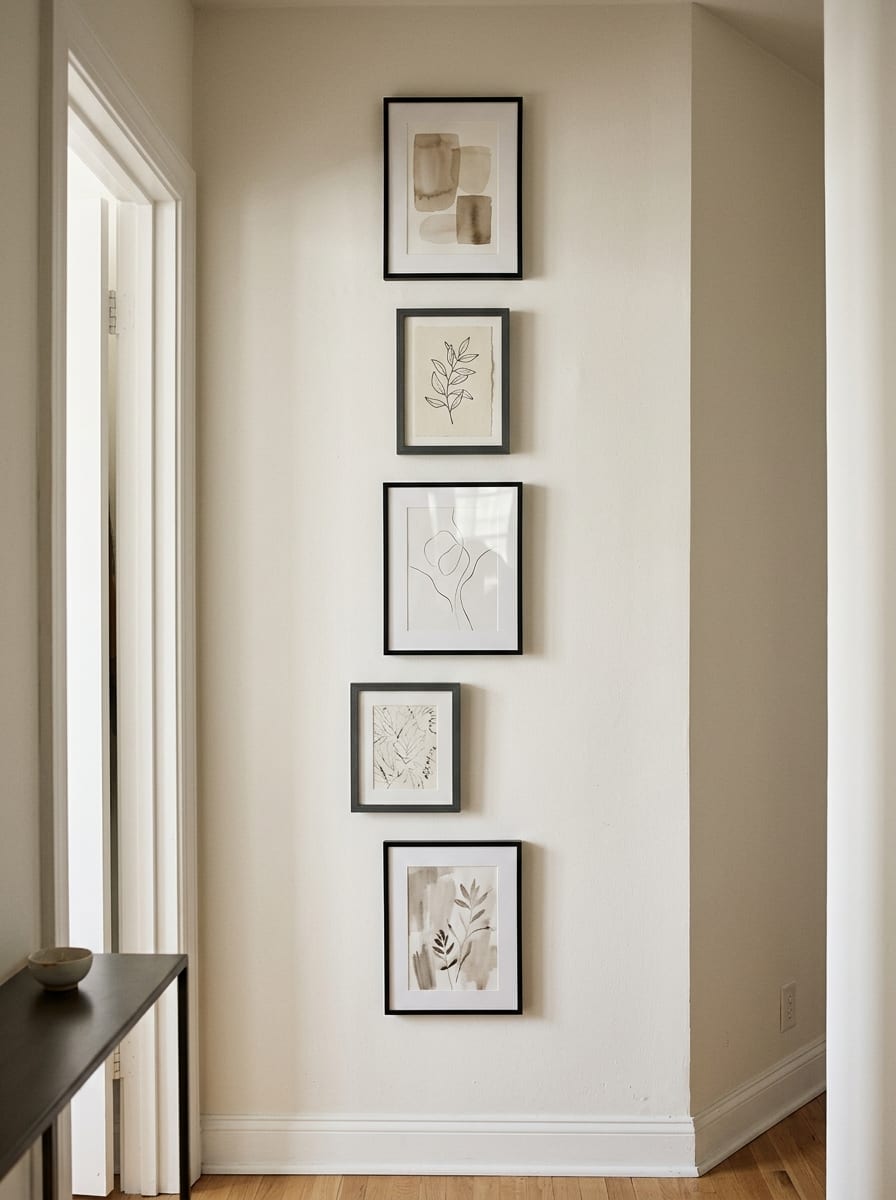
6. The Vertical Gallery for Narrow Walls
Treat a narrow strip of wall as a deliberate vertical display rather than trying to force a wide gallery onto it.
Stack a series of small and medium frames in a loose vertical arrangement. You can use similar frames for a more formal appearance or vary the sizes while keeping their centers aligned along an invisible vertical line.
This works beside a doorway, between a window and a corner, or on a short wall near a bedroom entrance. It makes use of vertical space while leaving the room’s main furniture arrangement untouched.
Check the full height of the proposed display before hanging. Account for nearby switches, trim, door swings, and the height of any furniture below it. If the wall is extremely narrow, fewer pieces with enough breathing room will look more intentional than a crowded stack.
Small-space tip: A vertical gallery can visually connect two levels of a room, such as a console below and a wall light above, provided the arrangement does not interfere with the fixture or its clearance requirements.
7. The Sofa-Anchored Gallery
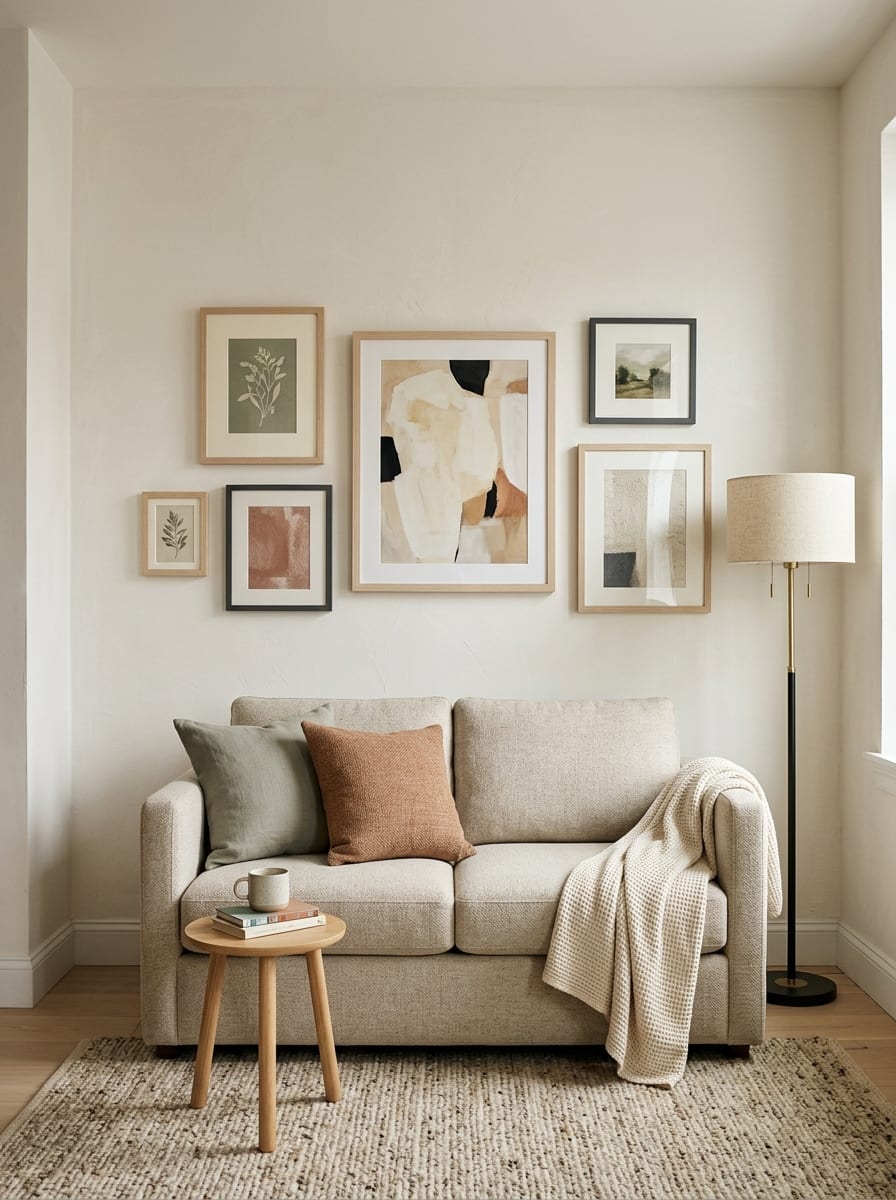
Use the sofa as the visual anchor for a gallery wall in the living room.
Rather than treating the artwork as an independent decoration, relate its width and overall shape to the furniture below. A wider arrangement can sit above a longer sofa, while a compact cluster can work above a loveseat. The gallery should feel connected to the seating zone without overwhelming it.
Mixing a larger central frame with smaller supporting pieces can create a relaxed composition. Alternatively, a row of similarly sized prints can give the room a more orderly appearance.
Lay out the complete arrangement before hanging it and evaluate it from the main seating position. Check that the frames are not so high that they appear detached from the sofa, but leave sufficient clearance above the back cushions.
Small-space tip: Do not automatically fill the entire wall behind the sofa. A composition that relates to the sofa’s width often feels more intentional than one that stretches across every available inch.
8. The Personal Timeline Wall
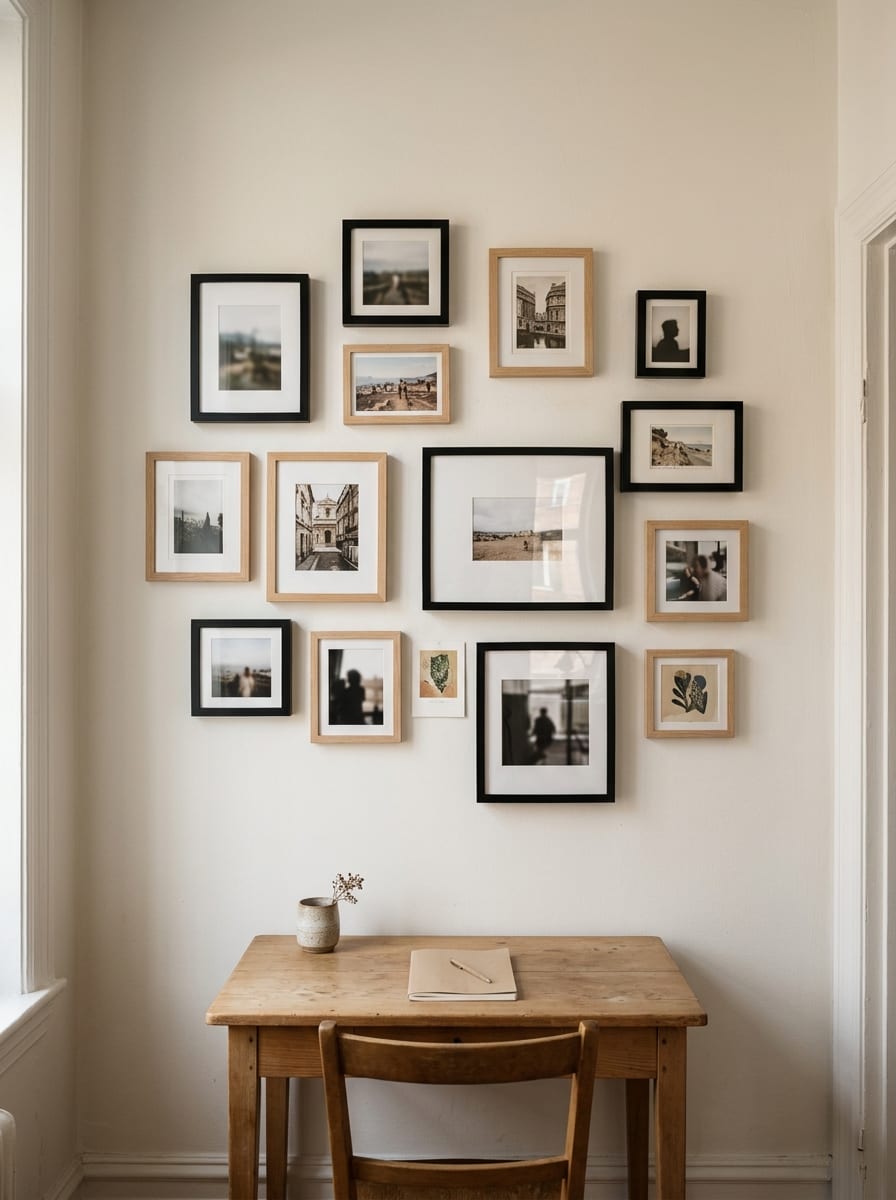
Build a gallery around meaningful photographs, travel memories, family images, postcards, or artwork collected during different stages of life.
The pieces do not have to match perfectly. Give them a common thread through a consistent frame finish, a limited color palette, similar matting, or a clear arrangement. You can also mix personal photographs with a few art prints to keep the display from looking like a formal photo board.
This approach is especially effective in apartments where the decor needs to feel personal without relying on large statement furniture or expensive decorative objects.
Edit the collection before hanging. Choose images that matter to you, and avoid adding a frame simply because there is an empty gap. Leave room for the arrangement to evolve as you collect new memories.
Small-space tip: A small, thoughtfully edited collection can be more powerful than covering an entire wall. Let the images tell a story instead of treating every available space as somewhere to fill.
9. The Renter-Friendly No-Drill Gallery
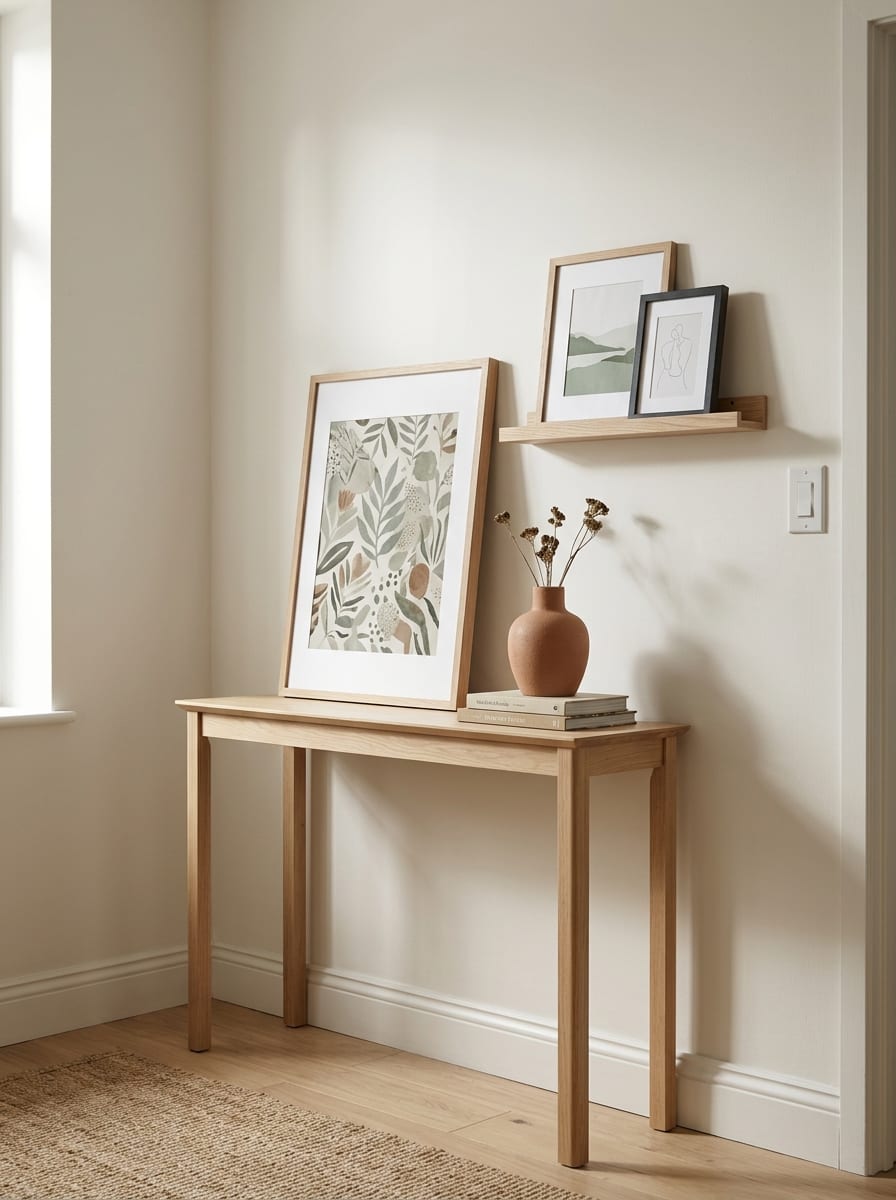
Create a gallery effect without automatically committing to a wall full of holes.
Depending on your wall surface, artwork weight, lease conditions, and the product instructions, you might use suitable removable picture-hanging strips, a freestanding leaning frame arrangement on a stable shelf, or a picture ledge installed with an approved mounting method. Another option is to lean a larger framed print on a secure console and arrange smaller pieces nearby.
There is no single no-drill method that works for every wall. Removable products have specific weight limits and surface requirements, and some can damage paint or wallpaper when removed. Test and follow the manufacturer’s guidance, and get permission before making changes if your rental agreement requires it.
Keep heavier artwork low and secure. Avoid hanging anything fragile above a bed or seating area unless the mounting system is appropriate for the load and conditions.
Small-space tip: If you cannot safely mount several frames, one large leaning artwork paired with a small picture ledge can deliver a similar collected look with fewer wall attachments.
How to Plan a Gallery Wall Before Hanging It
A little planning can prevent unnecessary holes and make the finished arrangement feel more cohesive.
Start with the wall’s purpose
Decide what the gallery should do. It might anchor a sofa, bring interest to a hallway, add personality above a desk, or make a blank bedroom wall feel finished. The location should determine the arrangement rather than the other way around.
Measure the complete arrangement
Measure the available wall area and include the outside edges of every frame, not just the artwork itself. Check nearby furniture, trim, switches, windows, and door swings. As a starting point, a gap of roughly 2–3 inches between frames can work for many arrangements, but smaller frames, narrow walls, and denser compositions may need different spacing. (Tip: Calculate precise spacing, centerlines, and nail coordinates with our interactive Picture Hanging Calculator).
Choose one connecting element
Your artwork does not need to match, but the collection usually benefits from at least one connection. This could be a frame color, a recurring accent color, a shared subject, a similar mat, or a consistent visual style.
Test the layout first
Lay the frames on the floor or make paper templates and tape them to the wall with a suitable low-tack product after checking the surface. Photograph the layout from the front and review it from the doorway and the main seating position. Adjust the arrangement before making permanent holes.
Keep installation safe
Use mounting hardware suited to the wall type and the weight of each piece. Follow the manufacturer’s instructions for anchors, adhesive strips, ledges, and frames. Avoid mounting artwork where it blocks ventilation, covers important controls, obstructs a walkway, or creates a hazard above a bed.
Gallery Wall Mistakes That Can Make a Small Room Feel Cluttered
- Using too many unrelated pieces: A varied collection can work, but it needs a visual connection or a clear arrangement.
- Ignoring the furniture beneath it: The gallery may feel disconnected if its scale does not relate to the sofa, desk, or console.
- Leaving inconsistent gaps by accident: Uneven spacing can make an otherwise good collection look unfinished. Intentional variation is different from accidental misalignment.
- Filling every inch of wall: Empty space around the gallery helps define its shape.
- Choosing frames before checking the layout: The frame sizes determine the final dimensions, so test the complete arrangement first.
- Assuming removable hardware is always renter-safe: Product limits, wall finishes, paint condition, and lease rules all matter.
How to Choose the Right Gallery Wall Style
If you prefer a clean and orderly room, start with The Tight-Grid Gallery or The One-Color Frame Mix. For a more collected and personal look, try The Centerpiece-First Gallery Wall or The Personal Timeline Wall. A narrow wall may suit The Vertical Gallery, while The Picture-Ledge Layer is useful if you want to change your artwork frequently.
For more small-space styling inspiration, explore our small living room decor ideas and small apartment decorating ideas.
Conclusion
A successful gallery wall is not simply a collection of attractive frames. It is an arrangement that fits the wall, relates to the furniture, and reflects the people who live there.
Start with the layout that suits your space, choose one or two elements to connect the pieces, and test the arrangement before hanging anything. Whether you prefer a tight grid, layered picture ledges, a personal photo collection, or a renter-conscious display, a thoughtful gallery wall can make a small apartment feel more individual without making it feel crowded.