10 Christmas Gift-Wrapping Station Ideas for Small Apartments
Wrap holiday presents without taking over the living room. 10 small apartment gift wrapping station ideas—rolling carts, hanging closet organizers, and door racks.
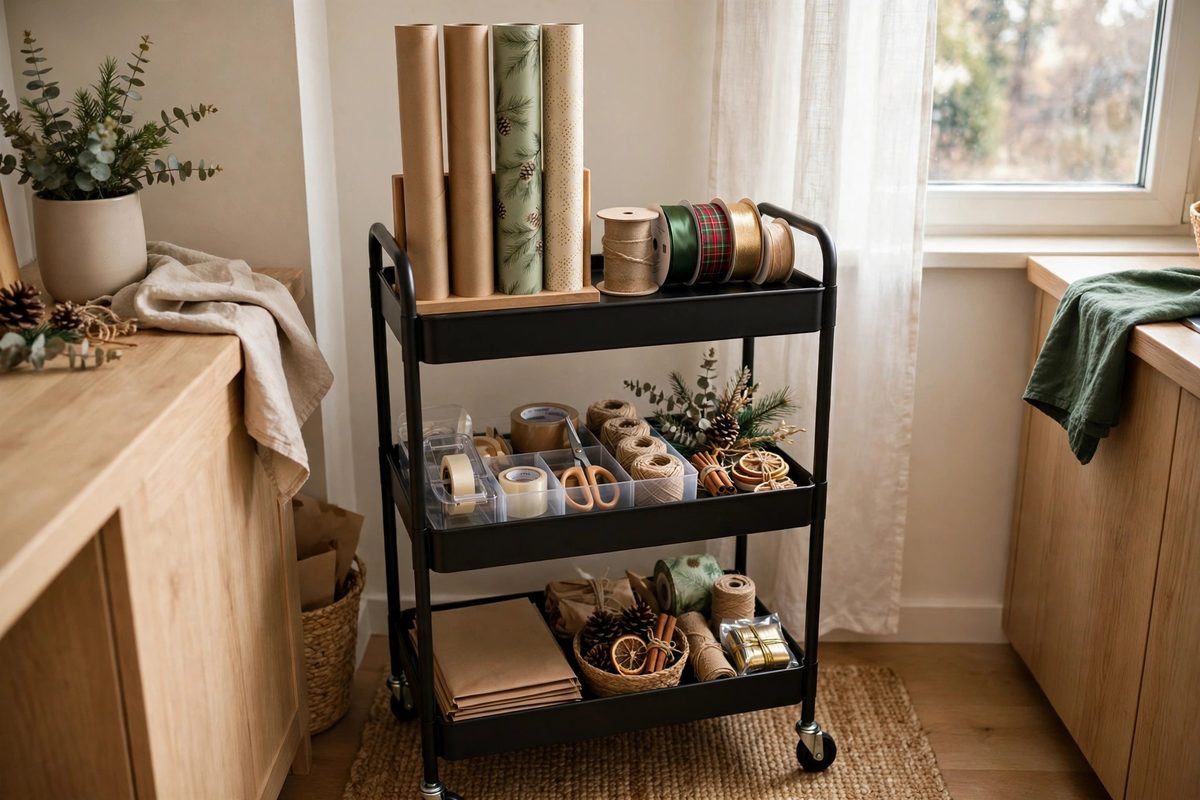
Compact gift wrapping station in a small apartment with paper rolls, ribbon, and tape organized on a cart
In This Guide
Gift wrapping in a small apartment usually means the same chaos every December. Rolls of paper fall over in a closet, ribbon tangles in a drawer, scissors disappear, and wrapping happens on the bed because there is no clear surface. By Christmas Eve, the apartment looks like a paper factory exploded.
A wrapping station fixes this by giving every supply one home and giving you one surface to work on, even if that surface is temporary. The best station for a small apartment is not a dedicated room. It is a cart, a door, or a closet zone that can be set up in November and packed away in January without a trace.
Start by gathering everything you own: paper rolls, gift bags, tissue, ribbon, tape, scissors, tags, and boxes. Most people find they already have enough paper for two Christmases, and the real problem is storage, not supplies. For related holiday organization, see narrow hallway mirror ideas and small kitchen food container storage ideas, plus Christmas decor storage ideas for small apartments for packing it all away after the holidays.
These 10 ideas fit wrapping stations into closets, doors, carts, and corners, so you can wrap calmly even in a studio.
1. A Rolling Cart Wrapping Station
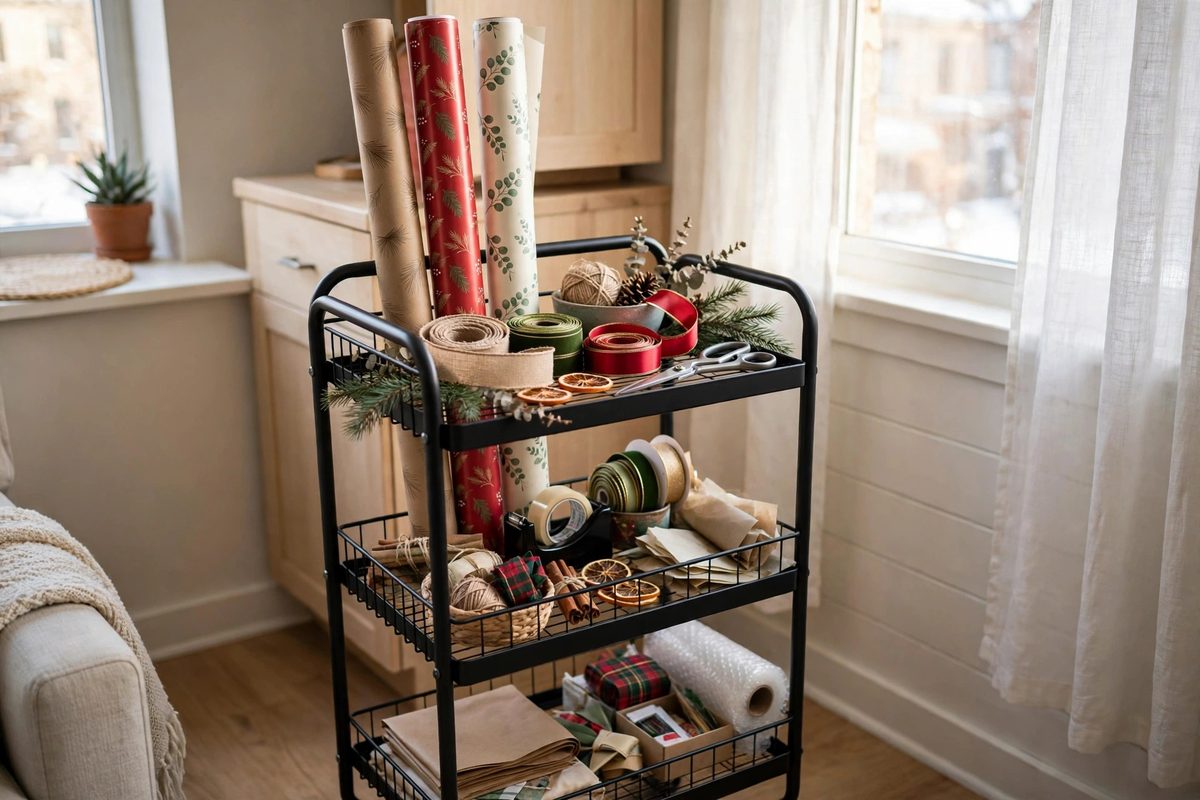
A three tier rolling cart is the most flexible wrapping station for a small apartment. Paper rolls stand upright in the bottom tier or lean in a tall bin on the cart, ribbon and tape live in the middle, and scissors and tags go on top. When you need to wrap, roll the cart to a table. When you are done, roll it into a closet.
Rolling carts cost 30 to 60 dollars, and most are about 17 by 12 inches, so they fit in a standard closet. Choose one with locking wheels so it stays put while you pull paper. A cart with a removable top tray is useful, since the tray can become your wrapping surface on a small table.
How to make it work
Keep the cart stocked all December, not just on wrapping day, so you never hunt for tape mid gift. Put the heaviest items, like paper rolls, on the bottom tier to keep the cart stable. If the cart lives in a closet, measure the closet door width first, since some carts are wider than narrow closet openings.
2. An Over Door Wrapping Organizer
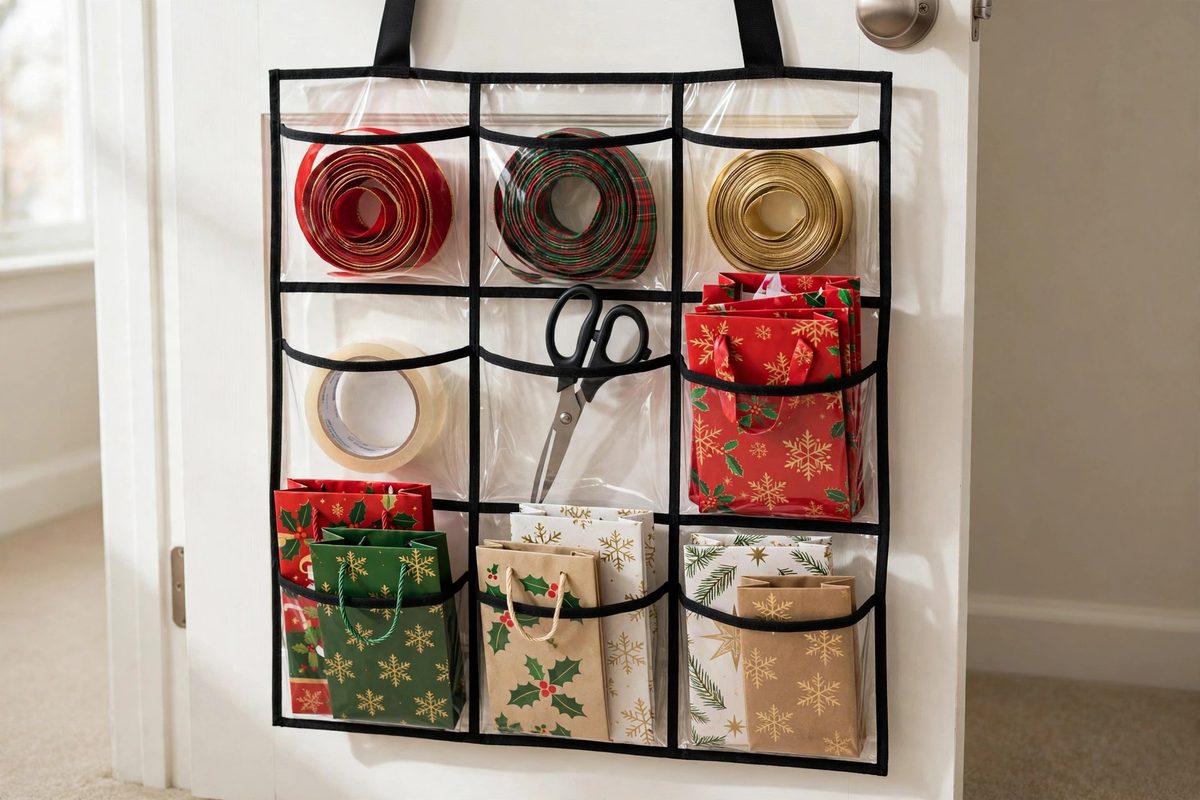
An over the door organizer uses the back of a closet or bedroom door, space that is otherwise completely wasted. Clear pocket organizers hold ribbon, tape, scissors, tags, and small gift bags, while a tall pocket or a hook holds one or two paper rolls.
Over door organizers cost 15 to 30 dollars and need no tools, which makes them ideal for renters. Choose one with clear pockets so you can see supplies without opening every pocket, and check that the door still closes fully when the organizer is loaded.
How to make it work
Put the most used items, tape and scissors, in pockets at hand height, and lighter items, like tissue paper, higher up. Do not overload the organizer: a door that will not close properly will damage hinges over time. If the door is a hollow core door, keep the total weight under 15 pounds.
3. A Closet Door Station
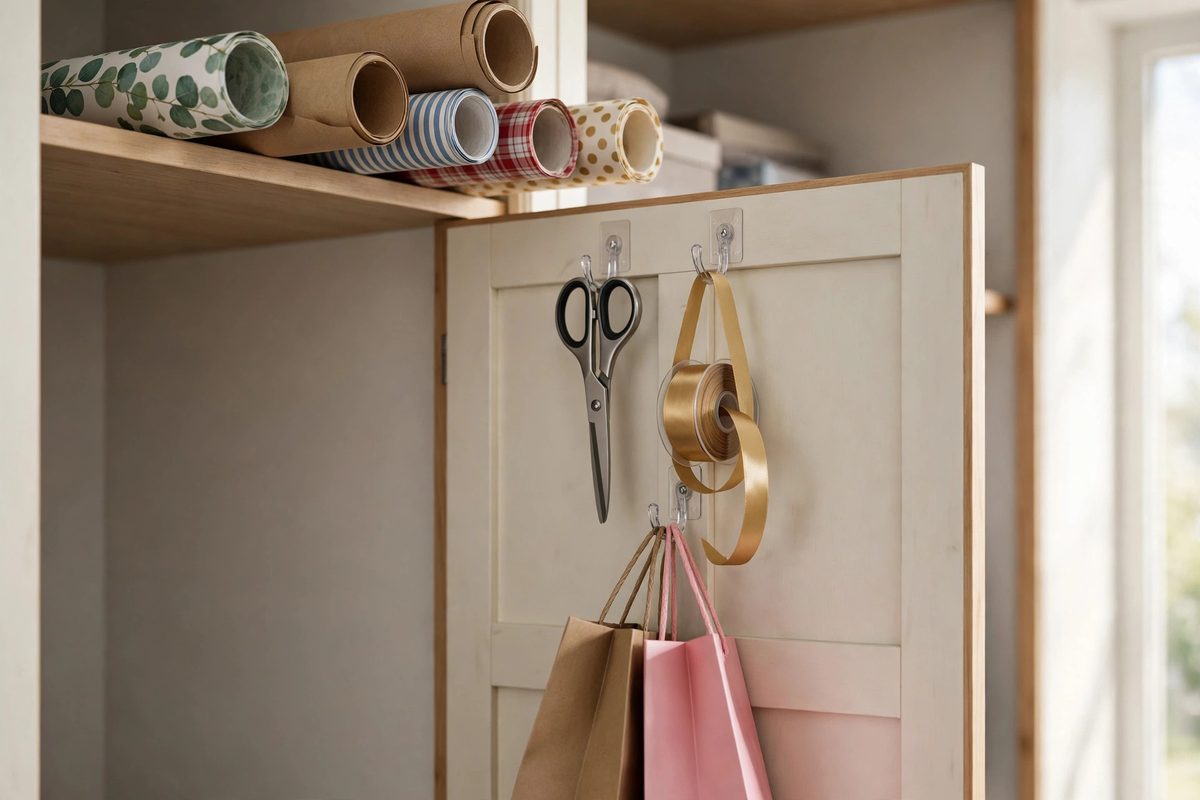
If you have a closet with a door that opens fully, the inside of that door plus a shelf in the closet can become a semi permanent wrapping station for December. Hooks on the door hold scissors, ribbon, and bags, while a shelf holds paper rolls horizontally.
This setup costs almost nothing if you already have adhesive hooks, about 10 dollars for a set. It works because the station is hidden when the door is closed, so the apartment does not look like a wrapping workshop all month.
How to make it work
Use adhesive hooks rated for at least 3 pounds each, and remove them in January with a hair dryer to soften the adhesive, so paint does not peel. Store paper rolls horizontally on a shelf, not standing up, since horizontal rolls do not fall over when the door opens. Keep a small trash bag in the closet for paper scraps, so cleanup is part of the station, not an afterthought.
4. An Under Bed Wrapping Bin
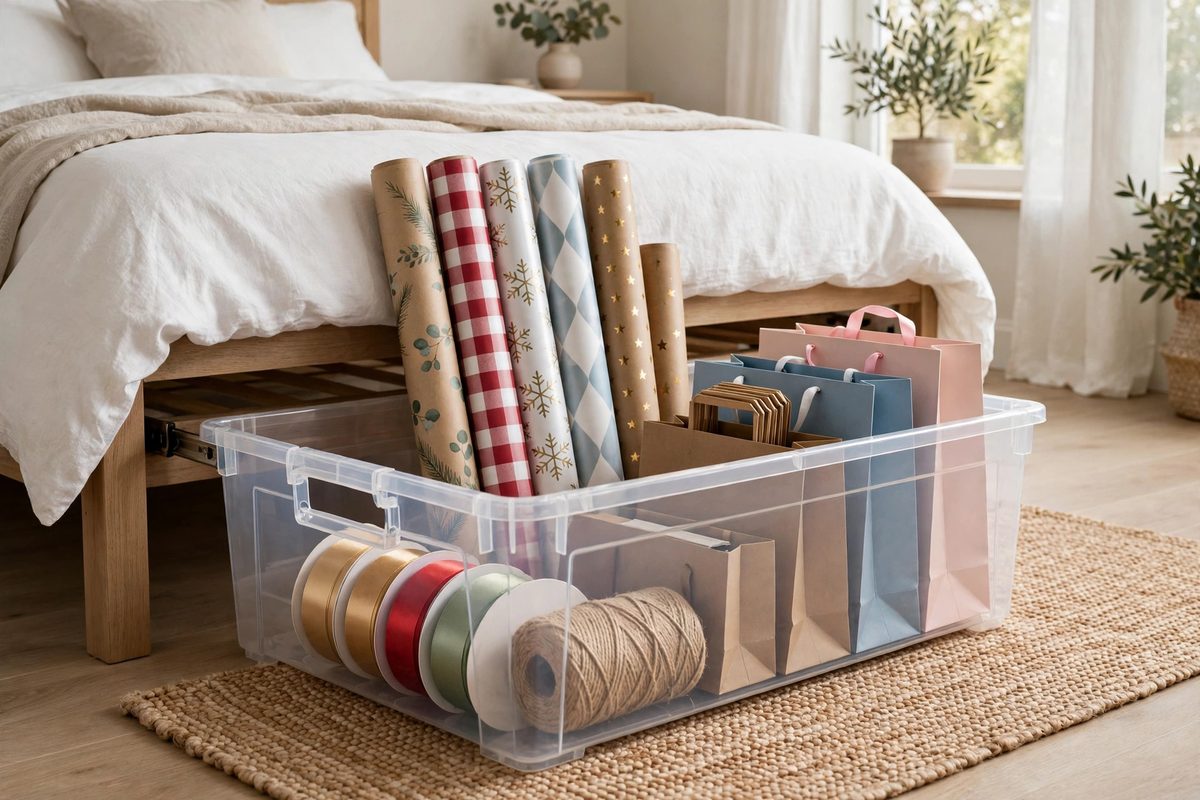
Under bed space is ideal for wrapping supplies, since paper rolls are long and flat and fit perfectly in a shallow under bed bin. A bin about 40 inches long holds standard 30 inch paper rolls with room for ribbon and bags beside them.
Under bed bins cost 20 to 40 dollars, and clear bins let you see contents without pulling the bin out. Choose a bin with wheels if your bed is low, since dragging a full bin across carpet is awkward.
How to make it work
Roll paper in a tall tube or a wrapping paper storage bag inside the bin, so rolls do not unroll and tangle. Keep scissors and tape in a small zip pouch inside the bin, so the whole station travels together when you pull it out. Slide the bin back under the bed after each wrapping session, so the room stays tidy between sessions.
5. A Wall Mounted Paper Roll Holder
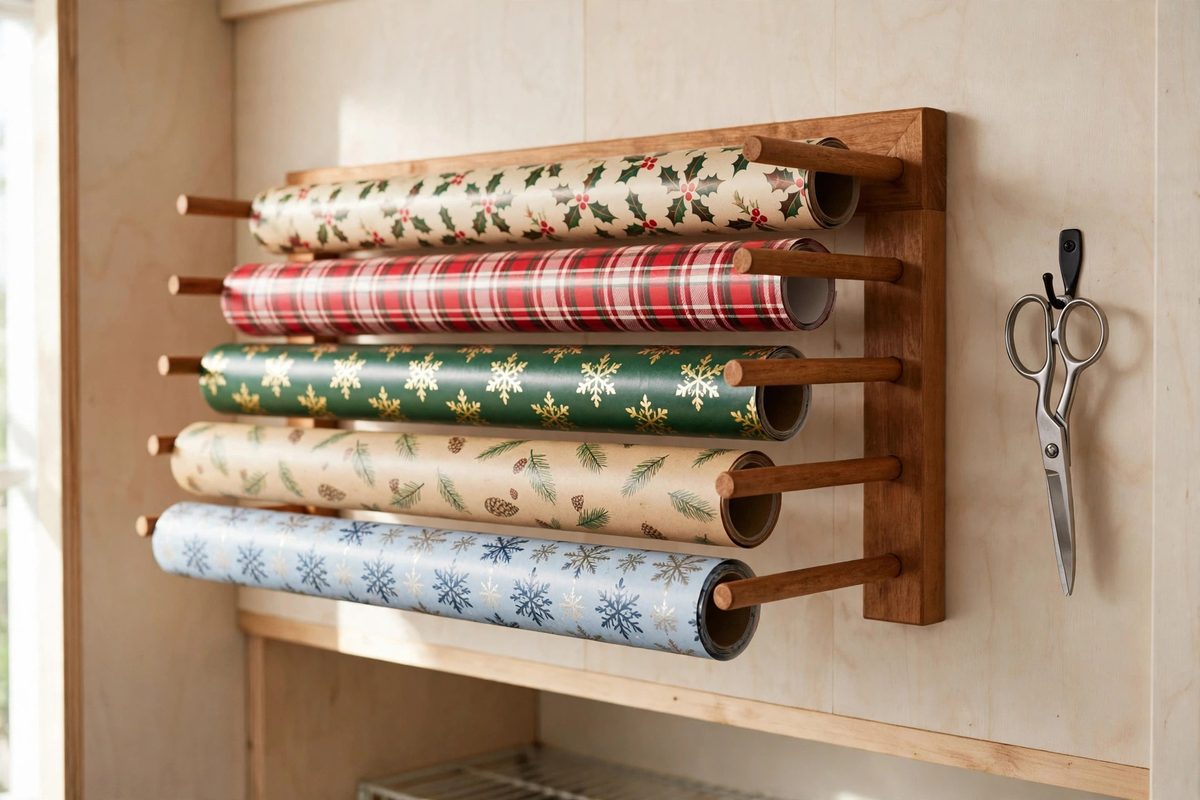
A wall mounted paper roll holder, like a horizontal dowel or a set of brackets, keeps rolls visible, accessible, and off the floor. Mounted inside a closet or on a laundry room wall, it turns a blank wall into a wrapping supply rack.
Wall holders cost 15 to 35 dollars. A simple wooden dowel on brackets holds two to three rolls, and you pull paper directly from the roll without removing it. Mount the holder at waist height so you can cut paper comfortably.
How to make it work
Space brackets about 24 inches apart so rolls do not sag in the middle. Keep a pair of scissors on a hook beside the holder, since the holder only works if cutting is easy too. If you rent and cannot drill, a tension rod inside a closet frame holds rolls the same way with no holes.
6. A Tension Rod in the Closet
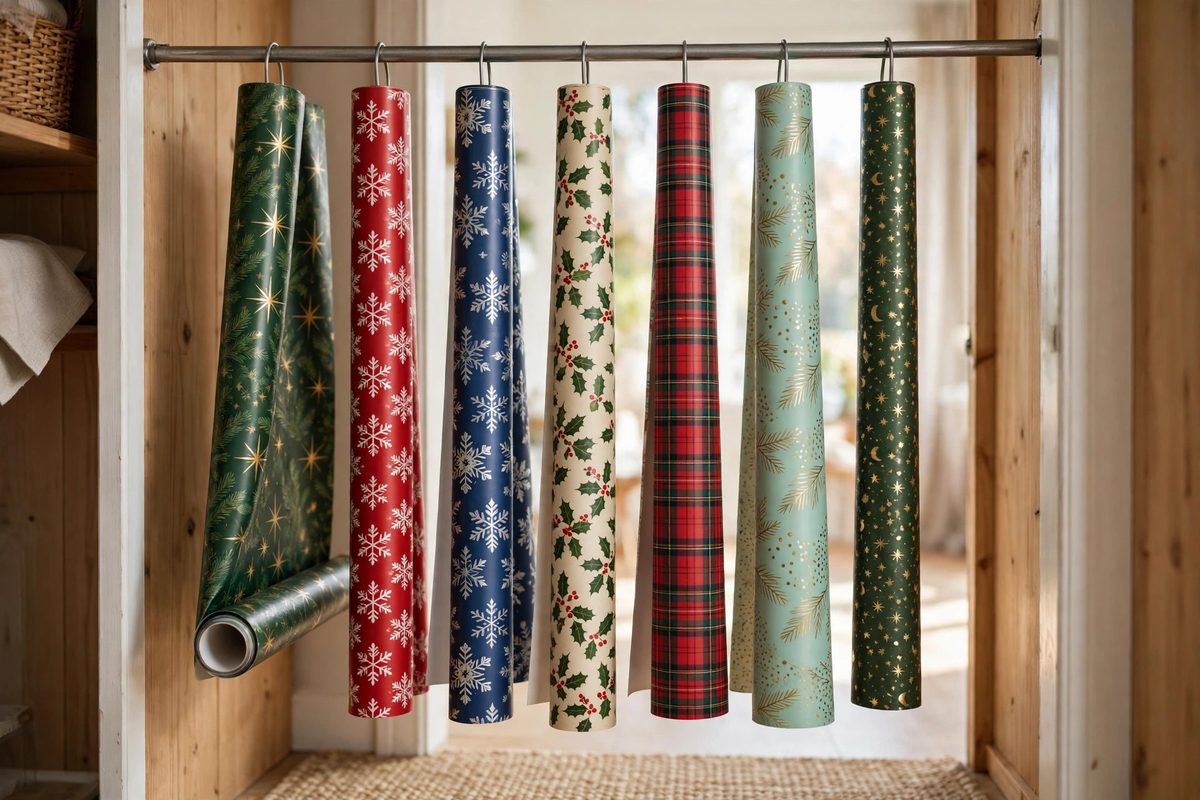
A tension rod across a closet, or between two shelves, creates an instant paper roll holder for under 10 dollars. Slide paper rolls onto the rod like curtains, and they hang neatly, visible, and easy to pull from.
This works best in a closet at least 24 inches wide, where rolls can hang without touching the walls. Use a rod rated for the span, since paper rolls are heavier than they look, especially when several hang together.
How to make it work
Put the most used paper on the outside of the rod, so you do not have to move other rolls to reach it. Add a second tension rod lower down for ribbon spools, which slide onto a rod the same way. Remove the rods in January and the closet returns to normal with no marks.
7. A Desk Corner Wrapping Zone
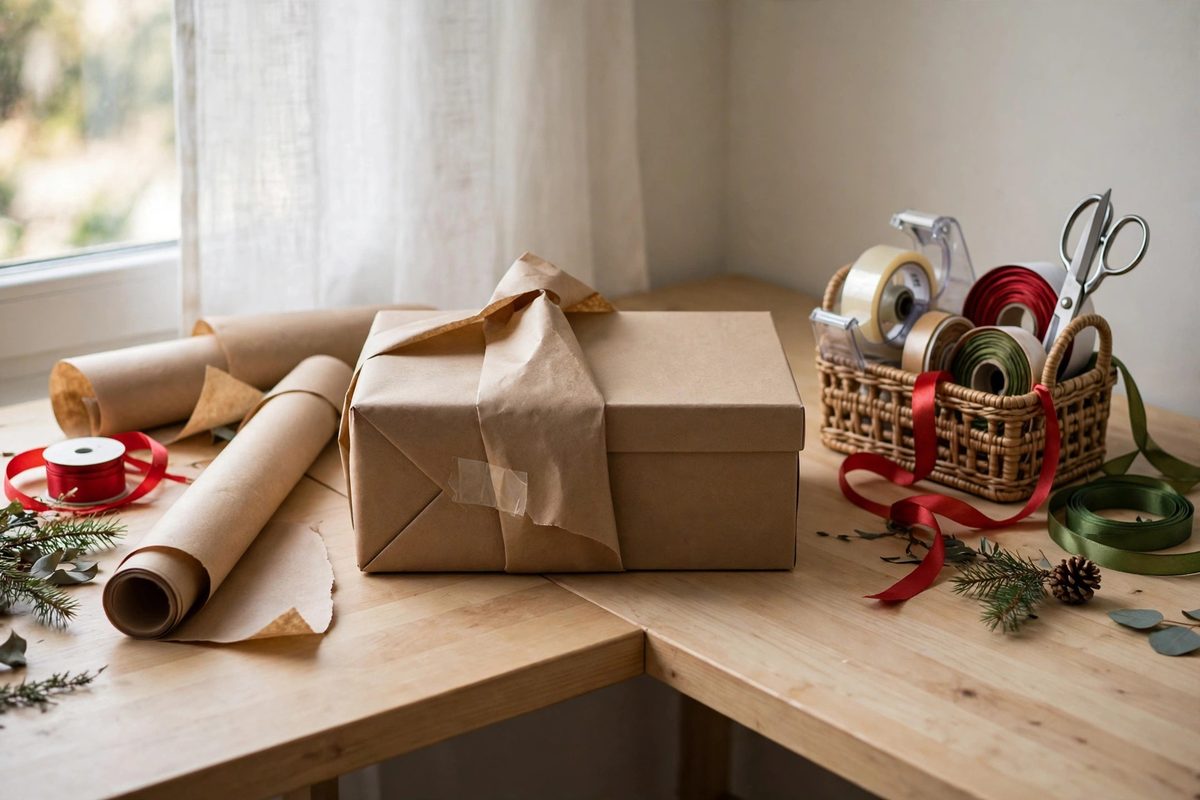
If you have a desk, you already have a wrapping surface. A desk corner station means clearing one end of the desk in December, keeping a small caddy of tape, scissors, and ribbon there, and storing paper rolls beside the desk in a tall bin.
This costs nothing beyond a caddy, about 15 dollars, and it works because the desk is already a flat, well lit surface at a comfortable height. The tradeoff is that the desk cannot be fully used for work during wrapping season, so this suits people who wrap in batches on weekends.
How to make it work
Protect the desk with a cutting mat or an old tablecloth, since scissors and tape can mark wood. Keep the caddy small, so it does not take over the whole desk, and return work items to the other end. Wrap in batches of five to ten gifts at a time, then clear the desk, so the station never becomes permanent clutter.
8. A Pegboard Wrapping Wall
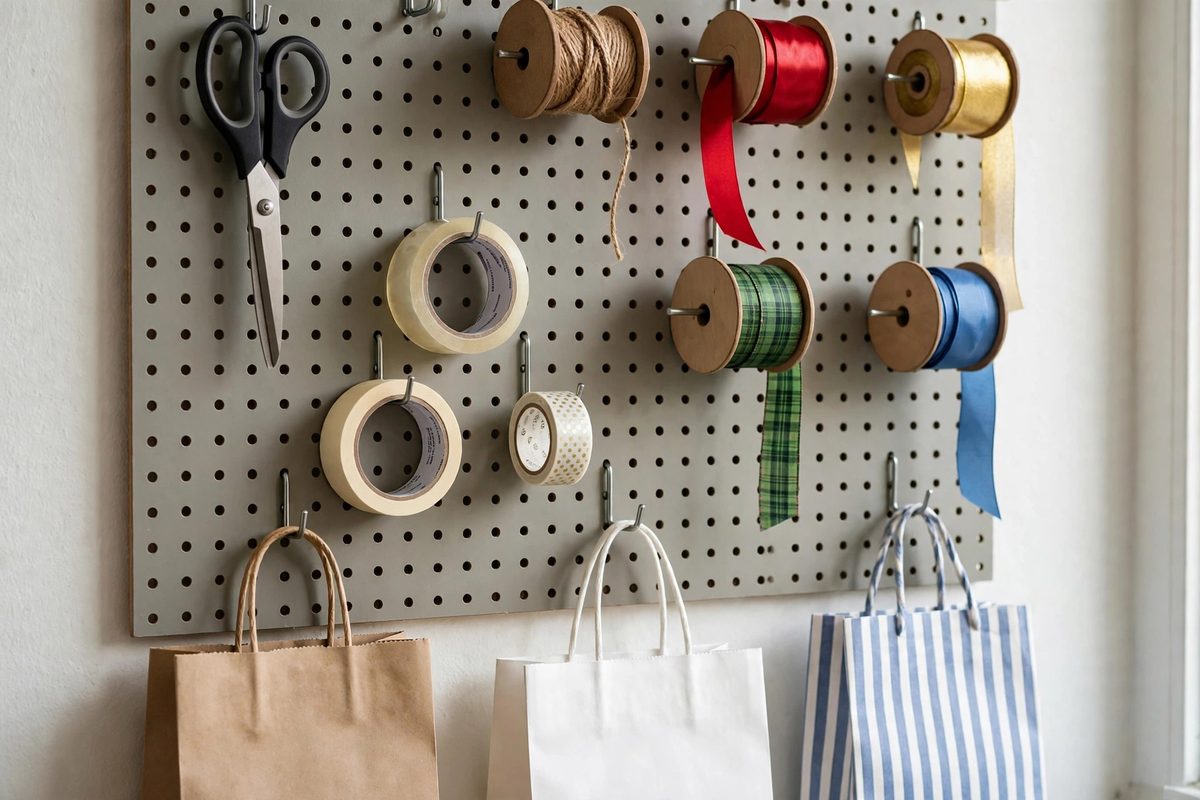
A pegboard panel on a closet wall or a hallway wall turns wrapping supplies into a visible, organized display. Hooks hold scissors, ribbon, tape, and bags, while a small shelf or bin on the pegboard holds tags and tissue.
Pegboard panels cost 20 to 40 dollars for a 24 by 36 inch board, plus 10 to 20 dollars for hooks and bins. This is a strong choice if you wrap gifts all year, for birthdays as well as Christmas, since the station stays useful beyond December.
How to make it work
Outline each tool’s spot with a marker on the pegboard if you want a system that stays tidy, since missing tools are obvious when their outline is empty. Keep heavy items low on the board and light items high, so the board stays balanced. If you rent, use a freestanding pegboard on a stand, or lean a framed pegboard against the wall, to avoid drilling.
9. A Tall Bin Plus a Ribbon Board
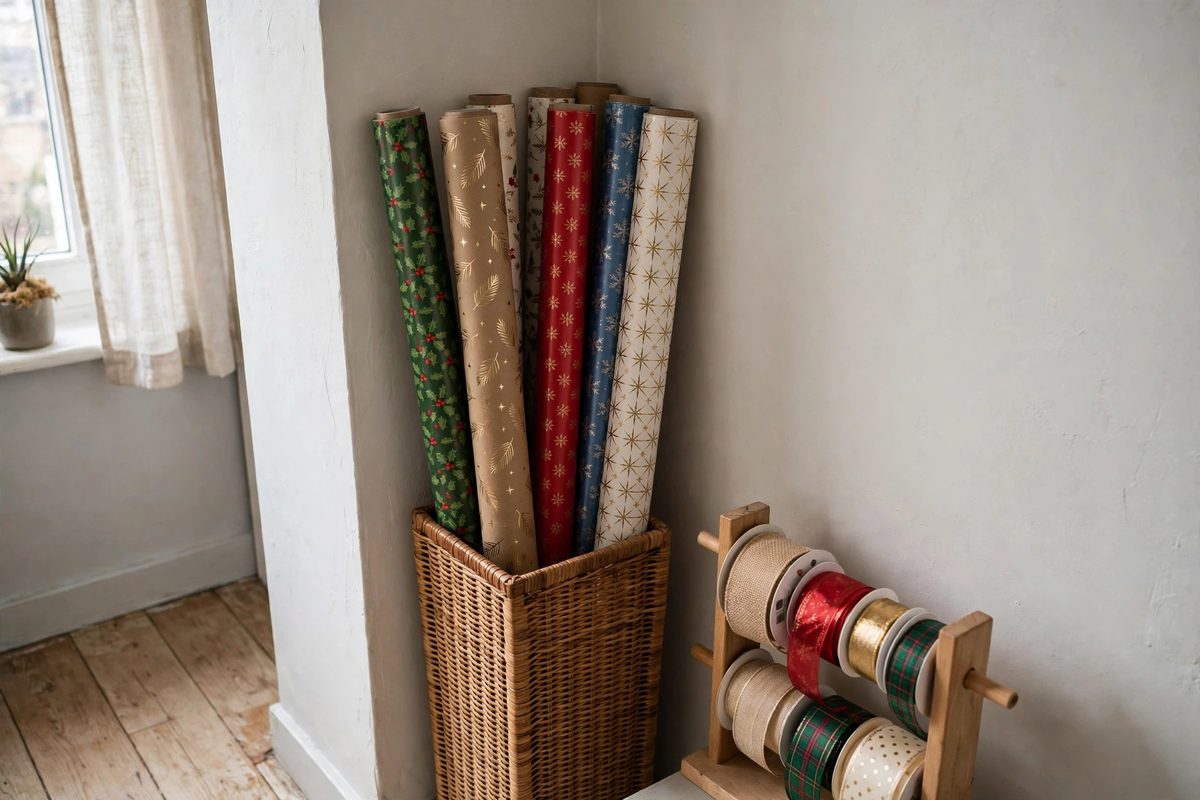
A tall, narrow bin, about 14 inches square and 36 inches tall, holds paper rolls upright in a corner, while a small board or a tension rod beside it holds ribbon spools. This pairing solves the two hardest wrapping storage problems, long rolls and tangled ribbon, in about 2 square feet of floor.
Tall bins cost 20 to 35 dollars. Choose one with a lid if it will live in a visible corner, since a lid makes it look like furniture rather than storage. Ribbon boards can be a simple wooden dowel on brackets, or a dedicated ribbon holder for 15 dollars.
How to make it work
Sort paper rolls by color family in the bin, with the most used rolls at the front. Thread ribbon spools onto the dowel in color order, so you can pull ribbon without unspooling the whole roll. Keep a small pair of scissors tied to the bin handle with ribbon, so they never wander off.
10. A Portable Wrapping Caddy
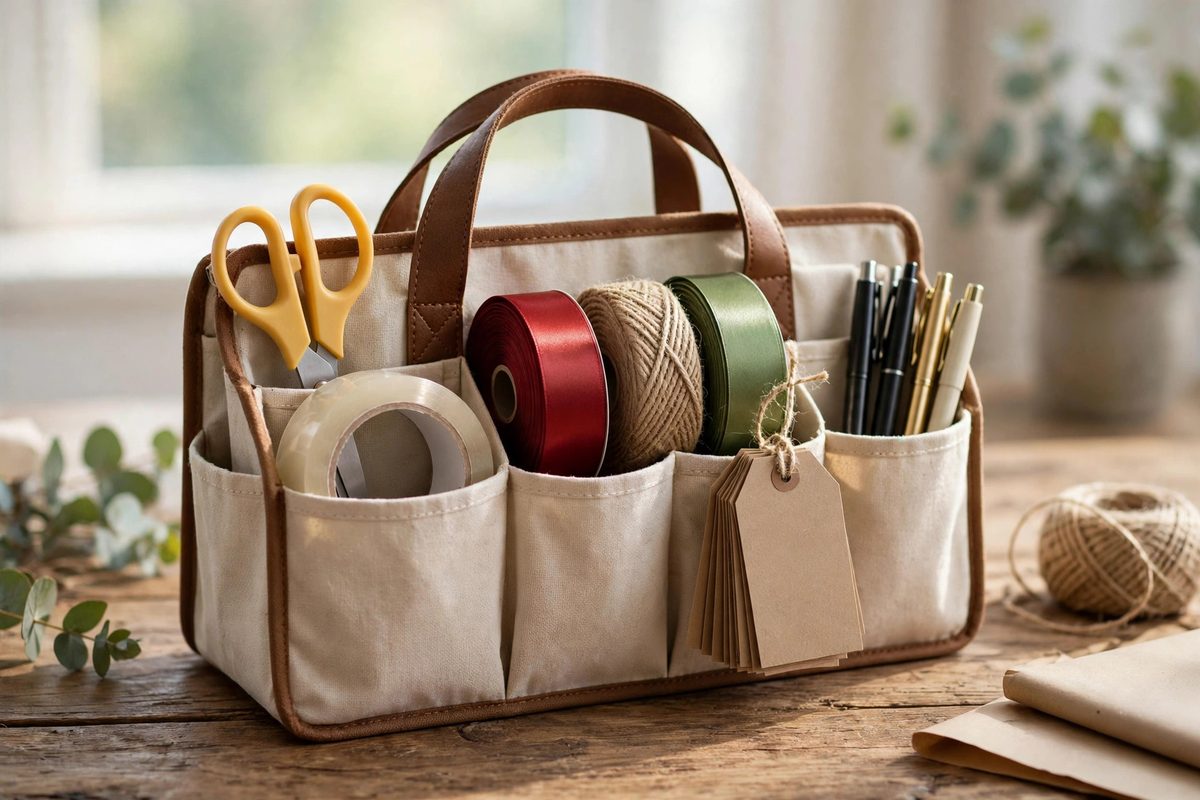
A portable caddy, a tote or a small toolbox with compartments, holds tape, scissors, ribbon, tags, and pens, and travels to wherever you wrap: the kitchen table, the bed, or a friend’s house. Paper rolls travel separately in a bag, but everything else fits in the caddy.
Caddies cost 15 to 30 dollars. Choose one with a handle and compartments that keep small items separate, since a single open tote becomes a tangled mess within a week. A caddy with a lid keeps supplies contained when it is stored on a shelf.
How to make it work
Restock the caddy after each wrapping session, replacing tape and tags before you forget. Keep one caddy per household, not one per person, so supplies do not duplicate and scatter. Store the caddy on a closet shelf with the paper bin beside it, so the whole station is in one place even though it is portable.
Wrapping gifts should feel festive, not frantic. Pick the station that fits your apartment, keep every supply in that one spot for December, and pack it away in January so the new year starts tidy.